
If you’ve ever struggled with pillowcases that slip off, expose stuffing, or ruin your bed’s polished look, an envelope pillow case might be the solution you’ve been missing. Unlike traditional open-ended pillowcases, envelope styles use overlapping back flaps to fully enclose the pillow, just like slipping a letter into an envelope. This design not only keeps your pillow securely hidden but also delivers a clean, hotel-like finish to your bedding. Whether you’re using a silky sleep case or a decorative throw cover, knowing how to insert and care for it properly makes all the difference. In this guide, you’ll learn foolproof insertion methods, care tips for delicate fabrics, and how to get the most from your envelope pillow case, no guesswork required.
Insert Pillow the Right Way
Getting the pillow inside an envelope case requires the right technique. The method you choose depends on your fabric type and pillow thickness.
Standard Insertion Method
Most envelope pillow cases are designed for quick, no-fuss use. The standard method works best with cotton, bamboo, or sateen cases that have a bit of stretch.
-
Face the front up
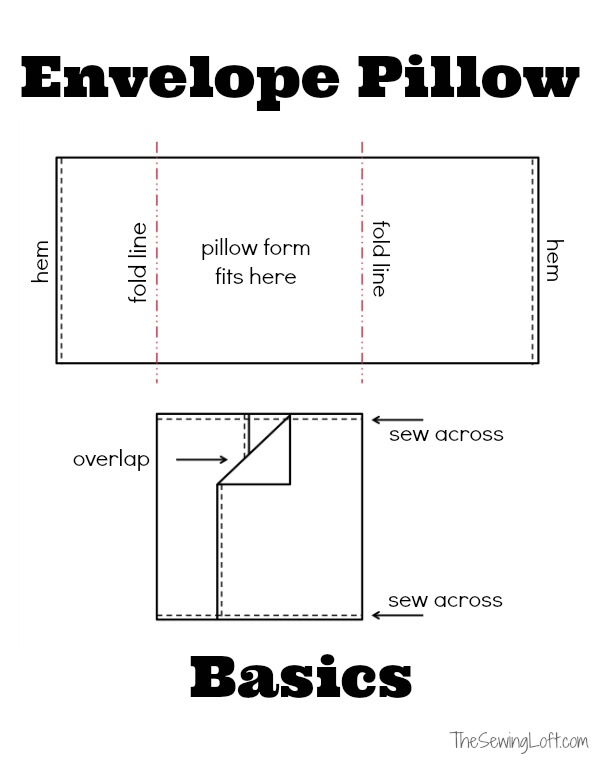
Lay the case with the decorative side facing you. The back will show two overlapping flaps, one longer (bottom layer), one shorter (top layer). -
Fold the pillow
Gently fold your pillow in half lengthwise or widthwise to reduce its thickness. -
Slide it in
Insert the folded edge between the two flaps at the center back. Push it forward until the pillow reaches the front edge. -
Unfold and smooth
Use your hands to push the pillow into the corners. Smooth out any bunching for an even look. -
Close the flap
Pull the shorter top flap across the back of the pillow. It should cover the entire opening without strain. -
Final check
Flip the pillow over. Ensure no filling is visible and the closure lies flat.
Pro Tip: For deeper pillows, slightly compress the insert as you push it through to avoid fabric strain.
Arm-Assisted Insertion for Silk
Silk and other delicate fabrics can tear or stretch if forced. This method protects the fabric while ensuring a smooth fit.
-
Turn case inside out
Flip the entire pillowcase so the soft interior is exposed. -
Insert your arm
Slide your dominant arm through the center of the case, reaching through both back flaps. -
Grab and guide
Hold the folded pillow with your hand inside the case. Push it forward with your arm, guiding it through. -
Emergence at front
Keep pushing until the pillow fully emerges at the front panel. -
Pull flap over
Once in place, pull the top flap over the back and smooth. -
Adjust position
Rotate the pillow to align the corners and eliminate wrinkles.
Why it works: This technique prevents pulling on seams and reduces friction, ideal for 22-momme silk or sensitive blends.
Karate-Chop for Stiff Inserts
Thick or firm pillows (like down-alternative or body support types) resist folding. Use this quick-force method.
-
Open the back
Pull apart the two flaps to expose the full opening. -
Hold pillow vertically
Align one end with the center of the opening. -
Push with momentum
Use a firm, fast motion, like a karate chop, to drive one end into the case. Follow through to slide the rest in. -
Smooth and seal
Adjust the pillow so it fills all corners. Fold the top flap over and press flat.
Best for: Decorative throw pillows, overstuffed inserts, or memory foam toppers.
Prevent Slippage and Bunching
A poorly fitted envelope case leads to shifting, bunching, and frustration. Follow these guidelines to keep your pillow secure.
Secure the Flap Fully
An improperly closed flap leads to shifting during sleep. Make sure the top flap covers at least one-third of the pillow’s back. If it falls short, the case may be too small or poorly made.
Ideal overlap: 3-4 inches
Check tension: The fabric should lie flat, not sag or pucker
Warning: If the flap gaps or pulls open at night, consider a deeper envelope design or add light hand tacks at the sides for DIY versions.
Match Size Exactly
An ill-fitting case causes frustration. Always ensure your pillow insert matches the cover size.
| Insert Size | Case Size |
|---|---|
| 16″ × 16″ | 17″ × 17″ |
| 18″ × 18″ | 19″ × 19″ |
| 20″ × 20″ | 21″ × 21″ |
Rule of thumb: Add 1 inch total (one-half inch per side) for seam allowance when measuring.
Smooth Layers During Insertion
Bunching happens when fabric folds on itself. As you push the pillow in, smooth the front and back layers with your free hand to keep them aligned.
Expert note: Pause halfway to check that the case isn’t twisting inside.
Care for Long-Lasting Use
Proper cleaning extends the life of your envelope pillow case significantly. Different fabrics require different approaches.
Wash Silk Gently
Silk envelope pillow cases require special handling to maintain sheen and strength.
• Turn inside out before washing
• Hand wash or use a delicate machine cycle
• Use cold water and mild, sulfate-free detergent
• Never wring; roll in a towel to remove moisture
• Air dry flat, away from sunlight
• Iron on low with a pressing cloth if needed
Look for OEKO-TEX certification: This ensures no harmful chemicals were used, such as with Mulberry Park Silks products.
Maintain Cotton and Blends
Cotton sateen and bamboo cases are more durable but still benefit from proper care.
• Machine wash warm with like colors
• Tumble dry low or medium
• Avoid bleach to prevent fiber breakdown
• Iron if desired for a crisp hotel look
Pro tip: Wash new cases before first use to prevent shrinkage.
General Best Practices
Regardless of fabric, follow these universal rules.
• Use mild detergent
• Skip fabric softeners (they coat fibers and reduce absorbency)
• Wash similar textures together (silk with silk, cotton with cotton)
• Store flat or rolled to avoid creasing
Choose the Right Material
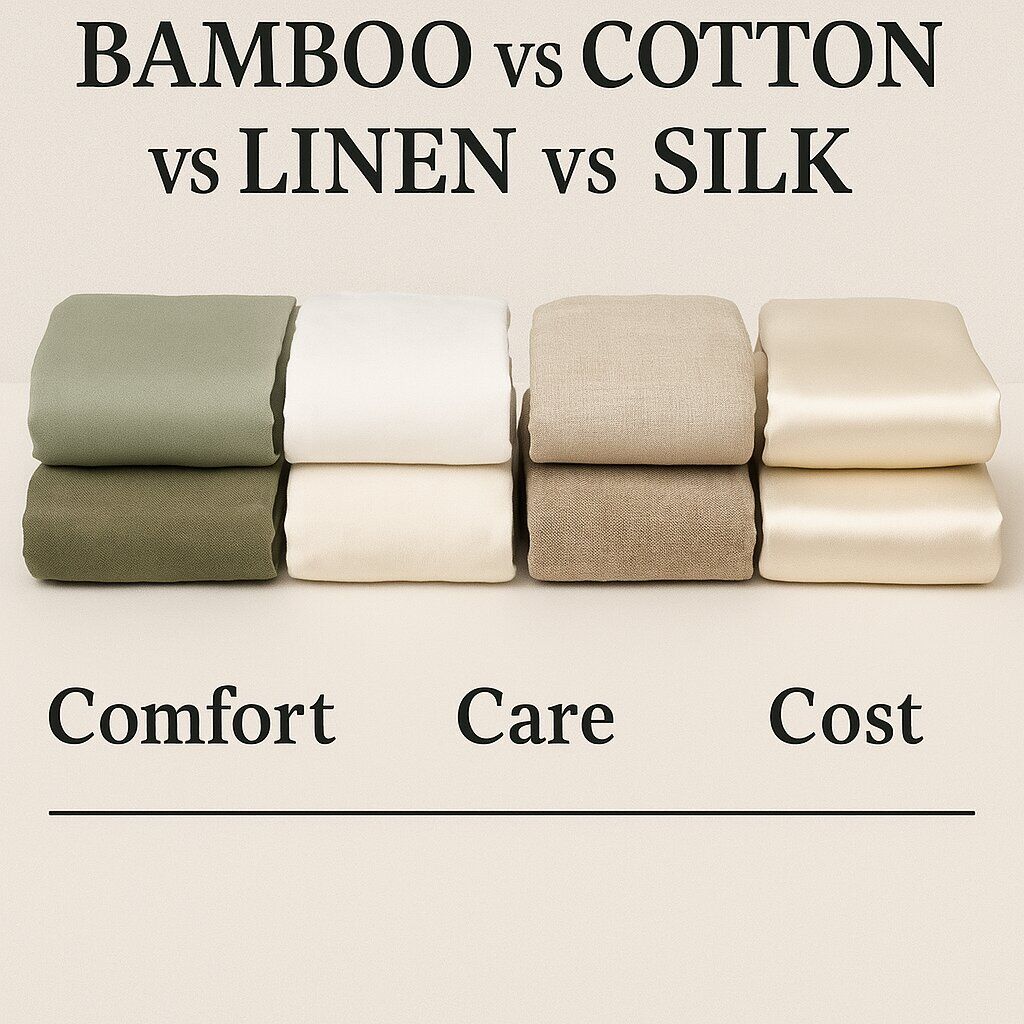
The fabric you choose affects comfort, durability, and maintenance. Here’s how to pick the best option for your needs.
Silk for Skin and Hair
100% Mulberry silk (22 momme, Grade 6A) is the gold standard for sleep wellness.
• Reduces friction, less bed-head and hair breakage
• Hypoallergenic and antimicrobial
• Regulates temperature, cool in summer, warm in winter
• Minimizes facial creasing, ideal for anti-aging routines
Best for: Nightly sleepers, sensitive skin, hair health
Cotton Sateen for Everyday Use
Soft, breathable, and easy to care for, perfect for daily rotation.
• Subtle sheen enhances bedroom elegance
• Durable through repeated washes
• Available in deep colors and prints
Best for: Family beds, kids, or guests
Bamboo for Hot Sleepers
Naturally moisture-wicking and eco-friendly.
• Keeps you cool all night
• Antibacterial properties
• Silky texture without the cost of real silk
Best for: Summer months, humid climates
Quilting Cotton for Decor
Ideal for throw pillows on sofas or benches.
• Wide variety of patterns
• Holds shape well
• Easy to sew and customize
Best for: DIY projects, seasonal decor
DIY: Make Your Own Envelope Case
Creating your own envelope pillow case is simpler than you might think. Two methods work well for different skill levels.
One-Piece Method (Beginner-Friendly)
This method is fast, simple, and requires minimal cutting.
-
Cut fabric
Width equals (pillow width times 2.5) plus 1 inch. Example: For 18-inch pillow, cut 46 inches by 18 inches. -
Hem short edges
Fold and stitch one-fourth inch twice for clean finish. -
Fold back panels
Fold one end 6.5 inches, the other 6.5 inches inward, overlapping by 13 inches total. -
Pin and sew
Sew both sides with one-half inch seam allowance. -
Turn and insert
Flip right side out and slide in pillow.
Why choose this: Fewer seams, less sewing time, great for repurposing old sheets.
Three-Piece Construction (More Control)
Ideal for custom fits and professional results.
-
Cut front panel
1 inch larger than pillow on all sides (for example, 17 inches by 17 inches for 16-inch insert). -
Cut two back panels
Same height, width equals (height divided by 2) plus 3 inches. Example: 17 inches by 11.5 inches each. -
Hem short edges
Double fold one-fourth inch on each back panel. -
Layer and pin
Place back panels on back of front, overlapping in center. -
Sew perimeter
Stitch around all four edges with one-half inch seam. -
Finish seams
Use zigzag, serger, or French seam to prevent fraying.
Best for: Silk or high-end fabrics where durability matters.
Style Like a Pro
Envelope pillow cases offer versatility beyond just sleeping. Here’s how to maximize their aesthetic potential.
Mix Textures and Layers
Create visual interest by pairing envelope cases with different materials.
• Silk plus linen for contrast
• Velvet plus cotton for seasonal depth
• Matte plus sheen for subtle drama
Pro tip: Use solid colors for sleep pillows, patterns for decor.
Coordinate Without Shams
One of the biggest advantages is that envelope cases look like shams but are fully functional.
• Match case to your duvet or sheet set
• No need to buy separate decorative covers
• Achieve a luxury hotel look with fewer pieces
Real user benefit: Many people use matching envelope cases as both sleep and display covers, eliminating extra clutter.
Rotate for Seasons
Make multiple covers in different fabrics for year-round use.
• Lightweight cotton for summer
• Flannel or sateen for winter
• Bold prints for holidays or events
Smart hack: Label each case by season for easy switching.
Troubleshoot Common Issues
Even with proper technique, problems can arise. Here’s how to solve them fast.
Pillow Won’t Fit
Cause: Case is too small or pillow is overstuffed.
Fix: Try folding the pillow diagonally. Gently compress filling. Verify dimensions; cover should be exactly 1 inch larger than insert.
Flap Doesn’t Close
Cause: Insufficient overlap or poor construction.
Fix: Ensure back panels are at least (height divided by 2) plus 3 inches wide. If DIY, remake with longer flaps. Avoid stretching, which may damage seams.
Fabric Bunches Inside
Cause: Insertion too fast or uneven smoothing.
Fix: Insert slowly, hand-smoothing as you go. Use arm-assisted method for tight cases. Rotate pillow after insertion to even corners.
Closure Loosens Overnight
Cause: Flap too short or fabric too slippery.
Fix: Choose deeper envelope designs (4 inches plus overlap). For DIY, tack sides lightly with hand stitches. Opt for textured fabrics like sateen over silk for better grip.
Frequently Asked Questions About Envelope Pillow Cases
Do envelope cases need zippers?
No. The overlapping flaps securely hold the pillow without zippers, buttons, or ties, offering a smooth back ideal for sleeping.
How much overlap is enough?
Aim for 3-4 inches of overlap. This fully conceals the pillow and prevents slippage during use.
Can I wash envelope pillow cases?
Yes. Turn inside out and follow fabric-specific care instructions: hand wash for silk, machine wash for cotton and bamboo.
What’s best for beginners?
Start with 100% cotton quilting fabric and the one-piece construction method. It’s easy to cut, sew, and wash.
Can I make one without a sewing machine?
Yes. Use a strong backstitch by hand. It’s slower but effective. Pre-wash fabric to avoid post-sew shrinkage.
How do I insert a thick pillow?
Use the karate-chop method: hold pillow vertically, push one end in fast, then slide the rest smoothly.
Final Tips for Using Envelope Pillow Cases
For comfort and style combined, choose silk or cotton sateen envelope cases. They’re soft, secure, and elegant for any bedroom. Skip extra decorative shams by using envelope cases as dual-purpose sleep and decor covers. This saves money and reduces clutter.
DIY enthusiasts can repurpose old sheets to make custom sizes quickly and affordably. Pick OEKO-TEX certified silk to ensure no harmful chemicals touch your skin, especially for nightly use. Beginners should start with cotton fabric and the one-piece method for fast success.
Higher-end pillowcases often feature this closure, but you don’t need to spend triple the price to hide your pillow. Making your own delivers the same polished look with more color and fabric choices. With the right technique, your envelope pillow case becomes more than just a cover. It’s a seamless blend of function, comfort, and style for your bedroom or living space.