

Nothing transforms a living room or bedroom like a fresh set of throw pillows, but store-bought covers can cost twice as much as the inserts themselves. Learning how to make pillow covers for throw pillows gives you complete control over fabric, fit, and finish while saving significant money. Whether you want a quick envelope style for seasonal swaps or a polished zipper version for a professional look, this guide walks you through every step with precise measurements and expert techniques. You’ll discover which fabrics work best, how to size covers for a snug fit, and how to avoid common mistakes that even experienced sewists make.
Choose Your Pillow Cover Style
The first decision when making a pillow cover is choosing the closure type. Each style affects durability, ease of removal, and final appearance.
Envelope-Style Pillow Cover
This is the easiest and most beginner-friendly option. An envelope cover has overlapping back panels that slide over the pillow insert, hiding the opening completely.
• No hardware needed
• Quick to assemble
• Ideal for frequent washing or seasonal swaps
• Best for cotton, linen, or decorator fabrics
Two versions exist. The one-piece method uses a single fabric rectangle folded at the back, while the three-piece version uses separate front and back panels for better pattern alignment and symmetry.
Zipper-Style Pillow Cover
A zipper cover provides a clean, tailored look with full access to the insert. It requires more skill but delivers a professional finish.
• Uses an invisible zipper sewn into one edge
• Requires a zipper foot on your sewing machine
• Great for velvet, wool, or high-use pillows
• Looks seamless when closed
Alternative Closure Options
Not all pillow covers need zippers or flaps. Depending on your needs, consider VELCRO for kids’ rooms or pet areas where easy removal matters. Button closures add vintage charm and require hand-sewn buttonholes. An open back with a 2 to 3 inch gap relies on a tight fit to keep the insert hidden. Ladder stitch creates an invisible hand-sewn finish perfect for reversible or heirloom pillows.
Gather Materials and Tools
Before cutting fabric, collect all supplies. Having everything ready prevents mistakes and ensures smooth progress.
Essential Sewing Supplies
• Pillow insert (determines exact cover size)
• Fabric (cotton, linen, velvet, denim, or decorator weight)
• Matching thread (polyester or cotton-wrapped polyester)
• Scissors or rotary cutter
• Ruler or measuring tape
• Fabric marker or chalk
• Pins or Wonder Clips
• Iron and ironing board
• Sewing machine
Specialized Tools for Advanced Styles
A zipper foot lets you sew close to zipper teeth. A walking foot handles thick fabrics like velvet. A point turner or chopstick sharpens corners after turning. A serger or overlocker finishes seams to prevent fraying.
Always pre-wash and iron fabric to prevent shrinkage and distortion after sewing.
Select the Right Fabric

Your fabric choice affects both appearance and ease of construction.
Best Fabrics for Pillow Covers
Cotton works best for beginners and washable decor. Linen offers rustic, natural texture. Cotton-linen blends provide softness with structure. Decorator fabric gives a durable, upscale look. Velvet creates luxe, statement pillows. Denim suits casual, kid-friendly spaces. Faux leather provides modern, wipeable surfaces.
Avoid slippery fabrics like silk or satin unless you have experience. These shift during sewing and require extra pinning.
Fabric Width and Yardage Tips
Fifty-eight to sixty inch wide fabric works ideal for 18 to 24 inch pillows. Forty-four to forty-five inch wide fabric may require careful layout for larger sizes. One and a half yards can yield two envelope covers depending on size.
Add 3 to 6 inches extra fabric for shrinkage, fraying, and pattern matching. Test pattern placement by laying fabric over the insert before cutting.
Measure and Cut Fabric
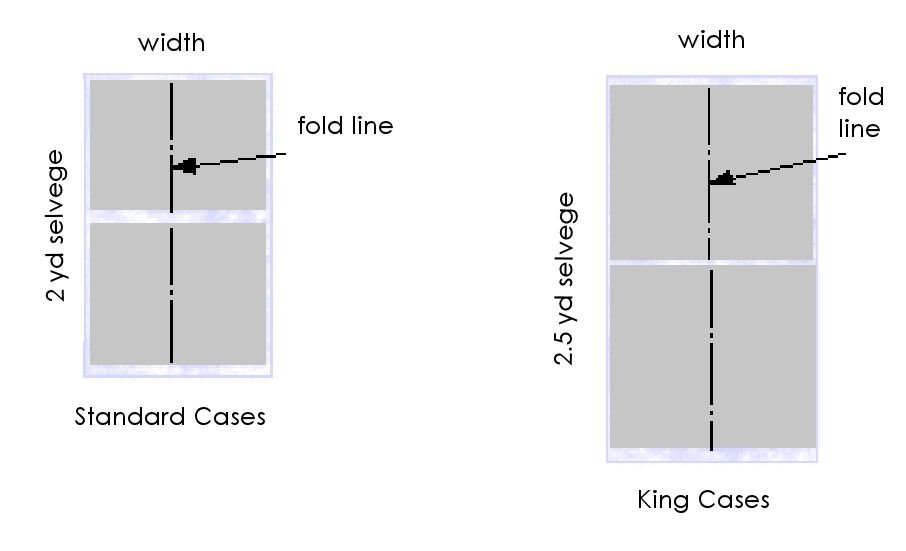
Accurate measurements are critical for a snug, plump fit.
Standard Pillow Insert Sizes
Standard size measures 18 by 18 inches. Large is 20 by 20 inches. Extra large is 24 by 24 inches. European sizes are 16 or 20 inches.
Always measure your actual insert. Do not assume standard sizes.
Finished Cover Sizing Rule
Make the finished cover one-half to one inch smaller than the insert for a full, tight look. For an 18 inch insert, cut for a 17 to 18 inch finished cover.
Use one-half inch seam allowance for most seams. Reduce to one-fourth inch when sewing invisible zippers. Mark seam lines clearly with fabric chalk.
Make an Envelope Pillow Cover
The envelope style is fast, tool-free, and perfect for beginners.
Cut Fabric Using One-Piece Formula
For an 18 inch insert, the width equals two times 18 inches plus 5 inches, which equals 41 inches. The length equals 18 inches. Cut one rectangle at 41 by 18 inches.
Use a rotary cutter and ruler for straight edges.
Hem the Short Edges
Fold one short edge 1 inch toward the wrong side and press. Fold again one-half inch to create a clean double-fold hem. Pin and repeat on the opposite edge. Topstitch one-half inch from the edge, backstitching at ends.
Iron after each fold. This ensures crisp, even hems.
Create the Envelope Overlap
Lay fabric right side up. Mark the center of both long edges. From center, measure 8.5 inches toward each side for an 18 inch insert. Fold one side to the 8.5 inch mark so it overlaps the center. Repeat with the other side. Panels should overlap by 3 to 4 inches.
This ensures the insert stays hidden when inserted.
Sew the Side Seams
With folded edges aligned, pin both sides. Sew with one-half inch seam allowance. Backstitch at start and end for strength. Use a straight stitch and reinforce with a second pass if desired.
Insert the Pillow
Turn cover right side out through the back opening. Use a chopstick or point turner to push out corners. Press lightly. Fold the envelope flaps and karate-chop the insert into place.
Test fit first. If too loose, remake with one-half inch smaller dimensions.
Make a Zipper Pillow Cover
For a polished, professional look, use a zipper closure.
Cut Two Fabric Squares
Size equals insert size plus 1 inch (one-half inch seam on each side). For an 18 inch insert, cut two 19 by 19 inch squares.
Ensure pattern alignment, especially for directional prints.
Prepare the Invisible Zipper
Use an 18 inch or longer invisible zipper that can be shortened. To shorten, measure desired length from top of teeth. Sew multiple rows across teeth to create a thread stop. Trim excess below.
Press zipper teeth flat before sewing. This opens space for the needle.
Attach Zipper to Fabric
Place right sides together with zipper face down. Align one fabric edge with one side of the zipper. Attach zipper foot to machine. Pin or clip in place. Sew as close as possible to the teeth. Repeat for the second fabric piece on the other side.
Sew in two passes. First with pull out of the way, then reposition to finish.
Complete the Cover
Open zipper one-third of the way. This allows turning later. Fold fabric right sides together. Sew remaining three sides with one-half inch seam allowance. Trim corners diagonally to reduce bulk. Turn right side out through the open zipper. Use a point turner to shape corners. Press lightly.
Optional: Topstitch one-half inch from edge around entire cover for a clean border.
Customize Your Pillow Cover
Make your pillows unique with creative touches.
Add Piping or Binding
Cut 1.5 inch bias strips from contrasting fabric. Attach before sewing side seams. Use three-piece method for full access during construction.
Use Reversible Design
Make a two-sided cover using different fabrics. Ideal for seasonal swaps or mood changes.
Embellish with Trims
Sew on pom-poms, tassels, or lace along edges. Attach before final seam closure.
Personalize with Embroidery
Hand-stitch monograms or quotes. Use fabric paint or stencils for bold designs.
Pre-wash embellished fabrics to prevent bleeding.
Finish Seams and Corners
Clean construction makes a huge difference in durability and appearance.
Prevent Fraying
Use zigzag stitch for woven cotton and linen. A serger or overlock works for all fabrics. Pinked edges suit stable, non-fraying fabrics. French seams encase raw edges for sheer or delicate materials.
Shape Perfect Corners
Trim corners at 45 degrees, just short of the seam. Turn right side out using a point turner. Press carefully without flattening corners.
Topstitch for Durability
Sew one-fourth to one-half inch from edge around perimeter. Use contrasting thread for a designer look. Backstitch at start and end.
Fix Common Pillow Cover Mistakes
Even experienced sewists make errors. Here is how to avoid them.
Cover Too Loose
Cause: Cut too large. Fix: Make finished cover one-half inch smaller than insert.
Insert Shows Through Back
Cause: Insufficient overlap. Fix: Use 75 percent back panel method or add 1 inch to overlap.
Fabric Fraying
Cause: Raw edges. Fix: Use zigzag stitch or serged seams.
Zipper Hard to Sew
Cause: Wrong foot or unpressed teeth. Fix: Use invisible zipper foot and press teeth flat.
Corners Not Sharp
Cause: Bulk not trimmed. Fix: Trim corners diagonally and use a point turner.
Test closures on scrap fabric before sewing the final piece.
Care for Your Pillow Covers
Keep your handmade covers looking fresh.
Washing Tips
Envelope covers: Turn inside out, use cold water, tumble dry low. Zipper covers: Always zip closed before washing to prevent snagging. Ironing: Use pressing cloth and avoid direct heat on zippers.
Longevity Tips
Reinforce corners and zipper ends with backstitching. Store flat or rolled. Do not fold sharply. Rotate covers every few months. Save scraps for repairs.
Follow fabric manufacturer’s care label for best results.
Key Takeaways for Making Throw Pillow Covers
Making pillow covers for throw pillows is a simple, rewarding project that elevates your home decor with minimal effort. Whether you choose a quick envelope style or a sleek zipper version, you will gain confidence, save money, and create pieces that reflect your personal style. Start with one cover today. You will be hooked by the second.
Frequently Asked Questions About Making Throw Pillow Covers
What is the easiest pillow cover style for beginners?
The envelope-style pillow cover is the easiest for beginners. It requires no special hardware, uses simple straight seams, and can be completed in 10 to 20 minutes. The overlapping back panels hide the opening completely, creating a clean look without any visible closure.
How much fabric do I need for a pillow cover?
For a standard 18 by 18 inch pillow, you need approximately three-fourths to 1 yard of 45 to 60 inch wide fabric. One and a half yards of 45 inch wide fabric can yield two envelope covers. Always buy extra fabric to account for pattern matching and potential mistakes.
Should the pillow cover be bigger or smaller than the insert?
The pillow cover should be the same size or one-half to one inch smaller than the insert. This creates a snug, plump appearance. If the cover is too loose, the pillow will look flat and the insert may shift inside.
How do I keep my pillow cover from slipping off?
Use an envelope closure with at least 3 to 4 inches of overlap. For zipper covers, ensure the zipper is high quality and fully closed. Choosing a cover one-half inch smaller than the insert also helps grip and prevents slipping.
Can I wash pillow covers with a zipper?
Yes, but always zip the closure completely before washing. This prevents the zipper teeth from catching on fabric or the washing machine. Use cold water and a gentle cycle, and tumble dry on low heat.
What thread count is best for pillow covers?
Use high-quality all-purpose thread. Polyester or cotton-wrapped polyester works well for most fabrics. For decorative stitching, you can use contrasting colors. Avoid cheap thread that may break or fray easily.