
Crocheting a pillow case is an easy and rewarding project that transforms simple yarn into a stylish, handmade home accent. Whether you’re a beginner or looking to refine your technique, this guide covers everything you need to know to create a durable, beautifully textured pillow cover. From choosing the right yarn and hook to mastering stitches like the alpine pattern and half double crochet in the back loop, each step ensures your finished piece fits snugly and looks store-bought without the price tag.
You will learn how to measure for perfect sizing, build structure with textured stitches, and finish with clean edges and secure closures. With options ranging from quick envelope-style covers to intricate two-panel designs, there is a method for every skill level. Plus, you can customize colors, add pom-poms, or switch yarn weights to match your decor.
Select the Right Hook and Yarn for Your Project
Choosing the correct hook size and yarn type directly impacts the look and feel of your finished pillow case. Taking time to select proper materials prevents frustration later and ensures a professional result.
Match Hook Size to Yarn Weight
Selecting the correct hook size ensures your pillow case has the right drape and density. Use a 5 mm hook with medium-weight (#4) acrylic yarn for a tight, structured fabric. If you prefer a looser weave, go up to a 5.5 mm hook. For chunky yarn, a 6 mm hook speeds up your work and creates plush texture. When using lighter DK weight (#3) cotton blend, a 3.75 mm hook gives better control and stitch definition.
Always check the yarn label for recommended hook size, but test with a swatch to confirm gauge. Crocheting too tightly or loosely affects fit, especially when wrapping around a pillow form. Adjusting hook size is the easiest way to correct tension issues before starting the full piece.
Pick Yarn for Texture and Durability
Medium-weight acrylic is ideal for beginners because it is affordable, durable, and available in many colors. For a premium look, try Irish Tweed or a cotton blend, which adds softness and visual interest. Use contrasting yarn for stripes or decorative borders to elevate the design.
Chunky yarn works fastest and gives a cozy, modern feel, while worsted weight (#4) balances speed and detail. DK weight yarn produces a lighter cover, perfect for seasonal decor. Avoid slippery or overly fuzzy yarns because they make seaming harder and hide stitch definition.
Calculate Gauge for Perfect Sizing
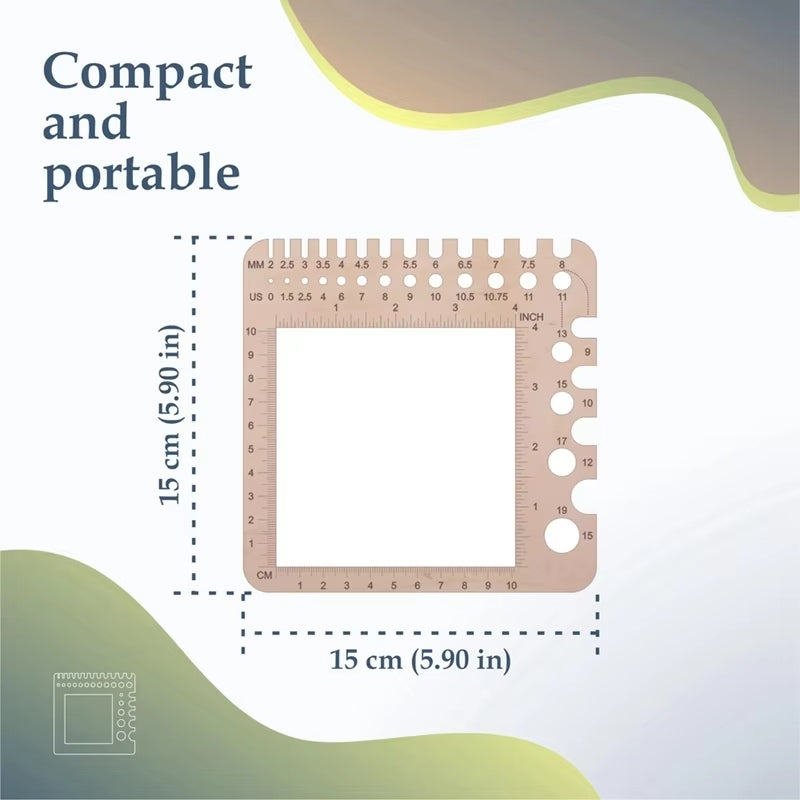
Gauge is the foundation of any well-fitting crochet project. Skipping this step often results in a pillow case that is either too big or too small, wasting time and materials.
Create a Gauge Swatch First
Gauge is the number of stitches and rows per inch. To check gauge, crochet a 4″ × 4″ swatch using your chosen stitch pattern. For example, if you are using alpine stitch, work 14 stitches × 16 rows = 4 inches with a 4.50 mm hook.
Measure after blocking if you plan to wash the finished piece. Press the swatch flat without stretching. Count full stitches across the middle to avoid edge distortion. If your swatch has more stitches per inch, your work is too tight. Switch to a larger hook. Fewer stitches mean your work is too loose. Try a smaller hook.
Calculate Chains and Rows for Your Desired Size
Once you have gauge, calculate foundation chains and rows. For a 15″ × 15″ pillow, use these formulas:
Stitches per inch = total stitches ÷ 4
Example: 14 sts ÷ 4″ = 3.5 sts/inch
Required chains = desired width × stitches per inch
15″ × 3.5 = 52.5 → round to 53 (must be odd for alpine stitch)
Rows per inch = total rows ÷ 4
16 rows ÷ 4″ = 4 rows/inch
Required rows = height × rows per inch
15″ × 4 = 60 rows
For an 18″ × 18″ cover with DK yarn (5.5 sts/inch), chain 99 and work 90 rows. Always round based on stitch pattern requirements, as some need multiples of 2 or 3.
Master Essential Stitches for Structure
The right stitch pattern creates fabric that holds its shape and looks professional. These techniques produce textured, durable results that elevate your pillow case from basic to beautiful.
Crochet the Two Single Crochets Together Stitch
This stitch creates stiff, ridged fabric that holds its shape, perfect for pillow cases. It works with any chain count and looks polished on both sides.
How to do it:
- Chain your desired number.
- Row 1: Single crochet in second chain from hook.
- Insert hook into same first chain, pull up a loop (3 loops on hook).
- Yarn over, pull through all three loops.
- Now insert hook into last worked loop and next chain, pull up a loop (3 loops again).
- Yarn over, pull through all three.
- Repeat across: always work into last loop and next chain.
Turn, chain 1, single crochet into first loop to start the next row. Repeat the sequence. The result is a dense, textured fabric with horizontal ridges, ideal for decorative pillows or structured cuffs.
Pro Tip: This stitch requires no counting once you find the rhythm. It is great for crocheting while watching TV or talking.
Try the Alpine Stitch for Cable-Like Texture
The alpine stitch uses front post treble crochets to create a raised, cable-like pattern. It is denser than regular stitches, making it excellent for durable pillow covers.
Pattern (for 53-chain foundation):
- Row 1: Foundation double crochet (Fdc) 53.
- Row 2: Ch 1, turn, sc across.
- Row 3: Ch 2, turn, dc in first st, FPtr in third dc below, dc, repeat from * to last st, dc in last.
- Row 4: Ch 1, turn, sc across.
- Row 5: Ch 2, turn, dc 2, FPtr, dc, repeat from * to last 2 sts, dc 2.
- Repeat Rows 2–5 until you reach 60 rows.
Note: Chain 1 and 2 do not count as stitches. Keep tension even on FPtr to maintain alignment.
This stitch is intermediate level but produces a high-end look. Users report falling “head over heels in love” with the result.
Build Your Pillow Case with Simple Methods

Construction method determines how your pillow case looks and functions. Choose the approach that matches your skill level and design preferences.
Make an Envelope-Style Cover (Beginner Friendly)
This one-piece design wraps around the pillow like an envelope, with no buttons or zippers needed.
Steps:
- Chain the width of your pillow.
- Work half double crochet (Hdc) in back loop only across.
- Continue Hdc in back loop for 60+ rows until length wraps around the pillow with a 4–6 inch overlap.
- Fold and slide onto the pillow form.
- Use a yarn needle and whip stitch to sew the two open sides.
The back loop only technique creates vertical ribs with natural stretch, so the cover hugs the pillow snugly. Seams blend into the texture and are nearly invisible.
Time: 2–3 hours. Perfect for first-time crocheters.
Join Two Panels with a Border
For a clean, professional finish, make two identical panels and join them with single crochet edging.
Steps:
- Crochet two matching rectangles (e.g., alpine stitch 15″ × 15″).
- Place panels with wrong sides together.
- Attach yarn a few stitches from a corner.
- Single crochet evenly around all four edges.
- At each corner, place 3 sc in the same stitch for a smooth turn.
- Join with slip stitch to first sc.
Add 2–3 border rounds if desired. Increase in the second sc of each corner set (3 sc total) to keep edges flat.
This method allows for reversible designs and crisp corners.
Finish with Clean Edges and Secure Closures
The final details distinguish a handmade project from a professional product. Take time with closures and edges for results that impress.
Add a Textured Perimeter Edge
Use the “two single crochets together” stitch for a matching border. It adds stiffness and complements ridge or alpine patterns.
How to do it:
- Join yarn with slip stitch to any corner.
- Chain 1, sc into same spot.
- Work the ridge stitch around: always insert into last loop and next stitch.
- At corners, place two single crochets instead of skipping to maintain curve.
- Mark corners with pins for even spacing.
- Finish with slip stitch to first chain-1.
This edge prevents curling and gives a finished look without bulk.
Secure with Yarn Ties or Overlap
Yarn ties are fun and functional:
• Cut three 9-inch (23 cm) strands.
• Attach at left, center, and right of one open end.
• Tie with shoelace knots and finish with bows.
• Do not overtighten. Allow easy removal for washing.
Envelope overlap needs no fasteners. The stretch from back-loop Hdc holds the pillow securely. Just tuck the open edge inside.
Pro Tip: Use a larger hook when adding stripes. Insert new yarn mid-row by pulling it through from back to front, then carry the tail underneath.
Customize Your Pillow Case Design
One of the best parts of crocheting your own pillow case is complete creative control. Adjust size, color, and embellishments to match your style.
Adjust Size for Any Pillow
Recalculate chains and rows using your specific gauge. For a lumbar pillow (16″ × 12″), multiply width and height by stitches and rows per inch. Round to fit pattern multiples.
Use a pillow form as a template. Wrap your piece around it as you crochet to test fit. Slight tightness is better than looseness to avoid sagging.
Add Color and Embellishments
Switch to contrasting yarn every few rows for stripes. Join new color by:
- Yarning over with new color at the end of a row.
- Pulling through last two loops.
- Carrying unused yarn along the edge.
Add pom-poms with a pom-pom maker for playful flair. Attach at corners or center back.
Mix yarn types. Pair tweed with solid for depth. Leftover yarn works great for ties or borders.
Maintain and Care for Your Cover
Proper care extends the life of your handmade pillow case and keeps it looking fresh. Follow these guidelines for years of enjoyment.
Wash and Store Properly
Hand wash in cold water with mild detergent, or use a gentle machine cycle in a mesh bag. Lay flat to dry. Never hang, as it can stretch the shape.
Avoid ironing textured areas. If needed, steam lightly from a distance.
Re-tighten yarn ties if they loosen over time. Store in a cool, dry place away from moths.
Ensure Long-Term Durability
Tight stitches resist fraying. Reinforce seams with multiple sc rounds. Acrylic and cotton blends hold up well to repeated washing.
Avoid high heat in the dryer. It can melt synthetic fibers and distort shape.
User Insight: Well-made crochet pillow cases last years and look better than store-bought versions costing $25–$60.
Frequently Asked Questions About Crocheting a Pillow Case
What is the easiest stitch pattern for beginners?
The half double crochet in back loop only is the easiest method for beginners. It creates vertical ribbing with natural stretch, requires minimal counting, and hides seams effectively. The envelope-style construction using this stitch is forgiving and produces quick results.
How do I calculate how much yarn I need?
For a standard 15″ × 15″ pillow case with medium-weight yarn, you will need approximately 1–2 skeins depending on stitch density. Chunky yarn requires less yardage because larger stitches cover more ground. Always buy one extra skein to be safe, as colors can be discontinued.
Can I use any yarn weight for a pillow case?
Yes, you can use any yarn weight, but you must adjust your hook size and gauge calculations accordingly.DK weight (#3) produces lighter, drapier covers. Worsted (#4) and chunky weights create thicker, more structured pieces. Just recalculate your foundation chains and row counts using your specific gauge.
How do I make my pillow case fit tighter?
Crochet slightly tighter than your measurements suggest. Pillow covers should be slightly tighter than the insert to prevent flopping and maintain shape. Use a smaller hook than recommended, or simply pull slightly more on each stitch. Test fit as you go using the pillow form.
What closure style is most practical?
The envelope overlap is the most practical closure for most projects. It requires no buttons, zippers, or ties, and allows easy removal for washing. The natural stretch from back-loop crochet holds the pillow securely. If you prefer a more decorative touch, yarn ties add charm and are also easy to open.
Key Takeaways for Crocheting a Pillow Case
With the right materials, gauge, and stitch choice, you can crochet a pillow case that is both beautiful and functional. Whether you choose a quick envelope style or a detailed alpine design, each method offers room for creativity and customization.
Start with a gauge swatch to ensure proper fit. Choose medium-weight acrylic and a 5 mm hook for your first project. The half double crochet back loop technique creates a ribbed texture that is forgiving and looks professional. For more advanced crafters, the alpine stitch produces a stunning cable-like pattern that rivals store-bought decor.
Remember these core principles:
• Always calculate gauge before starting to ensure proper sizing.
• Use the back loop only technique for stretch and hidden seams.
• Add contrasting yarn or pom-poms for personalized style.
• Hand wash and lay flat to maintain shape over time.
Start small, practice your tension, and soon you will be making custom covers that impress everyone. Your handmade pillow cases will save you $25–$60 compared to retail prices while adding a unique, personal touch to your home decor.