
You bought king-sized sheets on sale or inherited a set you love, but now they drown your queen mattress in loose fabric. Waking up to bunched corners and slipping edges ruins sleep quality and frustrates even the most patient sleeper.
This guide reveals exactly how to make king sheets fit a queen bed using proven no-sew tricks or permanent sewing methods. You will learn precise measurements, essential tools, and step-by-step instructions to transform oversized linens into a snug, custom fit.
Measure the Size Difference Between King and Queen Beds
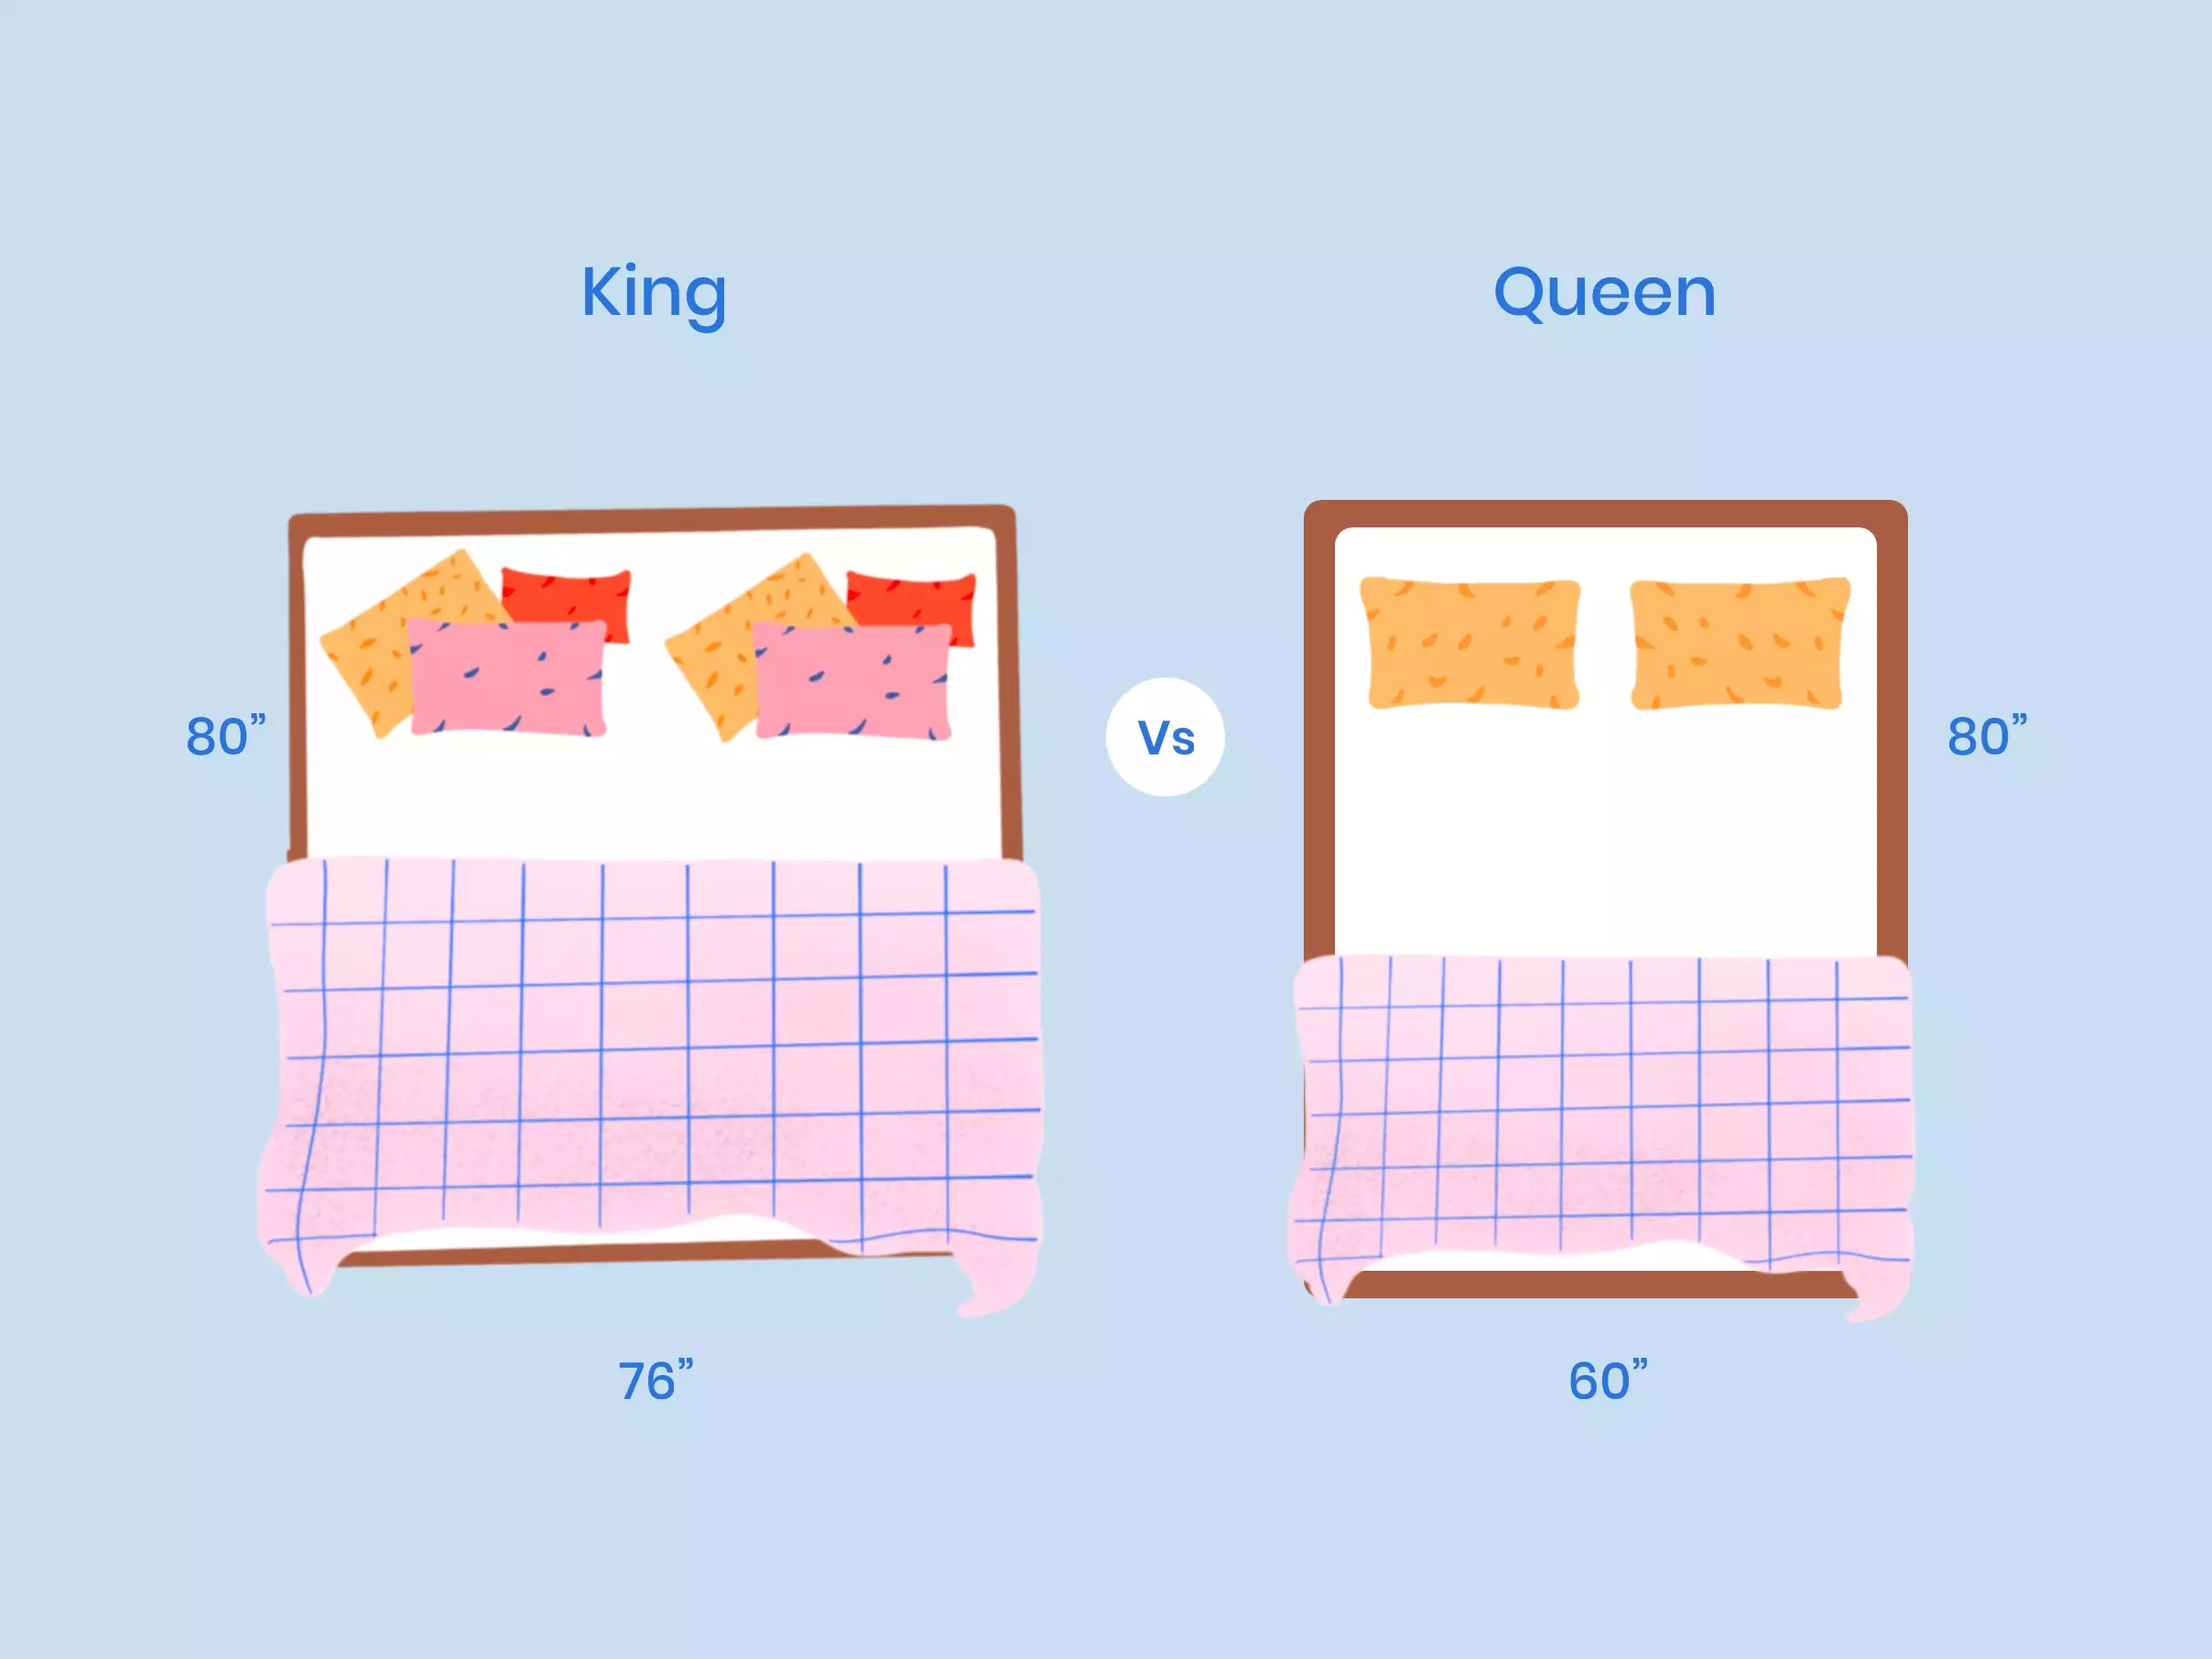
Understanding the exact dimensional gap is the first step toward a successful conversion. A standard queen mattress measures 60 inches wide by 80 inches long. In contrast, a standard king mattress spans 76 inches wide by 80 inches long.
Calculate the Excess Width
The primary issue is width, as both mattress types share the same 80-inch length. You must address a 16-inch discrepancy across the total width of the sheet.
* Remove or fold 8 inches from each side to match the queen dimensions.
* Verify your sheet label to ensure it is not a California King, which has different length and width ratios.
* Incorrect identification leads to poor fitment since California King sheets are narrower but longer.
Check Corner Depth and Elastic Placement
Fitted sheets rely on elasticized corners to stay secure, not just surface area coverage. Most king and queen sheets share similar pocket depths ranging from 12 to 15 inches.
* The goal is repositioning the elastic to match the smaller queen footprint.
* Misaligned elastic causes the sheet to sag or pop off during the night.
* Accurate measuring before cutting ensures the elastic grips the mattress corners tightly.
Try Non-Sew Temporary Fixes for Immediate Relief
If you lack sewing skills or need a reversible solution, several methods can tighten king sheets on a queen bed without permanent alteration. These techniques are ideal for dorm rooms, guest beds, or temporary living situations.
Use Sheet Suspenders or Clips
Sheet suspenders are elastic bands with clips that attach to the corners of your fitted sheet underneath the mattress. They pull excess fabric taut and prevent shifting.
* Instant results: No tools or skills required for application.
* Reversible: Perfect for rental properties or borrowed linens.
* Effective: Eliminates most shifting issues caused by oversized dimensions.
Simply tuck the loose sides under the mattress, clip the suspenders to the sheet corners, and adjust the tension until the fabric lies flat.
Apply the Diagonal Stretching Technique
You can force a king sheet onto a queen mattress by stretching the elastic corners diagonally across the bed. This method uses the existing tension of the elastic to hold the sheet in place.
* Pull one corner of the sheet across the diagonal of the mattress.
* Secure the opposite corner to create tension.
* Warning: This leaves loose fabric along the long edges and risks tearing the elastic over time.
Use this only as an emergency fix when other options are unavailable, as it does not provide a clean or durable solution.
Utilize Aggressive Tucking Methods
Tucking the extra fabric deep under the mattress can temporarily secure the sheet. Focus your efforts on the long sides where the majority of the excess width resides.
* Roll the excess fabric inward before tucking to reduce bulk.
* Push the rolled fabric firmly under the mattress edges.
* Limitation: Movement during sleep often pulls the sheet loose by morning.
This method requires nightly readjustment and is not suitable for restless sleepers or active households.
Fold Without Cutting for a Reversible Sewing Project
The no-cut folding method allows you to resize the sheet permanently while preserving the option to revert it to king size later. This approach creates a clean, double-layered edge without removing any fabric.
Create a Permanent Folded Hem
This technique involves folding the extra 8 inches of fabric inward and stitching it flat against the underside of the sheet. It is an excellent choice for beginners who want a professional look.
Tools You Will Need:
* Sewing machine or needle and thread
* Pins or sewing clips
* Iron and ironing board
* Measuring tape and chalk
Steps to Fold and Stitch:
1. Iron the sheet flat to remove all wrinkles that could skew measurements.
2. Fold the sheet in half lengthwise to align the corners perfectly.
3. Measure 30 inches from the fold across the width and mark with chalk.
4. Measure 40 inches from the fold along the length and mark the new corner.
5. Reduce these measurements by 1 inch for a snug fit, aiming for 29 by 39 inches.
6. Fold the excess fabric inward along your marked lines to create a double layer.
7. Pin the fold in place and stitch using a zig-zag stitch to maintain stretch.
8. Reposition or reattach the elastic along the new folded edge.
Cut and Resew for a Perfect Permanent Fit
For the most durable and seamless result, cutting and resewing the sheet removes excess fabric entirely. This method replicates a factory-made queen sheet and eliminates bulk.
Phase 1: Deconstruct the Sheet Corners
Begin by removing the existing stitches that secure the elastic at all four corners. Use a seam ripper to carefully open these seams without damaging the fabric.
* Iron the entire sheet flat on a large surface.
* Fold all four corners together so top meets bottom and left meets right.
* Pin the corners in place to ensure symmetry before marking.
Phase 2: Mark New Corner Dimensions
Accurate marking is critical for a balanced fit. Use your measuring tape and chalk to define the new perimeter of the sheet.
* Measure 30 inches in width and 40 inches in length from the folded center.
* Subtract 1 inch from each measurement to ensure tension, marking 29 by 39 inches.
* Connect your marks to form a triangle at each corner.
* Verify that the distance from the elastic start to your new mark is approximately 12 inches.
Phase 3: Fold and Prepare Seams
Instead of cutting the elastic band itself, fold the excess fabric inward so the elastic track moves to your new edge. This preserves the integrity of the original elastic.
* Fold about 3 inches of fabric to create a sturdy double layer.
* Remove any old stitches that block the fabric from lying flat.
* Stretch the elastic slightly to test tension before sewing.
Phase 4: Sew With Reinforced Stitches
Use a sewing machine with a zig-zag or stretch stitch setting. Straight stitches will snap when you pull the sheet over the mattress corners.
* Sew along the folded edge, keeping the fabric flat and aligned.
* Use a flat fell seam technique by folding the raw edge inward and stitching it down.
* Reinforce each corner with backstitching at the start and end of the seam.
Phase 5: Test Fit and Adjust Before Finalizing
Place the altered sheet on your queen mattress before trimming any loose threads. This dry fit reveals potential issues with tension or alignment.
* Ensure corners hug the mattress tightly without sagging.
* Check that the elastic lies flat under the mattress edges.
* Unpick and adjust seams if the fit is too tight or too loose.
Avoid the Center Seam Trap During Alteration
Some DIY guides suggest sewing a seam down the center of the sheet width to reduce size. This approach creates a high-stress weak point directly under where you sleep.
Why Corner Alteration Beats Center Seams
A center seam concentrates pressure in the middle of the bed, leading to puckering, tearing, and uncomfortable ridges.
* Weight distribution during sleep stresses the center line.
* Center seams often rip open after repeated washing and use.
* Corner alteration distributes stress evenly around the perimeter.
If you must use a center seam, fold the excess into a wide pleat rather than a tight seam and topstitch both edges. However, corner adjustments remain the superior choice for longevity and comfort.
Reinforce Your Work for Longevity and Durability
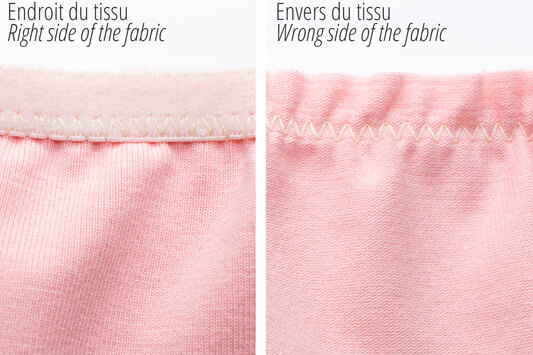
Knit fabrics used in sheets require specific stitching techniques to maintain their stretch and strength. Using the wrong stitch can lead to broken threads and failed seams.
Use the Right Stitch and Seam Types
Select a zig-zag or dedicated stretch stitch for all sewing tasks. These stitches expand with the fabric rather than breaking under tension.
* Zig-zag stitch: Allows fabric to stretch without snapping threads.
* Flat fell seam: Hides raw edges and prevents fraying over time.
* Enclosed seam: Adds an extra layer of strength for high-stress areas.
Skip the serger if you do not own one. Simply folding the raw edge under and stitching it down provides sufficient durability for home use.
Maintain Proper Elastic Tension
When resewing, stretch the elastic slightly as you sew to ensure it grips the mattress firmly.
* Avoid over-tightening, which can cause the sheet to pop off.
* Replace worn elastic with 2-inch wide bands if the original is degraded.
* Cut four pieces of new elastic, each 16 to 18 inches long, and thread them through the new hem.
Troubleshoot Common Fitting Problems
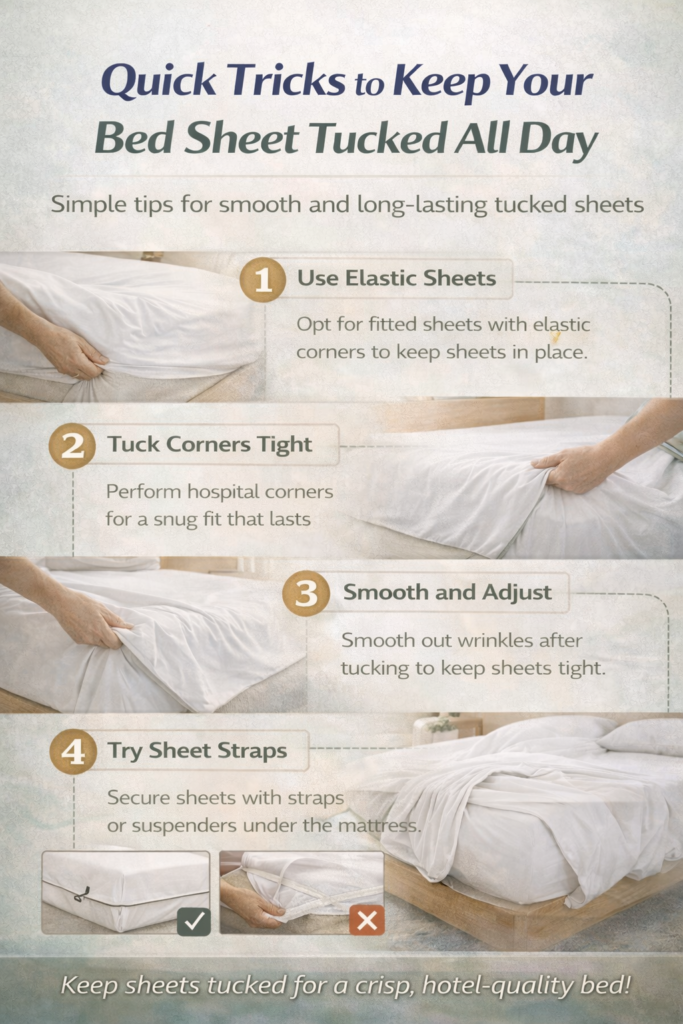
Even with careful measurement, issues can arise during the conversion process. Identifying and fixing these problems ensures a successful project outcome.
Sheet Still Feels Loose After Alteration
If the sheet sags despite your efforts, check your corner measurements and seam allowances.
* Verify you subtracted the full 1 inch for snugness.
* Add bed straps or suspenders underneath the mattress for extra hold.
* Reinforce seams if the fabric itself has stretched out over time.
Wrinkles and Bunching Persist
Bunching often indicates that the corners are still too large or the fabric is not taut enough.
* Reduce corner dimensions by an additional 1 to 2 inches.
* Switch from center pleats to the folded hem method for cleaner edges.
* Ensure you are using a stretch stitch that allows the fabric to lie flat.
Elastic Keeps Breaking During Use
Old or improperly sewn elastic will fail under regular use. Replace it if it feels brittle or loose.
* Never use straight stitches on elastic areas.
* Avoid over-tightening the elastic while sewing.
* Use wider elastic bands (1.5 to 2 inches) for better grip and durability.
Save Money and Reduce Textile Waste

Repurposing king sheets saves money and keeps high-quality fabrics out of landfills. This project is especially valuable for luxury linens or discontinued colors you love.
Repurpose Luxury or Favorite Sheets
High-thread-count king sheets or unique colors like dusty purple are worth saving. Resizing them extends their life and saves you from buying new queen sets.
* Save $20 to $50 on new sheet sets.
* Keep favorite fabrics and designs in rotation.
* Reduce textile waste through practical upcycling.
One 45-minute project gives you a custom-fit sheet that lasts for years.
Adjust the Top Sheet Too
While converting the fitted sheet, consider resizing the flat sheet for a complete set match.
* Trim 8 inches from one long side only to maintain length for tucking.
* Hem the cut edge with a narrow double fold of half an inch.
* Preserve the decorative hem at the top for a polished bedroom look.
Final Tips for Success Before You Start
Preparation and patience are key to a professional result. Follow these final recommendations to ensure your project goes smoothly.
Always Dry Fit First
Never finalize your stitches without testing the sheet on the actual mattress. A dry fit reveals tension issues and alignment problems before they become permanent.
* Check if corners are too tight or loose.
* Verify the elastic sits correctly under the mattress edges.
* Confirm the width feels balanced on both sides.
Practice on Scrap Fabric
If you are new to stretch stitches or working with elastic, practice on a scrap piece of fabric first. This helps you master your machine settings without risking your sheet.
Follow the 1-Inch Rule
The secret to a snug fit is subtracting 1 inch from your measured corner dimensions. A sheet that fits exactly will still sag, so this small reduction adds necessary tension.
Frequently Asked Questions About Making King Sheets Fit Queen Beds
Can you make king sheets fit a queen bed without sewing?
Yes, you can use sheet suspenders, clips, or aggressive tucking methods to secure king sheets on a queen bed. These non-sew solutions pull excess fabric taut underneath the mattress. While effective for temporary fixes, they may require nightly readjustment compared to sewn alterations.
How much fabric do I need to remove from a king sheet?
You need to remove or fold in a total of 16 inches from the width of the sheet. This translates to removing 8 inches from each side to match the 60-inch width of a queen mattress. Always measure twice before cutting to ensure accuracy.
What stitch is best for altering bed sheets?
A zig-zag stitch or a dedicated stretch stitch is essential for altering bed sheets. These stitches allow the fabric to stretch over the mattress corners without breaking the thread. Straight stitches should be avoided as they lack the necessary flexibility.
Will converting king sheets ruin the elastic?
Converting sheets properly will not ruin the elastic if you fold the fabric rather than cutting the elastic band itself. Repositioning the elastic track to the new edge preserves its integrity. If the elastic is old, replacing it during the process ensures a secure fit.
Is it better to cut or fold king sheets for conversion?
Cutting provides a permanent, professional fit with less bulk, while folding allows you to revert the sheet to king size later. Choose cutting for everyday use and folding if you need flexibility or are unsure about your measurements.
Key Takeaways for Making King Sheets Fit Queen Beds
Transforming king sheets to fit a queen bed is a practical skill that saves money and reduces waste. By removing 16 inches from the width and using proper stitching techniques, you can create a custom fit that stays secure all night. Remember to always subtract an extra inch for tension and use stretch stitches to maintain fabric integrity.
Whether you choose a quick no-sew fix or a permanent sewing project, these methods ensure your favorite linens continue to serve you well. Gather your tools, measure carefully, and enjoy a wrinkle-free sleep experience with your newly resized sheets.