

You’ve seen round pillows on sofas, floor loungers, and patio sets, adding color and comfort to any space. Instead of paying premium prices for pre-made covers, you can make a round pillow cover yourself in just a few hours. Whether you’re a beginner with basic sewing skills or an experienced crafter, this guide walks you through every step, from choosing fabric to selecting the best closure method for your project.
By the end, you’ll know exactly how to make a durable, washable, and beautiful round pillow cover using six popular construction styles. Each method includes specific measurements, tested techniques, and real-world tips to ensure your project succeeds the first time.
Choose Your Pillow Cover Style
Match Design to Use Case
Not all round pillow covers are made the same. The best style depends on where it will go and how often you plan to wash it.
• Drawstring: Great for patio cushions or holiday décor, easy removal, no zipper needed
• Boxed with welt cord: Ideal for custom upholstery, structured, professional finish
• Button-tufted: Perfect for accent pillows, elegant hand-sewn look
• Fringe-trimmed: Adds boho flair, best for decorative use
• Envelope back: Beginner-friendly, no zipper required, reversible option
• Zippered: Most practical, best for large or frequently washed pillows
Pro Tip: Use envelope or zipper closures if you plan to wash the cover often. Save button-tufted or drawstring styles for semi-permanent or decorative use.
Gather Materials and Tools
Essential Supplies for Any Style
Before cutting fabric, collect these core materials and tools. Most can be found at craft stores or online.
Materials needed:
• Outer fabric such as cotton, linen, canvas, or cuddle
• Lining or interlining such as muslin or old sheet for thin fabrics
• Pillow form purchased or DIY with poly-fil
• Thread heavy-duty for tufting, standard for seams
• Closure item such as cord, zipper, buttons, or bias binding
Tools required:
• Sewing machine
• Rotary cutter, mat, and ruler
• Scissors and pins or clips for thick fabrics
• Marking tool such as chalk, pen, or pin
• Measuring tape
• Iron and press cloth
• Safety pin for threading drawstrings
• Seam ripper for mistakes
Important: Always pre-wash fabric to prevent shrinkage after sewing. Cuddle fabric sheds, so vacuum or lint roll it before sewing to avoid fluff buildup in your machine.
Measure and Cut Perfect Circles
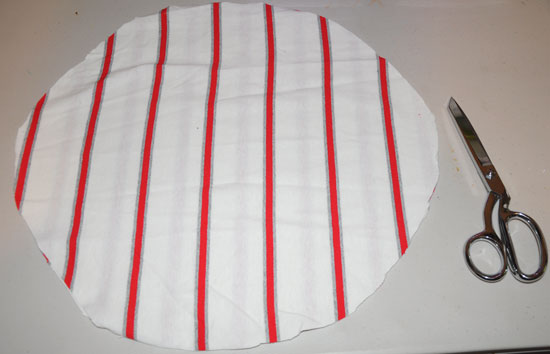
Get Sizing Right the First Time
Accurate measurements ensure your cover fits snugly over the pillow form. Use this simple formula:
Cut Size = Finished Pillow Diameter + (2 × Seam Allowance)
Standard seam allowance is ½ inch, though use ¼ inch for light fabrics and 3/8 inch for bulky fabrics like cuddle. For example, for a 16-inch pillow form, cut two 17-inch diameter circles.
Drafting Methods for Circles
String-and-Pencil Compass: Cut a string 3 to 4 inches longer than the radius. Tie one end to a pencil and knot the other at the radius length. Pin the knot at the center of the fabric and rotate the pencil to draw a perfect circle.
Household Object Tracing: Trace around cake pans, buckets, or Christmas trays. Ensure the object matches finished size plus seam allowance.
Printable Templates: Use scaled PDF templates for exact alignment, ideal for envelope backs or fringe trimming.
Pro Tip: Mark 12, 3, 6, and 9 o’clock points on each circle for accurate pattern alignment and quarter matching.
Make a Drawstring Pillow Cover
Simple, Removable, and Reversible
This is one of the easiest ways to make a round pillow cover, especially for outdoor or seasonal use.
Steps:
1. Cut two identical fabric circles
2. Sew a buttonhole 1 1/8 inches from the edge on one circle
3. Fold the edge 1 inch inward and stitch close to the fold to create a casing
4. Thread cord through the buttonhole and around the casing using a safety pin
5. Insert pillow form
6. Pull cord to gather and tie a bow
7. Tuck excess cord inside rather than cutting it
User Feedback: Drawstring covers are praised for quick swaps and reversible designs. Just flip the cover inside out to change the look entirely.
Build a Boxed Pillow with Welt Cord
Professional Finish for Custom Décor
This structured style mimics high-end upholstery and holds its shape beautifully.
Materials needed:
• Front and back fabric circles
• Welt cord
• Bias binding, 3 or more yards
• Lining optional
• Pillow form
Cutting Plan for 15-inch Pillow:
• Front and back circles: 16 inches diameter
• Boxing strip: 3 inches wide by 50.27 inches long
Steps:
1. Cover welt cord with bias binding without serging edges
2. Glue-baste the cord’s lip to the edge of each circle
3. Sew welt cord to both front and back pieces
4. Mark quarter points on all pieces
5. Pin boxing strip to front, sew next to welt cord
6. Repeat for back, leaving a turning hole
7. Turn right side out and insert pillow form
8. Push seams into boxing
9. Close opening with ladder stitch
10. Steam gently with a press cloth
Pillow Form Tip: Use a 10/90 down-feather blend. It fills well and stays firm. Size formula is pillow diameter plus boxing height plus 1 inch.
Sew a Button-Tufted Round Pillow
No Machine Required
Create a luxurious, tufted look entirely by hand, perfect for accent pillows.
Materials:
• One fabric circle same size as pillow form
• Heavy-duty thread
• Upholstery needle
• Button
• Pillow form
DIY Form Option:
1. Cut two muslin circles
2. Sew around edge and turn right side out
3. Fill with poly-fil, 32 ounces for a 20-inch pillow
4. Optional: Add a 2-inch fabric band between circles for depth
Steps:
1. Cut fabric circle to match form size
2. Finish edge with zigzag stitch for woven fabric or leave raw for non-fraying like velvet
3. Thread needle with double heavy-duty thread, knot both ends
4. Sew a running stitch just inside the edge
5. Pull thread to gather and distribute gathers evenly
6. Insert form and pull tight to close
7. Seal center hole with star stitching, crisscross in multiple directions
8. Attach button by sewing through center, pulling tight to create tuft, and tying multiple secure knots
Critical Tip: Never use all-purpose thread. It snaps under tension. Use Gutermann or upholstery-grade thread.
Add Fringe to a Round Pillow Cover
Boho Style with Extra Steps
Fringe gives a playful, vintage vibe but requires careful handling at the seam.
Steps:
1. Pre-wash and iron fabric
2. Trim fringe to desired length before sewing
3. Attach fringe to front piece using stitch length 4 to prevent puckering
4. Place fringe on wrong side of fabric, sew along top edge with less than ½-inch seam allowance
5. Overlap ends by cutting one loop past start and nesting together
6. Assemble front and back, marking 7 to 8 inch opening for turning
7. Sew with ½-inch seam allowance
8. Turn right side out and insert form
9. Close opening by hand with ladder stitch, tucking fringe under to hide raw edge
User Feedback: Some find it hard to hide fringe at the closure. Tuck carefully and use clips to hold fringe in place while sewing.
Create an Envelope Back Pillow Cover
Beginner-Friendly, No Zipper Needed
This method is fast, reversible, and perfect for first-time makers.
Steps:
1. Cut Front Circle: One circle at cut diameter
2. Cut Back Panels: Fold front circle in half, use half as template, add 3 inches to straight edge for overlap, cut two panels
3. Hem Back Panels: Fold straight edge ½ inch, then another ½ inch, press and topstitch
4. Assemble: Place front circle right side up, place back panels on top overlapping in center, right side down, align edges and pin
5. Sew: Stitch around with ½-inch seam, finish edges, turn right side out, insert pillow form
Why It Works: No zipper skills required. This is ideal for beginners or quick weekend projects.
Install a Zipper on a Round Pillow Cover

Best for Large or Frequently Washed Pillows
A sewn-in zipper makes removal and cleaning easy, even on big 28-inch floor pillows.
Steps:
1. Cut one fabric circle in half
2. Attach first half to zipper by placing right sides together, using zipper foot, sewing close to teeth
3. Attach second half on other side of zipper, right sides together, sew second seam
4. Assemble pillow by sewing front and back with ½-inch seam, leaving zipper open
5. Finish edges, turn right side out, insert form
Pro Tip: Keep zipper pull ahead or behind the foot. Lower the needle to lift the presser foot when passing over the pull. Use a 14-inch zipper for 20-inch to 28-inch pillows.
Choose the Right Fabric
Match Material to Function
The fabric you pick affects durability, texture, and care requirements.
Best picks by use:
• Outdoor pillows: Polyester blend or upholstery fabric, water-resistant, low fray
• Kids’ rooms: Canvas or cotton, durable, machine washable
• Soft throw pillows: Cuddle or stretch velvet, plush, no edge finish needed
• Elegant décor: Linen or quilted fabric, textured, natural look
Mixed Fabric Hack: Use cuddle for the front for softness and Essex linen or cotton for the back for structure. This combines comfort with clean hems.
Warning: Cuddle sheds heavily. Vacuum before sewing and use clips instead of pins.
Strengthen Seams and Closures
Avoid Popped Seams and Loose Ends
Even the prettiest cover fails if the seams give out.
Reinforcement Tips:
• Backstitch at start and end of all machine seams
• Use double thread for hand closures like ladder stitch and star stitching
• Adjust stitch length based on fabric: 2 to 3 for standard seams, 4 for stretch fabrics or fringe, approximately 3 for cuddle or bulky fabrics
• Use heavy-duty thread for tufting and gathering
User Insight: All-purpose thread often snaps during tufting. Always upgrade to upholstery or Gutermann thread.
Care and Maintenance Tips
Keep Your Cover Looking New
Washability depends on the style and materials used.
| Style | Wash Method | Removable |
|---|---|---|
| Drawstring | Machine wash, remove cord | Yes |
| Boxed | Spot clean or hand wash | Yes |
| Button-Tufted | Spot clean only | No |
| Fringe-Trimmed | Hand wash | Yes |
| Envelope | Machine wash | Yes |
| Zippered | Machine wash, zipper closed | Yes |
Pro Advice: Label non-removable covers with care instructions, especially if giving as gifts.
Save Money with DIY
Cost Comparison: DIY vs. Retail
Making your own round pillow cover saves 30 to 60 percent compared to store-bought versions.
Typical DIY Costs:
• Polyester form 16-inch: $8 to $15
• Cotton fabric half yard: $5 to $12
• Welt cord and bias: $6 to $10
• Fringe trim 1 yard: $8 to $15
• 10/90 down-feather form: $20 to $40
• 14-inch zipper: $3 to $6
• Poly-fil 32 ounces: $5 to $8
Bottom Line: A high-end 16-inch pillow that costs $60 or more in stores can be made for under $30.
Final Tips for Success
Expert-Tested Best Practices
Follow these 10 rules for flawless results every time.
- Pre-wash fabric to avoid post-sewing shrinkage
- Use heavy-duty thread for tufting and gathering
- Mark quarter points to ensure pattern alignment
- Test iron settings on scraps first
- Use clips instead of pins for thick or stretchy fabrics
- Backstitch on all machine seams
- Leave 7 to 8 inch opening for turning and stuffing
- Tuck thread tails inside to avoid visible knots
- Press seams with a cloth to protect delicate fabrics
- Start simple by trying envelope or drawstring first
Design Bonus: Make it reversible by using two different fabrics for seasonal style changes.
Frequently Asked Questions About Making Round Pillow Covers
What is the easiest way to make a round pillow cover for beginners?
The envelope back method is the easiest for beginners. It requires no zipper, no special tools, and uses simple overlapping panels. The steps involve cutting a front circle and two back panels, hemming the back panels, and sewing around the edges. This style is also reversible, giving you two looks in one.
How do I calculate the right size circle to cut for my pillow cover?
Use the formula Cut Size equals Finished Pillow Diameter plus two times the seam allowance. For a standard ½-inch seam allowance on a 16-inch pillow form, cut two 17-inch circles. Adjust for fabric type: use ¼-inch for lightweight fabrics and 3/8-inch for bulky fabrics like cuddle.
Can I wash a button-tufted round pillow cover?
Button-tufted covers are not removable, so washing is limited. Use washable fabric and a washable pillow form if laundering is needed. Spot cleaning is the safest method. The gathering and stitching make it impossible to remove the cover without destroying the tufted design.
What type of thread should I use for tufting a round pillow?
Never use all-purpose thread for tufting. It snaps under tension. Use heavy-duty thread such as Gutermann or upholstery-grade thread. Thread a long upholstery needle with double thread and knot both ends for maximum strength when gathering and tufting.
How much fabric do I need to make a round pillow cover?
For a 16-inch pillow, you need approximately half a yard of fabric. This allows for two 17-inch circles with room for pattern matching. Larger pillows up to 28 inches may require a full yard. Always buy extra if working with directional patterns.
Which closure method is best for frequently washed pillows?
Zippered closures are best for frequently washed pillows. They allow complete removal of the cover for easy machine washing. Envelope backs and drawstring covers are also good options since they are fully removable. Avoid button-tufted styles for washable applications.
Key Takeaways for Making Round Pillow Covers
Making a round pillow cover is a rewarding project that saves money while giving you complete control over style and fit. Start with simple methods like envelope back or drawstring if you’re new to sewing, then progress to more advanced techniques like welt cord or button-tufting as your skills develop. Always pre-wash your fabric, use appropriate seam allowances, and choose heavy-duty thread for any gathering or tufting work. The right closure depends on your needs: envelope or zippered for washable use, button-tufted or drawstring for decorative purposes. With proper measurements, quality materials, and attention to seam reinforcement, your DIY round pillow cover will look professional and last for years.