
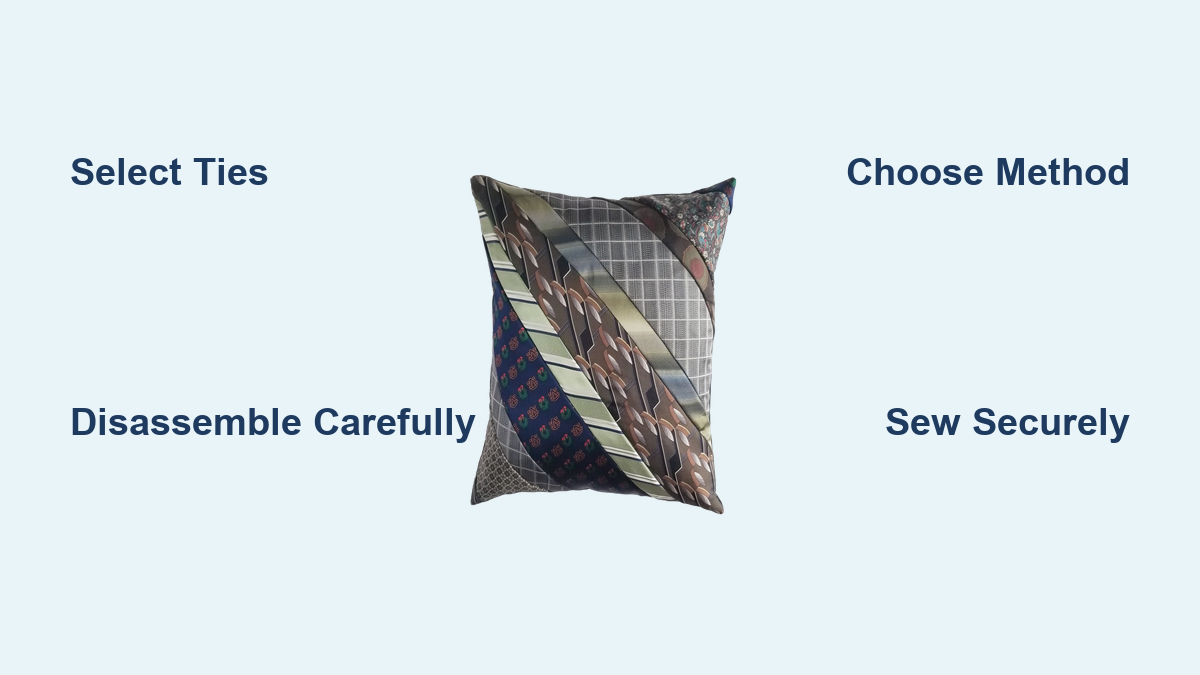
Turning a collection of neckties into a handmade pillow isn’t just a craft project. It is a way to preserve memories and create a lasting tribute to someone special. Whether you are honoring a late loved one, celebrating a milestone, or creating a meaningful gift, a neck tie pillow transforms sentimental garments into a functional keepsake that brings comfort for years to come.
This guide walks you through every step of making a neck tie pillow, from selecting the right ties to adding the final stitch. You will learn how to disassemble ties cleanly, choose the best construction method for your skill level, and create a polished, durable pillow that honors the past while fitting beautifully into your home.
Select and Prepare Your Neckties
Choosing the right neckties sets the foundation for a successful project. Gather 8 to 20 neckties depending on your design approach. Polyester ties, especially vintage 1970s styles, offer the best durability. They are colorfast and machine-washable, making them ideal for beginners. Silk ties provide elegance but require gentle handling to avoid water spots and fraying. Rayon and cotton blends work well but may slip during sewing.
Inspect each tie for stains, tears, or moth damage before purchasing. Slightly worn ties are perfectly acceptable since knot creases and subtle wear add emotional authenticity to the finished piece. Avoid heavily damaged ties unless you plan to include them symbolically.
Wash Ties Before Using
Preparing your ties properly makes assembly much easier. Polyester ties can be machine washed on a gentle cycle with mild detergent. Air dry or tumble dry on low heat to restore flatness and remove any odors. This step improves workability and ensures better patchwork alignment.
Never machine wash silk ties. Instead, spot clean with a damp cloth and mild soap, then air dry flat. Iron with a pressing cloth on low heat, skipping steam to prevent spotting.
Disassemble Ties Efficiently

Opening ties into flat strips takes under two minutes per tie when done correctly. Flip the tie over to expose the back and locate the center tab at the base, which is secured with thick thread. Use a seam ripper to cut the stitches holding the tab in place. Gently pull one thread, which often runs the full length, and unravel completely to open the tie into a long, flat fabric strip.
Decide Whether to Keep Interfacing
The internal stiffener is a personal choice that affects the final look. Keep the interfacing if you want to preserve the tie’s original structure and emotional feel. This approach maintains the tactile connection to how the tie once held its shape. Remove it only if you need extra fabric or prefer a flatter finish for your pillow.
Choose Your Design Method
.JPG)
Two primary approaches work best for neck tie pillows. The wedge patchwork method creates symmetrical, formal designs and works best for 16-inch pillows using approximately 20 ties. This technique requires intermediate sewing skills and takes 6 to 10 hours to complete.
Wedge Patchwork Technique
Create a cardboard or plastic template for the wedge shape. Cut each piece one-quarter inch larger than the template to allow for seam allowance. Stack up to four ties at once and cut with a rotary cutter, ruler, and self-healing mat for precision. Sew wedges together using a quarter-inch presser foot and 1.5 to 2.0 millimeter stitch length.
Place scrap paper under silk or rayon when sewing to stabilize slippery fabrics. Tear the paper away after stitching. Press seams to one side rather than open to reduce bulk, then assemble two side wedges first before adding the center piece.
Diagonal Layout for Simplicity
The diagonal layout works best for quick builds and beginner crafters. This method uses 8 to 10 ties and takes 4 to 6 hours to complete. Lay full-length ties diagonally across a cotton or linen backing fabric, positioning them so they touch but do not overlap.
Cut backing fabric to size, such as 19 inches by 19 inches for an 18-inch pillow. Arrange ties in your preferred order and secure with 505 spray adhesive, a glue stick, or quilter’s pins. Flip the first two ties right sides together and sew along the long edge with a quarter-inch seam allowance. Use a walking foot on your sewing machine to prevent shifting with thick or stretchy layers.
Assemble the Pillow Front
Once you have created your wedge blocks or completed the diagonal layout, joining them properly creates a cohesive front panel. For wedge blocks, sew two blocks together to form the top half and the other two for the bottom half. Join the halves with a single center seam and press all seams in the same direction for a flat finish.
For diagonal layouts, trim edges straight after all ties are sewn. Ensure the panel matches your pillow insert size plus one-half inch seam allowance. Press carefully with a low-heat iron and pressing cloth, holding the panel up to light to spot any gaps or overlaps.
Add Piping for Professional Finish
Piping strengthens corners and gives a high-end look to your pillow. Cut a 1.5-inch-wide strip from a black or matching tie and piece strips together for the full perimeter length. Fold around cording or fold double if using no cording, then attach to the front edge using a piping foot. Start one inch from the end to allow for tucking the tail under.
Turn corners cleanly by stopping stitching one-half inch from the edge. Snip diagonally into the piping up to the stitching line, rotate the fabric, and resume stitching. Finish by aligning and trimming the ends, folding the raw edge under, and stitching off.
Build the Back Closure
The envelope back remains the most common and user-friendly closure method. Cut two rectangles, such as 19 inches by 12 inches for an 18-inch pillow. Hem one long edge of each by folding one-half inch, then another one-half inch, and sewing with a quarter-inch seam. Position on the back with one panel right-side down, overlapping the other by 6 to 7 inches. Pin and sew around all edges during final assembly, leaving the envelope opening unsewn.
Alternative Closure Options
Several other closure styles work well depending on your preference. An invisible zipper sewn near the edge provides a clean look. Button and loop closures add decorative interest while remaining functional. Velcro offers convenience though it appears less elegant. A flap closure uses a 1.5-inch strip of tie fabric with serged edges and a button.
Final Assembly Steps
Place front and back right sides together and pin or clip all edges, especially corners. Sew around the perimeter with a quarter-inch seam allowance, leaving the envelope opening unsewn. Grade seams if bulky by trimming layers at different widths to reduce thickness. Clip corners diagonally to reduce bulk without cutting stitches.
Turn right side out through the envelope opening and use a blunt tool like a chopstick to push out corners. Press edges crisply, especially the piping, then insert a 16, 18, or 20-inch square pillow form.
Hand-Stitch the Opening
Use heavy thread and a hand needle for a seamless finish. Start stitching inside the piping to hide the knot and use small, invisible stitches to close the flap. Tie off with a knot and tuck the end inside.
Add a center button as a tactile focal point. Thread a needle through the button hole, push straight down through the front center, and come out on the back. Make one more stitch, wrap thread 3 to 4 times around the stitches to form a thread stem, then knot securely on the back.
Care and Maintenance
| Fabric Type | Cleaning Method |
|---|---|
| Polyester | Machine wash cold, gentle cycle; air dry or tumble dry low |
| Silk | Spot clean only; avoid moisture |
| Mixed Fabrics | Dry clean recommended |
Always remove the insert before cleaning the cover. Inspect stitching annually, especially at corners and stress points. Store flat or upright to maintain shape and keep out of direct sunlight to prevent fading.
Choose the Best Method for Your Project
The decision between patchwork and diagonal methods depends on your goals. Choose wedge patchwork if you want symmetry and a formal appearance. Choose diagonal layout if you prefer speed and want to preserve wear marks and knot creases that carry emotional meaning.
| Feature | Wedge Patchwork | Diagonal Layout |
|---|---|---|
| Time Required | 6 to 10 hours | 4 to 6 hours |
| Skill Level | Intermediate | Beginner-friendly |
| Design Style | Geometric | Freeform, artistic |
Frequently Asked Questions About Making a Neck Tie Pillow
How many neckties do I need for one pillow?
You need 8 to 10 neckties for a diagonal layout and approximately 20 ties for a wedge patchwork design. The exact number depends on your pillow size and chosen method.
Can I use silk ties for a neck tie pillow?
Yes, silk ties work but require careful handling. Spot clean only and use a pressing cloth when ironing. Place scrap paper under silk when sewing to prevent slippage.
What is the best way to wash a completed neck tie pillow?
Polyester neck tie pillows can be machine washed on cold, gentle cycle and air dried or tumble dried low. Remove the pillow insert before washing. Silk and mixed-fabric pillows require spot cleaning or dry cleaning.
How long does it take to make a neck tie pillow?
Depending on your chosen method and experience level, expect to spend 4 to 10 hours on a neck tie pillow. The diagonal method takes 4 to 6 hours while wedge patchwork requires 6 to 10 hours.
Do I need to keep the original tie interfacing?
Keeping the interfacing preserves the tie’s original structure and adds emotional authenticity to memory pillows. Remove it only if you need extra fabric or prefer a flatter finish.
Key Takeaways for Making a Neck Tie Pillow
Creating a neck tie pillow is more than a sewing project. It is an act of remembrance that transforms meaningful garments into functional heirlooms. Whether you choose the structured elegance of wedge patchwork or the freeform authenticity of diagonal layout, your pillow will carry stories in every stitch.
Start by selecting 8 to 20 quality neckties, prioritizing polyester for durability or silk for elegance. Disassemble ties carefully using a seam ripper, keeping the interfacing for memory projects. Choose your method based on skill level and desired aesthetic, then assemble using quarter-inch seams and professional finishing techniques.
The result is not just a pillow. It is a legacy stitched by hand and kept close to heart.