
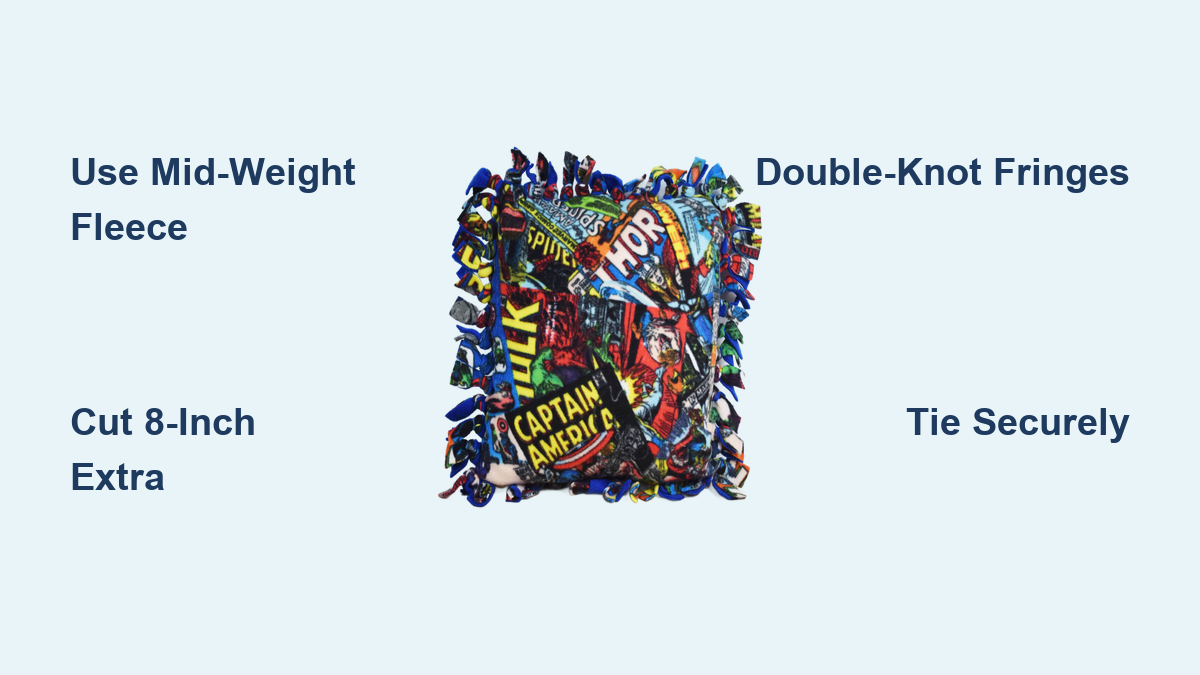
Tired of expensive throw pillows that do not match your style? You can make a soft, custom no-sew fleece pillow in under 30 minutes, with no sewing machine, needles, or prior experience required. This beginner-friendly project is perfect for DIYers of all ages, especially kids and crafters looking for quick, handmade home decor. Using just two pieces of fleece, scissors, and a pillow insert, you will create a cozy, personalized accent pillow that looks store-bought but costs just a few dollars.
This guide covers everything from choosing the right fabric to tying secure knots and cleaning your finished pillow. You will learn two popular methods, the tie-and-knot and braided-edge techniques, so you can pick the one that fits your time, skill level, and desired finish.
Choose the Right Fleece Fabric
Fleece is the ideal fabric for no-sew projects because it does not fray, holds knots securely, and offers a soft, stretchable texture. Selecting the right fleece ensures your pillow looks professional and lasts for years.
Pick Soft, Non-Fraying Fleece
Use mid-weight fleece for best results. It is soft, stretchy, and will not unravel when cut. Avoid thin or ultra-plush fleece, as these fabrics are harder to knot securely. Standard fleece measures 60 inches wide, so half a yard gives you enough material for multiple pillows.
Key fabric tips:
- One-sided printed fleece works well: pair a patterned fabric with a solid color to balance bold designs
- Skip cotton, denim, or flannel, as these fabrics fray and weaken knots
- Faux suede or low-fray wool blends may work but test first before committing
Match Fabric to Pillow Size
Cut each fleece piece 2 to 8 inches larger than your pillow insert, depending on which method you use. For the tie-and-knot method, add 8 inches total (4 inches per side). For example, use 24×24 inch fabric for a 16×16 inch insert. For the braided-edge method, add only 2 to 4 inches total (1 to 2 inches per side), so use 18×18 inch fabric for the same 16×16 inch insert.
Pro Tip: Trim curled selvage edges before cutting to ensure flat, even layers.
Cut Fleece Layers Accurately

Accurate cutting creates matching fringe strips and ensures your pillow looks polished. Take your time on this step, as it determines the final appearance.
Align and Secure Both Pieces
Place the two fleece squares together with soft sides facing out (the side that will be visible). Pin or clip the edges with ballpoint pins or Wonder Clips to prevent shifting during cutting. These specialized clips will not snag the fabric like regular pins can.
Cut Corners and Fringe Strips
- Trim corners by cutting a 2-inch square from each corner to reduce bulk when tying or braiding.
- Mark fringe lines using a ruler and fabric marker (or masking tape) to draw lines 1 inch apart along all four sides.
- Cut fringe by making 1-inch-wide strips that are 2 inches deep around the edges, skipping the corners. Cut both layers at once for perfect matching.
Visual Cue: You will end up with a square frame and 20-plus fringe strips per side on a 22-inch edge.
Tie-and-Knot Method: Quick and Easy
The tie-and-knot method is the fastest way to complete a no-sew pillow. It works well for beginners and is perfect for kids to help with.
Start Tying From One Side
Take one top-layer strip and one bottom-layer strip directly across from it. Tie them together with a double knot for security. Repeat this process around the entire perimeter of the pillow.
Warning: Do not tie the last 2 to 4 pairs of strips. Leave this opening for stuffing the pillow.
Insert Pillow or Fiberfill
For pre-made inserts, gently push the pillow into the fabric sleeve, filling each corner as you go. For poly fiberfill, add small handfuls evenly, shaping the pillow as you progress. Do not overstuff. Keep it plush and soft.
Close the Opening Securely
Once stuffed, tie the remaining strips with tight double knots. Pull firmly to close gaps and prevent stuffing from escaping.
Common Mistake: Loose knots cause fiberfill to peek out. Double-knot every pair of strips to prevent this.
Braided-Edge Method: Smooth and Durable
The braided-edge method creates a smoother, more professional-looking finish. It takes longer than the tie-and-knot method, but the result is worth the extra effort.
Prepare Slits in Each Fringe
After cutting 1-inch by 2-inch strips and removing 2-inch corners, make a 1/4-inch slit in each strip, 1/2 inch from the end. Alternatively, fold each strip and cut a slit in the center of the fold.
Tool Tip: Use a large crochet hook or a partially unbent paperclip to thread strips through the slits.
Begin the Braided Chain
- Start at the bottom layer by inserting your hook through the slit of a bottom fringe.
- Hook the corresponding top fringe and pull it through the bottom is slit.
- Take the next top fringe to the left, insert the hook into the loop you just made, catch the new strip, and pull it through.
- Continue alternating, with each new strip going through the previous loop, creating a continuous braid around the entire edge.
Finish Cleanly
At the last strip, cut it in half through the slit to make two thin tails. Use them to tie a double knot around the starting fringe. Tuck the knot inside the pillow for a seamless look.
Why It Is Better: No lumpy knots, smoother edge, and holds up for years. One user reported a braided fleece blanket that remained intact after nearly four years of daily use.
Pick the Best Stuffing Option
Your stuffing choice affects the pillow is comfort, shape, and durability. Choose based on your needs and preferences.
Use Pre-Made Pillow Inserts
Choose a poly-fil soft touch insert that fits your size. These give a consistent shape and are easy to insert. Make sure the insert is firm but compressible so it fills the corners completely.
Fill With Poly Fiberfill
Ideal for custom softness, poly fiberfill allows you to control how firm or soft your pillow feels. Rip fiberfill into fist-sized chunks and stuff gradually. Distribute evenly to avoid lumps.
For Kids: Use a pillow insert to prevent loose stuffing from escaping, especially with younger children.
Fix Common Problems Fast
Even well-planned projects can run into issues. Here is how to handle the most common problems quickly.
Prevent Stuffing from Escaping
- Double-knot every pair of strips without exception
- Tie tightly, as gaps form when knots are loose
- Use textured or grippy fleece if your fabric tends to slip
Stop Fringe from Tearing
Keep slits at least 1/2 inch from the edge. Cuts too close will rip under tension when you pull the strips tight.
Avoid Fabric Shifting
Always pin or clip layers before cutting. Unsecured fleece slips during cutting, causing misaligned strips that ruin the final look.
Handle Insert Insertion Issues
If the insert will not fit, use the plus-8-inch rule for the tie-and-knot method. Stretch the fringe gently as you push the insert in, and rotate the pillow to feed corners evenly.
Customize Your Pillow Design
One of the best parts of making your own pillow is the endless design possibilities. Make it uniquely yours.
Mix Patterns and Colors
Pair a bold print (like dinosaurs, florals, or geometric designs) with a complementary solid. Try seasonal themes such as plaid for winter or pastels for spring.
Adapt to Any Size
Scale up or down based on your needs. A mini pillow uses an 8×8 inch insert with 16×16 inch fabric using the tie method. A floor cushion uses a 24×24 inch insert with 32×32 inch fabric.
Try New Shapes
Make round, heart-shaped, or animal-shaped pillows. Cut evenly spaced fringe around curves and adjust your braid or knot rhythm to follow the shape.
Add Embellishments
- Sew or glue on fabric patches or ribbons
- Use fabric paint for monograms or names
- Create matching sets with no-sew blankets or doll pillows
Gift Idea: Bundle a themed pillow with a coordinating blanket for a thoughtful, handmade present.
Clean and Maintain Your Pillow
Proper care extends the life of your handmade pillow and keeps it looking fresh.
Spot Clean Only With Stuffing In
Blot spills immediately with a damp cloth and mild soap. Never machine-wash with filling inside, as it can clump, shrink, or tear the seams.
Full Wash: Remove Stuffing First
- Untie 6 to 7 pairs of knots to open a gap.
- Remove all fiberfill or the pillow insert completely.
- Wash the fabric only using cold water, gentle cycle, and mild detergent.
- Air dry or tumble dry on low heat. High heat causes pilling.
- Once completely dry, restuff the pillow and retie all the knots.
Maintenance Tip: Store the pillow flat or loosely folded. Avoid heavy compression to maintain fluffiness.
Frequently Asked Questions About No-Sew Fleece Pillows
How long does it take to make a no-sew fleece pillow?
The tie-and-knot method takes about 20 to 30 minutes. The braided-edge method takes 30 to 45 minutes. Both are beginner-friendly and can be completed in one sitting.
What size fabric do I need for a 16-inch pillow insert?
For the tie-and-knot method, cut your fabric to 24×24 inches (add 8 inches total). For the braided-edge method, cut to 18×18 inches (add 2 inches total).
Can I use a regular pillow instead of an insert?
Yes, you can use poly fiberfill to stuff the pillow instead of a pre-made insert. This allows you to customize the firmness, but be sure to remove all the stuffing before washing.
Why do my knots keep coming loose?
Loose knots usually result from not using double knots or from tying them too loosely. Always use double knots and pull tightly. Also ensure you are using fleece, as other fabrics are too slippery.
Is this project safe for children?
Yes, children ages 6 and up can help with this project. Adult supervision is needed for cutting steps, but kids can do most of the tying. It is an excellent way to build fine motor skills.
How do I wash a finished no-sew fleece pillow?
Never machine-wash with the stuffing inside. Either spot clean the surface or untie several knots, remove the stuffing, wash the fabric only, then restuff and retie.
Key Takeaways for Making Your Own No-Sew Fleece Pillow
Making a no-sew fleece pillow is one of the easiest DIY projects you can tackle. The fleece fabric choice is critical: stick with mid-weight fleece that does not fray and holds knots securely. Cut your fabric size based on the method, adding 8 inches total for tie-and-knot or 2 to 4 inches total for braided-edge.
Both methods work well, but choose based on your needs. The tie-and-knot method is faster and great for kids crafts, while the braided-edge method offers a smoother, more durable finish that looks professional. Remember to always double-knot your strips and leave an opening for stuffing before closing everything up.
The total cost runs just $10 to $20, making these pillows affordable for批量 crafting, gifts, or home decor updates. With endless customization options in size, shape, pattern, and embellishments, you can create a pillow for every season or style. Start today with just two pieces of fleece and a pillow insert, and you will have a cozy, personalized pillow in under an hour.