

Torn bed sheets disrupt sleep and expose you to rough edges that ruin your comfort. Instead of throwing away your favorite set, you can learn how to repair torn bed sheets using simple tools found around your home.
This guide teaches you to assess damage, choose the right fix, and apply lasting repairs like darning or patching. You will discover methods to restore fabric strength and extend the life of your bedding for years to come.
Assess the Tear and Fabric Type
Inspecting the damage closely helps you select the correct repair strategy for your specific situation. The location and material determine whether you should darn, patch, or reinforce the area.
Check Location and Damage Pattern
Different areas of a sheet face unique stresses that cause specific tear patterns. Identifying the zone ensures you apply the most effective fix.
- Corners of fitted sheets: These often suffer L-shaped rips from foot movement and elastic strain.
- Center panel: Large rips here usually result from prolonged tension and uneven wear over time.
- Heel or beard zones: Repeated friction causes thinning and small holes roughly 6 to 8 inches across.
Identify the Sheet Material
Your fabric type dictates which repair method works best without causing further damage. Matching the technique to the material prevents future failures.
- Cotton or high-thread-count cotton: Ideal for darning or patching with matching thread.
- Semi-flannelette or thick cotton blends: These respond well to calico reinforcement layers.
- Silk, lace, or delicate weaves: Require invisible mending techniques to avoid heavy stitching.
- Denim-weight or durable cotton: Can handle double-sided patches and zigzag machine stitching.
If the fabric surrounding the tear feels brittle or thin, patching is often better than darning.
Match Method to Damage Type
Use this guide to pick the right fix for your specific damage scenario. Choosing correctly prevents re-tearing and ensures a flat result.
| Tear Type | Best Repair Method |
|---|---|
| Small corner rip (L-shaped) | Darning |
| Large hole (8 inches or more) | Double-sided patch |
| Center panel split | Calico reinforcement |
| Delicate fabric (silk/linen) | Invisible mending |
| General thinning | Cut-and-swap or rotation |
Gather the Right Repair Tools
Using proper tools makes the difference between a temporary patch and a lasting fix. Invest in these essentials to achieve professional results.
Basic Hand Sewing Kit
You do not need a full sewing machine to repair sheets effectively. Start with these core items for your kit.
- Embroidery hoop: Keeps fabric taut during hand stitching, which is critical for darning.
- Needles: Use a long, slender needle for darning and a standard size for patching.
- Thread: Match the color and weight, such as cotton thread for cotton sheets.
- Scissors: Sharp, small-pointed ones work best for trimming thread and patches.
- Thimble: Protects your finger during dense stitching sessions.
Reinforcement Supplies
Stronger repairs require specific materials to add durability to the weakened area. Include these supplies for robust fixes.
- Calico fabric: An inexpensive, strong cotton used for backing patches.
- Double-sided fusible web: Bonds patch layers without creating stiffness like standard interfacing.
- Washable glue stick: Acts as a temporary adhesive to hold patches before sewing.
- Old sheets: Harvest matching fabric from these for invisible patches.
Pro Tip: Never use wool darning needles on fine cotton because they are too thick and will damage fibers. Also, double your thread but do not knot it when darning, as knots create lumps.
Darn Corner Rips Flat and Strong
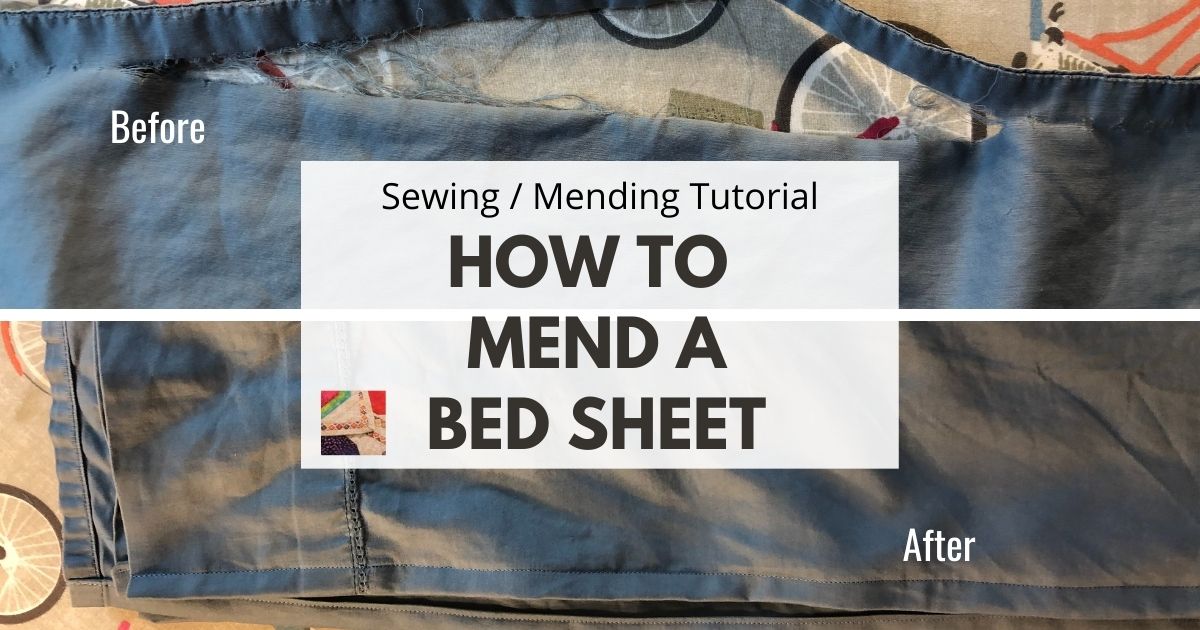
Darning is the gold standard for repairing torn fitted sheet corners. It creates an invisible, flexible repair that will not catch on toes or unravel.
Prep the Fabric for Darning
Proper preparation ensures the fabric stays flat while you work. Follow these steps to set up your workspace.
- Flip the sheet inside out to access the back of the tear.
- Pin two opposite corners together with a safety pin inserted deep into the fabric.
- Place the torn area in an embroidery hoop and tighten until the fabric is drum-tight.
This setup prevents distortion and gives you a flat surface to work on effectively.
Weave the Warp Threads First
Creating the foundation of your repair requires careful threading and placement. Start away from the edge to prevent the tear from spreading.
- Thread a needle with doubled cotton thread without tying a knot.
- Bring the needle up from the back about 1 inch away from the tear.
- Weave over and under the existing fabric threads in straight lines across the hole.
- Space stitches like a loose quilt and avoid pulling too tight.
Reinforce the Weft and Corners
Building a grid pattern adds strength to the repair. Focus on the corner as it is the weakest point of the sheet.
- Turn 90 degrees and weave perpendicular threads through the first layer.
- Fill gaps by strictly following the over-under pattern.
- Guide the needle straight into the tip of the corner and gently tug from underneath to secure.
This anchors the most vulnerable spot and locks the grid in place.
Add Diagonal Bias Stitches
Diagonal stitches lock the grid and resist stress from multiple directions. This final step ensures long-lasting durability.
- Stitch diagonally across the hole, especially near the corner area.
- Finish with a final pass over the entire area to lock all layers together.
- Trim excess thread, leaving tails secured within the weave.
Time Estimate: Expect to spend 30 to 40 minutes for a king-size corner repair. Darning uses only thread, making it the most eco-friendly fix.
Patch Large Holes with Double Layers
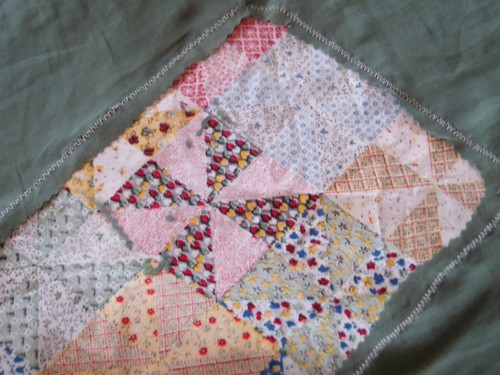
For holes bigger than 8 inches or shredded areas, a single patch will not last. Use a double-sided method to sandwich the damage for maximum strength.
Cut and Position Matching Patches
Sourcing the right material ensures your repair blends in seamlessly. You need two pieces to create the sandwich effect.
- Cut two patches from an old sheet or calico, ensuring they are 1 to 2 inches larger than the hole.
- Place one patch on top and one on the bottom to sandwich the torn area.
- Ensure the fabric matches in weight and color for a uniform look.
Bond Layers with Fusible Web or Glue
Securing the layers before sewing prevents shifting during the process. This step adds pre-strength to the repair.
- Apply double-sided fusible web to both patches, avoiding standard interfacing.
- Iron lightly to adhere if using fusible web, or use a washable glue stick.
- Press the layers together so they stay aligned during sewing.
Sew Through All Layers
Stitching through all layers creates a unified repair that withstands heavy use. Use a zigzag pattern for flexibility.
- Use a sewing machine or hand stitch with a zigzag pattern around the edges.
- Add cross-stitches through the center if the hole is particularly large.
- Keep tension moderate to avoid puckering the fabric.
The result is a soft, smooth patch on both sides with no raw edges exposed.
Reinforce Center Rips with Calico
When the center panel splits due to tension or thinning, calico backing stabilizes the entire area. This method prevents future tears in high-stress zones.
Baste a Top Calico Strip
Adding a top layer stops fraying and spreads stress across a wider area. Lay the sheet flat on a large table for best results.
- Cut a long strip of calico to match the length of the rip.
- Pin the calico along the top side of the tear.
- Tack it in place with temporary stitches for alignment.
Machine Stitch with Zigzag Seam
A zigzag stitch allows the fabric to stretch without breaking the thread. This flexibility is crucial for center panels.
- Use a zigzag stitch along both edges of the calico strip.
- Stitch directly over the seam where the calico meets the sheet fabric.
- Ensure the stitch moves with the sheet during use.
Apply a Bottom Patch
Supporting the tear from underneath completes the dual-layer system. This provides full coverage for the damaged area.
- Cut a second calico piece to cover the hole completely.
- Place it underneath the rip and tack it in place.
- Sew securely from the bottom with a zigzag or backstitch.
Now the tear is fully supported on both the top and bottom for heavy-duty durability.
Try Alternative Fixes for Special Cases

Not every tear needs darning or patching. Some situations call for clever, time-tested alternatives to save your sheets.
Invisible Mending for Silk or Lace
Delicate fabrics require a gentle touch to avoid further damage. Follow these steps for fine materials.
- Use a fine needle and thread that exactly matches the fiber.
- Stitch in a tight zigzag, following the original weave pattern.
- Avoid knots by tucking thread ends under existing stitches.
- Press with a cool iron to smooth the area after testing first.
Cut and Swap Worn Sections
This old-school trick doubles the usable life of flat sheets thinning in the center. It works best with solid-colored sheets.
- Cut the sheet down the middle lengthwise.
- Swap the two halves and sew the strong outer edges together in the center.
- Now the worn part sits on the low-stress edges.
Rotate and Flip to Even Out Wear
Extending sheet life before damage occurs is the best strategy. Regular rotation distributes wear evenly.
- Rotate 180 degrees weekly: Move the foot-end to the head-end.
- Flip corners: Use all four corners over time to balance stress.
- Turn inside out: Do this every other wash to reduce abrasion.
Prevent Future Tears and Extend Sheet Life
A repaired sheet is only as good as its care routine. Use these habits to avoid repeat damage and maximize longevity.
Stop Heel and Beard Wear
Friction from feet and facial hair is a common cause of tears. Take proactive steps to reduce this wear.
- Wear socks to bed if you have rough heels.
- Use a bed protector or throw blanket over high-friction zones.
- Pre-emptively darn heel areas if thinning begins.
Wash and Dry Properly
Improper washing accelerates fiber breakdown. Follow these guidelines to protect your repairs.
- Wash in cold water on a gentle cycle.
- Avoid overloading the machine so sheets have room to move.
- Air dry when possible, or use low heat to prevent damage.
Know When to Retire a Sheet
Even the best repairs have limits. Recycle beyond-repair sheets by cutting them into cleaning rags or using intact corners for patch material. Nothing needs to go to waste.
Frequently Asked Questions About Bed Sheet Repair
Can I repair a torn fitted sheet corner without it feeling bulky?
Yes, darning is the best method because it uses only thread to rebuild the fabric. This creates a flat, flexible repair that does not add the bulk of a patch, making it comfortable for sleep.
What is the best thread for repairing cotton bed sheets?
You should use cotton thread that matches both the color and weight of your sheets. Using matching thread ensures the repair blends in and moves naturally with the fabric.
How long does it take to darn a large hole in a bed sheet?
A standard king-size corner repair typically takes about 30 to 40 minutes. Larger holes requiring double-sided patches may take slightly longer depending on the sewing method used.
Is it worth repairing old sheets or should I buy new ones?
Repairing sheets is worth it if the fabric is still soft and high-quality. A single repair can extend the life of your bedding by years, saving money and reducing textile waste.
Can I use a sewing machine for all sheet repairs?
While machines work well for patches and calico reinforcement, hand darning is often superior for corner tears. Hand darning allows for the precise over-under weave needed for flexibility.
Key Takeaways for Fixing Your Torn Bed Sheets
Learning how to repair torn bed sheets transforms a throwaway habit into a sustainable practice. Whether you darn a corner, patch a large hole, or reinforce a split, each fix adds years to your linens.
Start with darning for fitted sheets and use double layers for big holes. With minimal tools and about 40 minutes of effort, you can save money and reduce waste while keeping your favorite bedding in rotation.