
Ever struggled with lumpy throw pillows that look messy or slip out of their covers? A custom rectangular pillow cover with an envelope closure solves that problem. It offers a clean, professional look and easy access for washing or swapping inserts. This guide walks you through every step from measuring fabric to pressing the final seam so you can create a tailored cover that fits perfectly and lasts for years.
You’ll learn three proven construction methods, avoid common mistakes, and discover pro tips like adding piping or decorative topstitching. No zippers, no buttons, no stress. Just one sharp-looking pillow cover in under an hour.
Choose Your Construction Method
Pick the right technique based on your pillow size, fabric width, and skill level. Three reliable methods work for any rectangle.
Equal Back Panels (Best for Standard Sizes)
Ideal for 16″ × 16″, 18″ × 18″, or 20″ × 20″ pillows. This method uses two identical back panels with a centered overlap.
Front Panel: Insert size plus 1 inch total (½ inch seam on each side). For an 18″ × 18″ insert, cut a 19″ × 19″ front.
Back Panels (each): Width equals insert width divided by 2, plus 4 inches. Height matches the front panel. For an 18″ × 18″ insert, each back panel measures 13.5″ × 19″.
The 4-inch addition ensures a 3 to 4 inch overlap, which prevents the insert from slipping out.
Unequal Back Panels (For Long Lumbar Pillows)
Perfect for 24″ × 14″ or 30″ × 12″ lumbar styles. One panel wraps farther for a secure closure.
Front Panel: Insert height plus 1 inch. For a 24″ × 14″ insert, cut 24″ × 14.5″.
Short Back Panel: Width divided by 3, plus 2 inches. For a 24″ wide pillow, that’s 10 inches wide.
Long Back Panel: Width divided by 3, multiplied by 2, plus 5 inches. For a 24″ wide pillow, that’s 21 inches wide.
Both back panels share the same height as the front panel. The longer panel fully covers the shorter one, even on wide pillows.
One-Piece Wrap-Around (Minimal Seams)
Best when fabric is wide enough (42″ to 45″). Only two side seams are needed, with no back cutting required.
Cut One Rectangle: Length equals twice the front height plus 8 inches for overlap. Width equals front width plus 1 inch seam allowance. For a 14″ × 14″ pillow, cut 37″ × 15.5″.
This method uses less fabric and hides seams on the sides.
Cut Fabric to Size
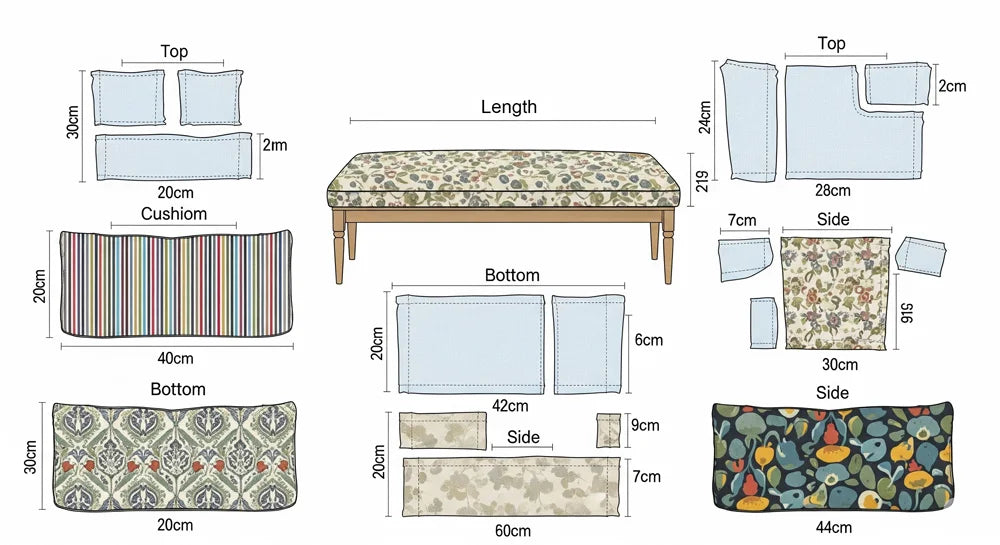
Precision here ensures a flawless fit. Always start with clean, pressed fabric.
Measure Pillow Insert First
Use a ruler or tape measure and record the exact width and height. Example: a 16″ × 20″ insert.
Pre-Wash Fabric
Wash and dry cotton, linen, or blends before cutting. This prevents shrinkage after sewing. Iron flat before measuring.
Mark and Cut Panels
Use fabric chalk or a washable marker. Align pieces with the grain line (parallel to the selvage). Cut with a rotary cutter and ruler for straight edges. Label each piece: “Front,” “Large Back,” “Small Back.”
Double-check dimensions before cutting. A ¼-inch error can cause misalignment.
Hem the Back Panels
This creates a clean, finished overlap edge with no raw fabric showing.
Fold and Press Twice
On the overlap edge (long side for square pillows, short side for lumbar styles), fold ½ inch toward the wrong side and press with an iron. Fold another ½ inch to hide the raw edge and press again. Pin or clip in place, then stitch close to the inner fold using a straight stitch.
Use clips instead of pins. They prevent shifting on thick or slippery fabrics.
Alternative: No-Sew Hem
Apply Heat n Bond tape to the raw edge. Iron to fold and seal. No stitching is needed. This works great for quick projects or kids’ activities.
For One-Piece Wrap Method
Hem both short ends (width sides) before folding and sewing the sides together.
Layer and Pin Correctly

Misaligned layers cause crooked seams and visible stitching. Do this right.
Place Back Panels First
Lay the smaller back panel right side up. Place the larger back panel on top, right side up, overlapping by 3 to 4 inches. Ensure edges are flush at top and bottom.
Add Front Panel
Place the front panel right side down on top. All three layers are now stacked with the small back on bottom, large back in the middle, and front on top (face-down).
The front must be face-down. This ensures the seam ends up on the inside.
Pin Every 3 Inches
Use clips or pins around all four edges. Double-pin at corners and the overlap zone. Check alignment by holding the project up to light.
Skipping pins causes fabric to shift easily, especially near the overlap.
Sew the Perimeter Seam
One continuous seam seals the entire cover. Accuracy here makes all the difference.
Set Seam Allowance to ½ Inch
Use guide lines on your sewing machine bed. Backstitch at start and end for strength.
Sew Around Entire Rectangle
Start on one side and sew all the way around. Stop with the needle down at each corner, lift the presser foot, rotate the fabric, and continue. Reinforce corners with a few extra stitches.
If adding piping later, use a zipper foot for better visibility around thick cord.
Finish Inner Edges
This prevents fraying and reduces bulk inside the cover.
Clip Corners Diagonally
After sewing, trim ¼ inch off each corner tip in a triangle shape. Do not cut the stitches. This allows sharp corners when turned right-side out.
Skip this step on delicate or very thick fabrics unless absolutely necessary.
Choose Edge Treatment
Pinking shears provide a quick anti-fray fix for cotton. Zigzag stitch sews over the raw edge of the seam allowance. French seams work for sheer or luxury fabrics but require re-sewing.
Pinking shears are best for beginners. They’re fast and effective with no extra sewing needed.
Turn and Press the Cover
This transforms a lumpy sewn pouch into a crisp, professional pillow cover.
Turn Right-Side Out
Reach through the envelope opening and pull the fabric through carefully. Push out corners with a point turner, chopstick, or pencil.
Use the broad end first to move bulk, then the tip to sharpen the corner.
Press for Crisp Edges
Iron flat, focusing on the seam line and corners. Use a pressing cloth for silk, satin, or heat-sensitive fabrics. Press hems flat to set the overlap.
Lightly spray with water before ironing. This helps creases set better.
Insert the Pillow Form
The final test of fit and fullness.
Choose the Right Insert
Select an insert 1 to 2 inches larger than your cover for a plump, full look. Use the same size or ½ inch smaller for a crisp, tailored appearance. Use the same size with no seam allowance for a loose, relaxed drape.
For example, an 18″ × 18″ cover needs a 20″ × 20″ insert for a full look.
Insert Carefully
Start with the corners first. Work edges evenly, then fluff and adjust for symmetry.
Label the inside with “Top” using a pin or stitch. This prevents confusion during laundry.
Upgrade with Design Touches
Make your cover stand out with simple enhancements.
Add Piping (Intermediate Skill)
Baste piping cord to the right side of the front panel. Use a zipper foot to stitch close to the cord. Attach back panels as usual, sewing over the piping. Clip the piping fabric at corners for smooth turns.
This creates a polished, boutique-style finish.
Decorative Topstitching
After turning, sew ½ inch or ¾ inch from the edge around the entire cover. Use contrasting thread for visual pop. This reinforces seams and adds modern flair.
Binding or Facing
Apply bias binding to the outer seam for color contrast. This replaces traditional edge finishing and works great for quilting cotton or patchwork designs.
Avoid Common Mistakes
Even small errors ruin the look. Here is how to dodge them.
Crooked Hems
The cause is skipping ironing before stitching. The fix is to always press folds. No exceptions.
Fraying Edges
The cause is unfinished seam allowance. The fix is to use pinking shears or zigzag stitch.
Bulky Corners
The cause is not clipping corner tips. The fix is to trim ¼ inch triangles. This reduces bulk dramatically.
Insert Falls Out
The cause is overlap less than 3 inches. The fix is to increase back panel width. Aim for 4 inches of overlap.
Visible Stitching on Front
The cause is placing the front panel face-up. The fix is to double-check. The front must be face-down during assembly.
Hand Sewing Option
No machine? No problem. You can make the entire cover by hand.
Use Backstitch for Strength
This is the most durable hand stitch for seams. Knot the thread securely at start and end. Use double thread for extra hold.
Whipstitch for Hems
Fold the hem twice, then stitch through the fold. Keep stitches small and even.
Plan for 2 to 4 hours depending on size and experience.
Care and Washing Tips
Keep your cover looking fresh for years.
Washing
Always turn inside out first. Use gentle cycle and mild detergent. Wash according to the fabric care label. Avoid bleach and softener.
Drying
Air drying is preferred to prevent shrinkage. If machine drying, use low heat and remove promptly to reduce wrinkles.
Ironing
Press after every wash. Use high heat for cotton and linen. Use medium heat for blends. Use low heat with a pressing cloth for delicates.
Store inserts in breathable cotton bags to prevent yellowing.
Key Takeaways for Making Rectangular Pillow Covers
You now have a durable, washable, custom-fit rectangular pillow cover with a hidden envelope closure. No hardware, no hassle.
Iron at every step. Pressing equals a professional finish.
Use clips, not pins. They give better grip and prevent shifting.
Test fit before final press. Slide in the insert to check the ease.
Label “Top” inside. This prevents confusion during laundry.
Prevent stretching. Let the feed dogs move the fabric. Do not pull it through.
This method works for beginners since only straight seams and hems are required. It is fully customizable in any size, fabric, or color combination. It is easy to care for and holds up well in high-use spaces. Once you make one, you will want to sew a whole set.
Frequently Asked Questions About Sewing Rectangular Pillow Covers
Do envelope pillow covers need a zipper?
No. The overlapping back panels securely hold the insert without any hardware.
How much overlap should the back have?
A minimum of 3 inches is required. Four inches is preferred for security and full coverage.
Can I wash the pillow cover?
Yes, if made with washable fabric. Always turn it inside out and follow the care label instructions.
What is the easiest fabric for beginners?
100% cotton is best. It is stable, presses well, and resists shifting during sewing.
Can I make this by hand?
Yes. Use a backstitch for durability. It takes longer but is fully feasible.
Why clip the corners?
Clipping reduces bulk and allows corners to turn sharply when the cover is right-side out.
Should I pre-wash fabric?
Yes, especially cotton and linen. This prevents shrinkage after you finish sewing.
Can I use a larger pillow form?
Yes. Using a form 1 to 2 inches larger creates a fuller, fluffier pillow.
How do I prevent fraying?
Use pinking shears, zigzag stitch, or French seams on the inner edges.
Can I add piping?
Yes. This requires basting the piping to the front panel before attaching the back panels.