
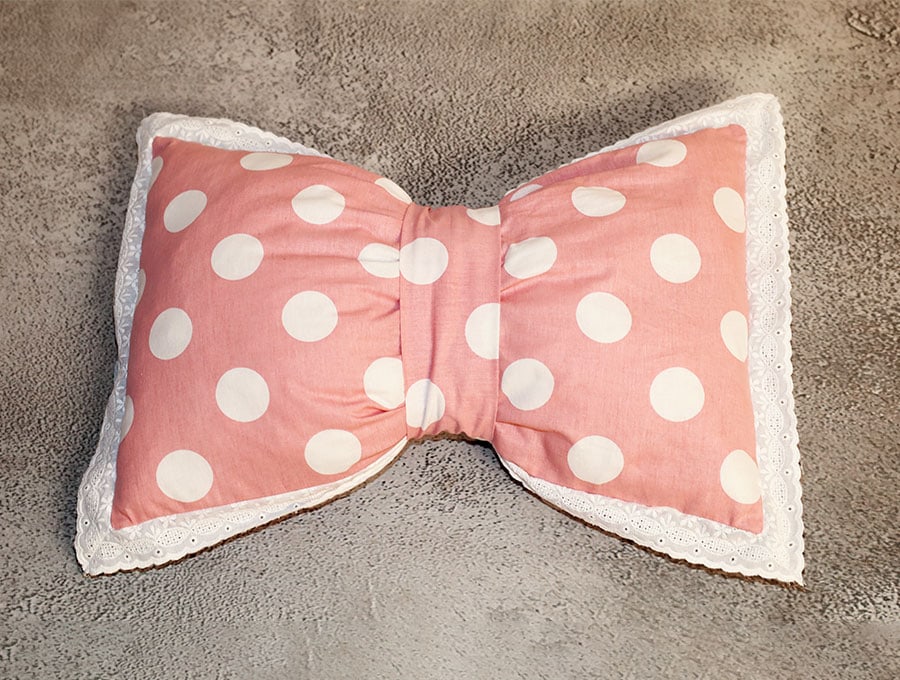
You’ve spotted them on stylish beds, cozy reading chairs, and nursery décor—bow shaped pillows that add instant charm with one elegant knot. These decorative pillows retail for $70 or more, but you can craft one at home for a fraction of the cost. This guide walks you through every step, from selecting the right fabric to attaching a professional-looking bow that stays secure. Whether you want a soft tied sash, a flat appliquéd style, or a ruffled vintage look, you’ll find complete instructions for each method here.
By the end of this tutorial, you’ll know how to make a bow shaped pillow in multiple styles, using supplies you likely already have. The project takes one to two hours and works for beginners and experienced sewers alike.
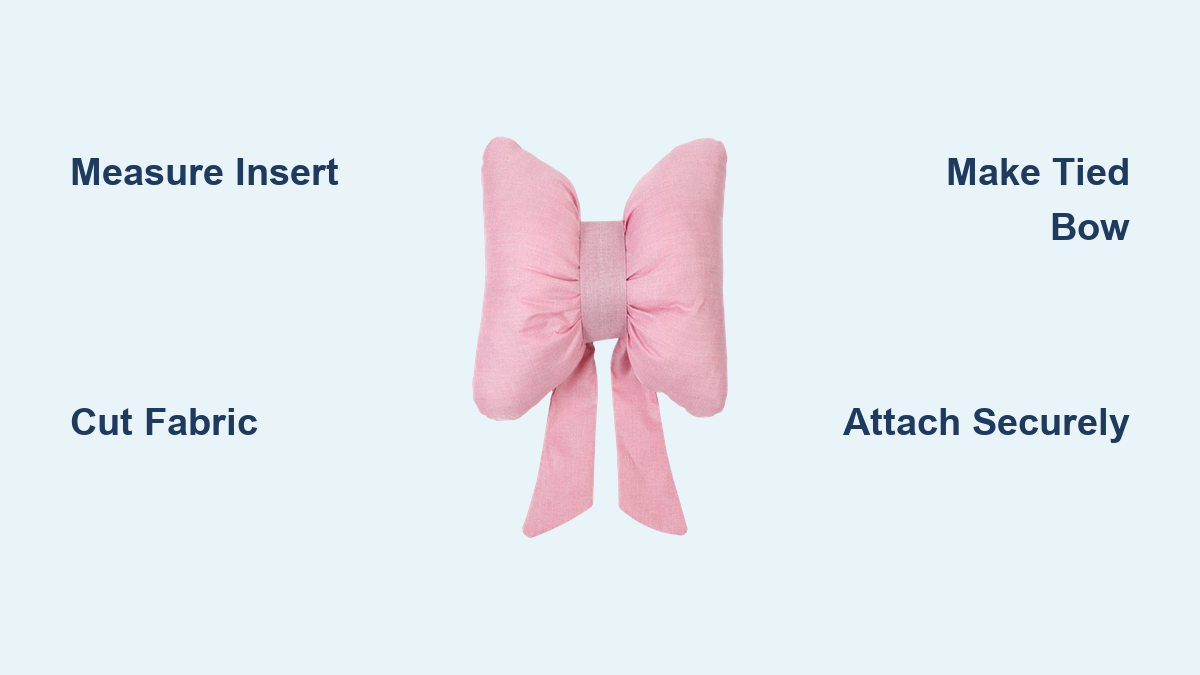
Prepare Your Fabric and Cut to Size
Measure the Pillow Insert First
Always start your project by measuring the pillow form you plan to use. Standard inserts come in sizes like 12″×18″, 16″×16″, or 20″×20″. Add 1 inch to both dimensions to account for a half-inch seam allowance on each side. A 12″×18″ insert, for example, requires a 13″×19″ front panel and a matching back panel.
Use sharp fabric scissors or a rotary cutter with a cutting mat for the cleanest edges. Mark your cutting lines with fabric chalk or a disappearing ink pen before slicing.
Pre-Wash and Press Everything
Wash and dry your fabric before cutting to prevent shrinkage later. Once dry, press it flat with an iron on the appropriate heat setting for your fabric type. Lay the fabric on a clean, flat surface and smooth out any wrinkles before you begin cutting.
Check the fabric’s directional pattern before slicing. If you’re using stripes, florals, or any print with a direction, make sure the pattern runs the way you want it on the finished pillow.
Choose Your Preferred Bow Style
Tied Sash Bow
A tied sash bow mimics a ribbon knotted around the pillow. Cut a 40″×5″ strip of fabric and sew it into a tube, leaving the short ends open. Turn it right side out using a safety pin, then tie it into a bow on a flat surface. The tails should extend to the bottom edge of your pillow for balanced proportions.
This style works well for beginners because the bow remains adjustable. You can hand-stitch the back to lock the shape permanently or leave it loose for easy swapping.
Flat Appliquéd Bow
A flat bow sews directly onto the pillow front like a decorative patch. Cut a 17″×10″ rectangle for the main bow and a 3″×5″ strip for the center knot. Pinch the center of the larger piece to form loops, wrap the smaller strip around that pinch point, and whip-stitch the edges together.
This method produces a clean, modern silhouette perfect for nurseries or minimalist bedrooms. The bow sits flush against the fabric rather than protruding.
Ruffled Bow Option
Add dramatic volume by creating a ruffle around your pillow first. Cut a strip 1.75 times longer than your pillow’s perimeter. For a 12″×18″ pillow with a 60″ perimeter, cut a 105″×4″ strip. Fold it in half lengthwise, wrong sides together, then zigzag over dental floss placed just inside the raw edge to gather it evenly.
Once gathered, pin the ruffle to the pillow front edge and stitch in place. The ruffle creates a full, romantic frame that makes the bow stand out dramatically.
Lace-Trimmed Design
For vintage charm, attach lace trim to the pillow edges before assembling. Cut four lace pieces, two for the long sides and two for the short sides, each extending 2 inches beyond the pillow edges. Align the scalloped edge inward and stitch corner to corner, mitering the corners at 45 degrees for a polished finish.
Sew the Pillow Cover
Use a Half-Inch Seam Allowance
Place your front and back panels right sides together. Pin around all edges, matching corners precisely. Sew with a half-inch seam allowance, leaving a 4 to 5 inch opening in the center of one long side for turning and inserting the pillow.
Backstitch at the beginning and end of each seam to secure the stitches. Trim the corners diagonally to reduce bulk and help achieve sharp points when you turn the pillow right side out.
Turn and Press Smoothly
Use a chopstick, knitting needle, or turning tool to push out the corners gently. Be careful not to poke through the fabric. Once fully turned, press the entire pillow flat with an iron, paying special attention to crisp edges and smooth seams.
Do not insert the pillow form yet if you’re adding a bow or ruffle to the front.
Create the Tied Bow

Make a Fabric Tube
Cut a 40″×5″ strip from your chosen fabric. Fold it in half lengthwise, right sides together, and press. Sew along both long edges with a quarter-inch seam allowance, leaving the short ends open.
Trim the corners diagonally, then turn the tube right side out using a safety pin or bodkin. Press flat, folding the raw edges inward at the open ends.
Form the Bow Shape
Lay the tube on a flat surface. Form one loop using about one-third of the length as the tail. Cross the other end over the center, loop it back, and pull through to create a knot. Adjust the loops and tails until they appear symmetrical.
For durability, hand-stitch through the back layer of the bow to secure its shape. This prevents it from loosening with use.
Attach the Bow to the Pillow
Position at Top Left Corner
Place the tied bow on the top left corner of the pillow front. Center it vertically so the knot sits just below the top edge. You can leave it untacked for a removable look or hand-stitch through the back layer only to anchor it permanently.
Use matching thread and small, hidden stitches to keep the attachment discreet.
Add a Center Wrap
For a more realistic ribbon effect, cut an 8.5″×19″ strip and wrap it around the bow knot. Hand-stitch the ends together at the back of the pillow. This simulates the wrapped center of a real bow and hides any messy stitching from the tied bow.
Install an Envelope Closure Back
Cut Two Overlapping Panels
Create an envelope-style back for easy insert removal. Cut two rectangles that, when overlapped, cover the opening completely. For a 12″×18″ pillow, cut two 12″×10″ panels.
Hem one long edge of each panel with a half-inch double fold. Overlap them in the center by 2 inches so they cover the opening entirely.
Sew Around the Perimeter
Place the back panels on the pillow front, right sides together, aligning the raw edges. Pin all around, then sew with a half-inch seam allowance, enclosing the envelope flaps.
Trim corner triangles to reduce bulk. Turn right side out through the overlap opening. Insert the pillow form and adjust until it sits snugly.
Add a Ruffle or Lace Trim
Gather the Ruffle Evenly
Cut a ruffle strip to 1.75 times your pillow’s perimeter. Fold it in half lengthwise, wrong sides together. Load dental floss under the presser foot and zigzag along one long edge, catching the floss in the stitches.
Pull both threads gently to gather the ruffle until it matches the pillow front’s perimeter. Distribute the gathers evenly and pin every 2 inches to prevent bunching.
Stitch Ruffle to Front Panel
With right sides together, pin the raw edge of the ruffled strip to the pillow front. Sew a quarter-inch from the edge all the way around. Press the seam toward the pillow body for a clean finish.
Finish With Professional Touches
Shape Seams for Softer Edges
After sewing, trim small triangles from each corner to reduce fabric bulk. For softer, more rounded edges, mark a dot three-quarters of an inch in from each corner and a pin at the center of each side. Stitch from dot to pin, tapering toward the original seam line.
This technique gives gently rounded pillow edges ideal for a plush, high-end look.
Close the Opening Invisibly
Once the pillow form is inserted, hand-sew the opening closed using a ladder stitch. Fold the raw edges inward, then use a needle and thread to whipstitch through the fold on both sides, pulling tight after each stitch.
The seam will disappear when done correctly, leaving a seamless finish.
Customize Your Design
Mix Fabric Types for Contrast
Pair a cotton or linen pillow body with a satin or silk bow for textural contrast. Use flannel for a cozy nursery version or velvet for a luxe adult bedroom look. Apparel fabrics often drape better than home decor fabrics, so browse the clothing section of fabric stores for unique options.
Play With Color and Pattern
Try monochromatic tones for elegance or bold contrast for drama. A red bow on a white pillow makes a statement for holidays. A pastel print works beautifully in a baby room. Rotate bows seasonally to refresh your décor throughout the year.
Troubleshoot Common Problems
Fix Puffy Corners
If corners bulge after turning, you didn’t trim enough fabric. Always cut diagonal triangles from each corner before turning. The shaping seam technique mentioned earlier also helps reduce bulk at corners.
Prevent Ruffle Gaps
Uneven gathering causes ruffles to bunch or gap. Pull dental floss threads slowly and evenly. Pin the ruffle in quarters, then eighths, to space the gathers uniformly before sewing.
Stop Lace From Puckering
Lace puckers at corners if not mitered correctly. After stitching the 45-degree seam, press carefully with a cool iron. Use a pressing cloth on delicate lace to avoid damage.
Care and Maintenance
Wash the Cover Safely
If the cover is cotton or canvas, machine wash cold on gentle cycle. For silk, lace, or delicate trims, hand-wash or spot-clean only. Always remove the bow before washing if it’s not permanently attached.
Store and Fluff Properly
Store the pillow upright or flat to maintain its shape. Avoid stacking heavy items on top. Fluff the insert regularly to preserve loft, especially if using polyester fiberfill.
Frequently Asked Questions About Making a Bow Shaped Pillow
What fabric works best for a bow shaped pillow?
Cotton, linen, flannel, and lightweight velvet work best. These fabrics offer good drape, are easy to sew, and press crisply. Avoid thick upholstery fabrics that create bulky seams.
How long does it take to make a bow shaped pillow?
Most projects take between one and two and a half hours, depending on the complexity. A simple tied sash bow takes about an hour, while a ruffled or lace-trimmed version may take two hours or more.
Can I make a bow shaped pillow without a sewing machine?
Yes, you can hand-sew all the seams, though it takes longer. Use a needle and thread for the construction seams and a ladder stitch for closing the opening. The gathering technique for ruffles requires a machine zigzag stitch, but you can gather by hand with long running stitches instead.
How do I make the bow stay in place?
Hand-stitch through the back layer of the bow to anchor it to the pillow front. For flat appliquéd bows, tack the center wrap down at the back. Using a bit of fabric glue specifically designed for crafts can provide extra hold.
Can I use a different closure instead of envelope back?
Yes, you can install a concealed zipper for a clean back, or use decorative buttons with buttonholes sewn into the back panels. The envelope closure remains the easiest option for beginners and allows the easiest pillow form removal.
Key Takeaways for Making a Bow Shaped Pillow
Making a bow shaped pillow combines creativity with practical sewing skills to create a custom décor piece that costs far less than store-bought versions. The most important steps involve measuring your pillow insert accurately, pre-washing all fabric to prevent shrinkage, and choosing a bow style that matches your skill level and aesthetic preferences. Whether you opt for a simple tied sash, a flat appliquéd bow, or a ruffled design, the techniques remain similar—cut precisely, press each seam, and secure the bow with hidden stitches. With multiple styles to choose from and endless fabric combinations, you can craft bow pillows for every season, room, or occasion. Start with a simple tied sash version, then progress to more elaborate designs as your confidence grows.