
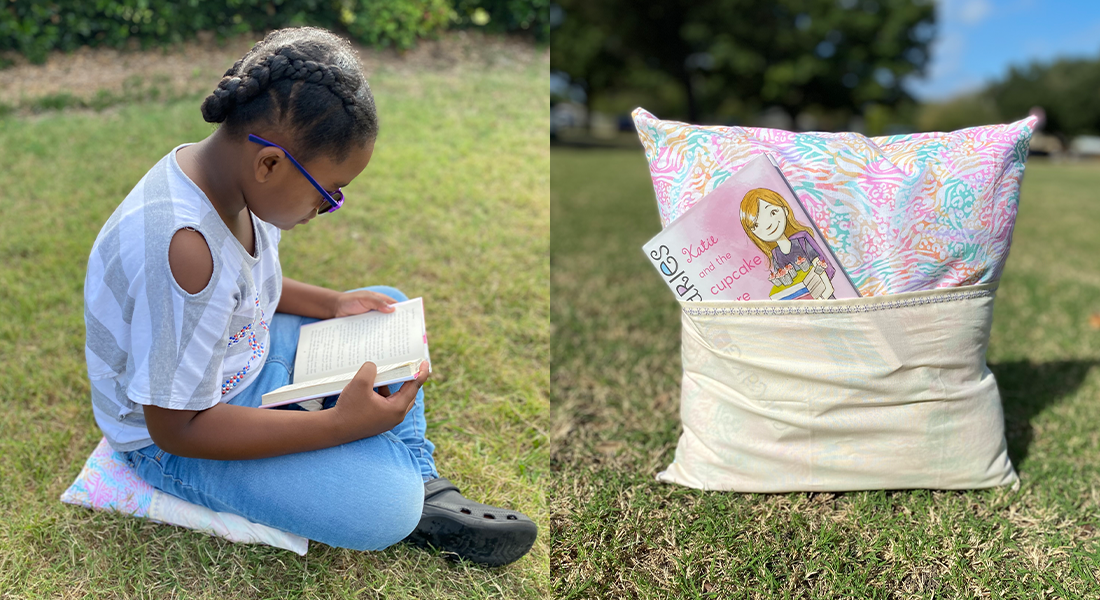
Nothing beats curling up with a great book and having everything within arm’s reach. A reading book pillow is a clever sewn cushion that features a built-in front pocket for holding books, tablets, flashlights, or remotes, plus a carrying handle for easy transport from room to room. This beginner-friendly DIY project takes just one to two hours and makes a thoughtful, personalized gift for book lovers of all ages.
This guide walks you through every step of how to make a reading book pillow, from selecting fabrics and cutting precise pieces to assembling the envelope back closure and adding custom touches like appliqués or monograms. You’ll learn construction techniques that ensure durability, tips for personalizing your pillow, and care instructions to keep it looking great for years.
Choose Your Fabric and Materials
Select Beginner-Friendly Fabrics
Quilting-weight cotton and soft flannel are ideal choices for your first reading pillow project. Both fabrics are easy to cut, sew, and find in countless fun prints. Choose a main fabric for the front panel and a contrasting fabric for the pocket to make the storage feature stand out. For children’s pillows, look for themed prints like animals, ABCs, or favorite book characters. Adults might prefer elegant solids, botanical designs, or literary-inspired fabrics.
Always pre-wash and dry all fabric before cutting to prevent shrinkage after your pillow is complete.
Gather Essential Supplies
You will need several key materials to complete this project.
• One 16″, 18″, or 20″ square pillow form (standard size)
• Main fabric: 18″ × 18″ or 20″ × 20″ for front panel
• Back envelope flaps: 12.5″ × 20″ and 10″ × 20″
• Pocket fabric: 11″ × 18″ to 13″ × 20″ for exterior and lining
• Handle: 4″ × 13″ fabric strip or 1″ wide ribbon
• Fusible fleece: 18″ × 18″ or 20″ × 20″ for front panel
• Basic tools: thread, scissors, pins, iron, ruler, rotary cutter, and sewing machine
Optional supplies include Fray Check for sealing ribbon ends and a walking foot for sewing through thick layers.
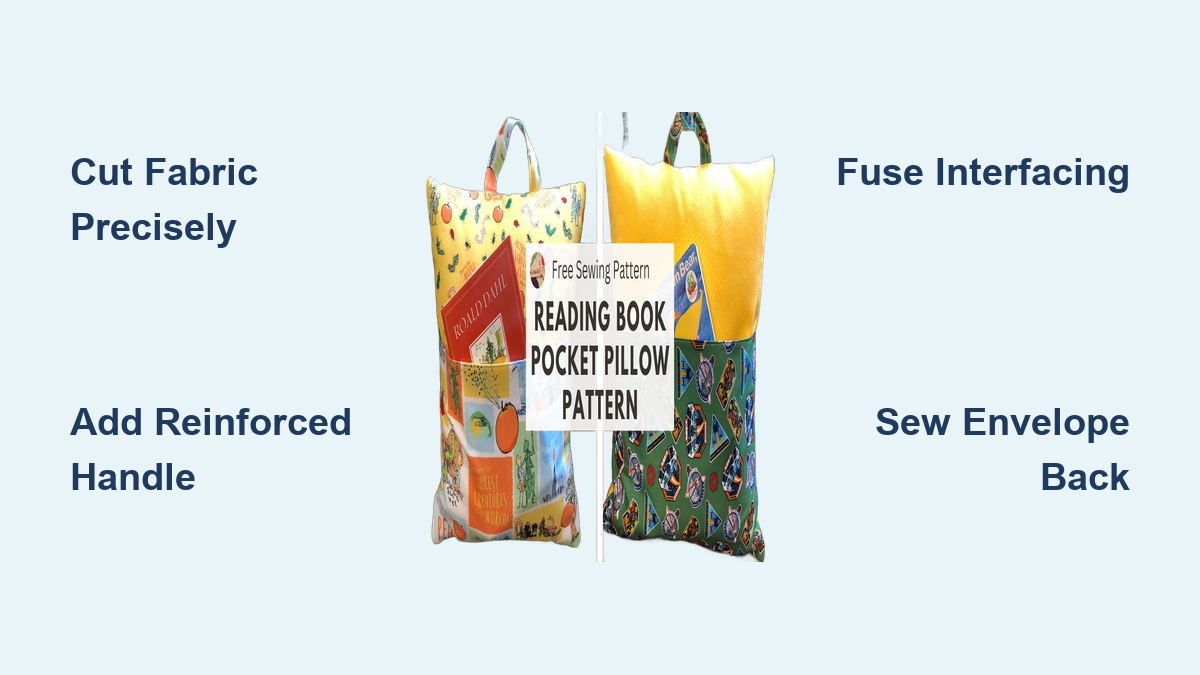
Cut Fabric to Size
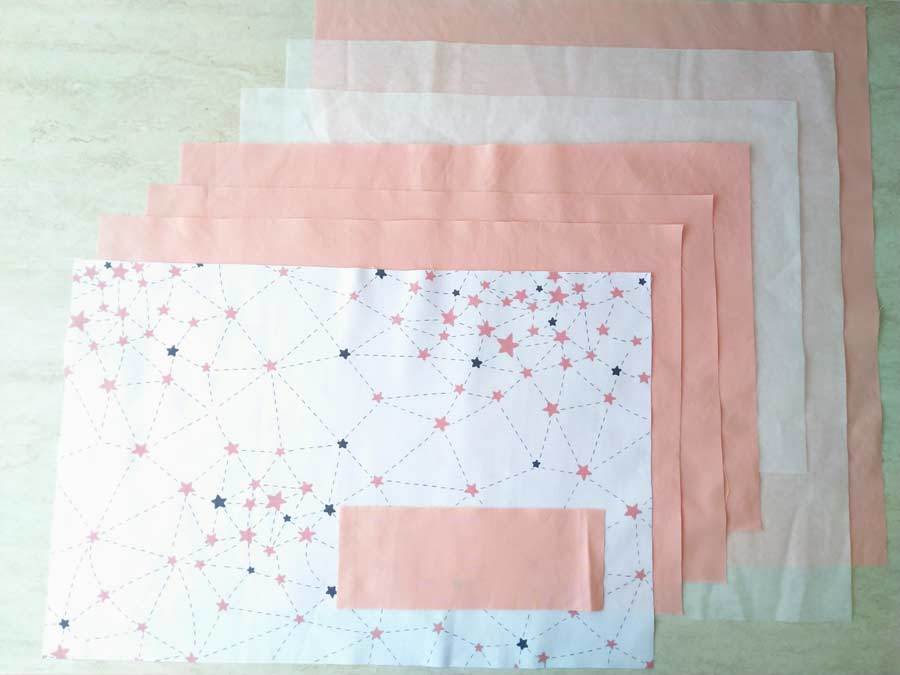
Measure and Cut Precisely
Accurate cutting ensures clean seams and a professional-looking finished pillow. Use a rotary cutter with a self-healing mat and quilting ruler for the straightest edges.
Cut the following pieces for your pillow.
• Front panel: 18″ × 18″ or 20″ × 20″ from main fabric
• Top back flap: 12.5″ × 20″
• Bottom back flap: 10″ × 20″
• Pocket exterior: 12″ × 20″
• Pocket lining: 13″ × 20″ (1″ taller for faux binding)
• Handle strip: 4″ × 13″
Label each piece with a fabric marker or sticky note to avoid confusion during assembly.
Make the Lined Pocket with Faux Binding
Sew a Clean-Finished Pocket
A lined pocket with faux binding hides all raw edges and creates a polished look without requiring extra binding steps. This construction method is beginner-friendly and yields professional results.
Place the pocket exterior and pocket lining right sides down, aligning the bottom edges. Sew along the left, bottom, and right sides using a 1/8″ seam allowance. Press the seams open or toward the lining fabric. Fold the 1″ overhang of the lining down 1/2″ and press. Fold again another 1/2″ to encase the raw edge completely. Edgestitch along the folded edge to secure the faux binding in place.
You now have a neat, double-layered pocket with a clean finished top edge ready to attach to your pillow front.
Add the Handle
Attach a Reinforced Fabric Handle
A sturdy handle transforms your pillow into a portable reading companion that can be carried like a tote bag. This four-layer strap construction provides strength without bulk.
Fold the 4″ × 13″ fabric strip lengthwise with wrong sides together and press. Unfold, then fold both long edges into the center crease and press again. Fold along the original center crease to create a 1″ wide, 13″ long strap with four layers of fabric. Topstitch along both long edges to secure all layers.
Position the handle on the top edge of your front panel, centering it horizontally. The raw ends should align perfectly with the top edge. Pin or clip in place before sewing.
Alternatively, use a 1″ wide ribbon cut to 8″ to 13″ long. Seal the ends with Fray Check to prevent fraying, then stitch close to each edge when attaching.
Fuse Interfacing for Structure
Stiffen the Front Panel
Fusible fleece gives your pillow body and prevents the pocket from sagging under the weight of books and other items. This step adds structure while maintaining a soft, comfortable feel.
Cut fusible fleece to match your front panel dimensions: 20″ × 20″ for a 20″ pillow form. Place the fleece on the wrong side of your front fabric with the adhesive side facing down. Iron in sections using steam, following the manufacturer’s instructions, until the fleece bonds securely.
You may also fuse a smaller piece of fleece to the wrong side of the pocket for added structure if desired.
Assemble the Front Panel
Position Pocket and Handle
Now you bring together all front elements to create the face of your pillow. Take your time with positioning to ensure everything looks centered and balanced.
Place the front panel right side up on your work surface. Center the pocket on the front, aligning the bottom edges perfectly. Pin or clip the sides and bottom in place. Position the handle at the top, keeping it 3 to 6 inches from each side and lying flat. Baste around the top edge of the pillow and the sides of the pocket to hold everything in place before final sewing.
Test the fit by sliding a book into the pocket. Standard books measuring approximately 8.5″ × 11″ should fit comfortably.
Construct the Envelope Back
Sew Two Overlapping Flaps
The envelope back closure allows easy insertion and removal of your pillow form without requiring zippers or buttons. This design also makes the cover fully removable for cleaning.
Cut your two back pieces to the specified dimensions. On each piece, fold one long edge 1/2″ toward the wrong side and press. Fold another 1/2″ to enclose the raw edge completely and press again. Topstitch close to the inner fold to create a clean, durable hem.
When assembled, the top flap overlaps the bottom by approximately 6 inches, concealing the opening completely while keeping the pillow form secure.
Sew the Pillow Cover
Join All Pieces with Strong Seams
Now you assemble the entire cover by joining the front panel with the envelope back flaps. Careful pinning ensures layers stay aligned throughout sewing.
Place the front panel right side up on your table. Lay the top back flap wrong side down over the left side of the front, aligning all raw edges. Position the bottom back flap wrong side down over the right side, overlapping the top flap by about 6 inches. Pin or clip around all four sides to secure the layers.
Sew around the perimeter using a 1/2″ seam allowance. Backstitch at the start and end of your stitching, at handle attachment points, and in the flap overlap zones for extra reinforcement.
For crisp corners, lower the needle at each corner, lift the presser foot, rotate the fabric 45 degrees, lower the foot, sew three to four stitches, then continue along the next side. This technique creates sharp, boxed corners when you turn the cover right side out.
Finish and Press the Cover
Trim, Turn, and Shape
Final finishing touches elevate your pillow from homemade to professional-looking. Taking time with these steps makes a noticeable difference.
Clip the corners at 45-degree angles to reduce bulk, being careful not to cut through the stitches. Optionally, sew a zigzag stitch along the seam allowance to prevent fraying during washing. Turn the cover right side out using a point turner, chopstick, or dull pencil to gently push out the corners. Press flat with an iron, avoiding any stretching of the fabric.
Check that the back flaps lie flat and overlap correctly before inserting the pillow form.
Insert the Pillow Form
Test Fit and Finalize
Slide in a 20″ square pillow form for a snug, plush feel. Use an 18″ form if you prefer a looser, softer look. Adjust the envelope flaps to close securely over the insert.
Your pillow should feel firm but comfortable, ideal for propping against a headboard or armrest while reading.
Customize Your Pillow
Add Personal Touches
Make your reading pillow uniquely yours with these beginner-friendly customization options.
Appliqué with fusible web allows you to attach fabric letters like “READ” or shapes like trees or stars. Use Heat n Bond to iron cut-out shapes onto the pocket or front panel, then secure with a blanket stitch or satin stitch. Machine embroidery works well for adding names, quotes, or literary lines, best done before attaching the pocket. Iron-on vinyl offers another option for designs cut with a Cricut machine or scissors. Use flocked vinyl for a soft, textured look.
Choose fabrics tied to the recipient’s favorite stories. Harry Potter fabrics work for fans of wizard tales, while vintage book cover prints appeal to literature lovers.
Upgrade to a Zippered Back (Optional)
Improve Washability
While the envelope back works well, a zipper makes the cover fully machine-washable and keeps the pillow form more securely in place during use.
Replace the back flaps with one 18″ × 20″ piece of fabric. Insert a 16″ to 18″ zipper along the bottom or side using a zipper foot. Sew with right sides together, then flip and topstitch for a clean finish.
This option works best for high-use pillows or gifts that need frequent cleaning.
Safety and Age Tips
Design for All Ages
Reading pillows are not safe for children under three years old due to choking hazards from ribbons, straps, or small embellishments. Supervise young children when they use flashlights or pens with the pillow. Use non-toxic, pre-washed fabrics for baby and toddler versions. Reinforce all seams well if the pillow will be used daily or roughly handled.
Care and Maintenance
Keep It Clean and Fresh
Spot clean with mild soap and a damp cloth for regular maintenance. Hand wash or machine wash on gentle cycle only if using a zipper version. Air dry or tumble dry on low heat, avoiding high temperatures that cause shrinkage. Remove the pillow form occasionally to fluff and air out the cover. Store flat or with the insert removed during long-term storage.
Never use bleach, as it damages both fabric and fusible adhesive.
Troubleshooting Common Issues
Fix Problems Fast
If the pocket proves too small, resew with a 13″ × 20″ lining and test with an actual book before finishing. Handle peeling requires reinforcement with X-shaped stitching or double rows of topstitching. Bulk at corners results from unsewn seams; clip at 45 degrees and grade seam allowances to fix. Back flaps that will not overlap properly usually stem from incorrect flap sizes. The top flap should be 2 to 3 inches longer than the bottom. Fabric puckering indicates a need for a walking foot to feed thick layers evenly through your machine.
Make It a Gift
Pair With a Great Book
A reading pillow becomes a complete, memorable present when paired with a beloved book.
For children, consider titles like The Very Hungry Caterpillar, Dragons Love Tacos, or Lion Lessons from Dolly Parton’s Imagination Library. For adults, Anne of Green Gables, The Little Engine That Could, or Last Stop on Market Street make excellent pairings.
Add a personalized tag saying “For the Cozy Reader in Your Life” for an extra special touch.
Final Thoughts and Pro Tips
Making a reading book pillow is a satisfying project that blends creativity with everyday functionality. With just a few yards of fabric and a couple of hours, you can create a custom piece that enhances comfort, organization, and style.
Key Takeaways for Your Reading Pillow Project
Use fusible fleece for structure and durability that lasts. Reinforce the handle and all seams with backstitching for strength. Always pre-wash fabrics to avoid shrinkage after completion. Customize with names, quotes, or themed fabrics for a personal touch. Consider a zippered version for easier washing. Use a walking foot when sewing through multiple layers.
Whether you are crafting for yourself or gifting to a book lover, this pillow proves that the best projects are the ones you use and enjoy every day.
Frequently Asked Questions About Making a Reading Book Pillow
What is the best fabric for a reading pillow?
Quilting-weight cotton and soft flannel are the best choices for beginners. Both are easy to cut and sew, come in countless prints, and hold up well to regular use. Pre-wash all fabric before starting to prevent shrinkage.
How long does it take to make a reading book pillow?
This project takes one to two hours for most beginners. Experienced sewers can complete it in under an hour. Assembly time depends on your familiarity with basic sewing techniques.
Can I wash a reading pillow with an envelope back?
You can spot clean the cover or hand wash it, but removing the pillow form first is essential. For machine washing, upgrade to a zippered back closure to protect the pillow form and ensure thorough cleaning.
What size pillow form should I use?
Use an 18″ × 18″ or 20″ × 20″ pillow form for standard reading pillows. A 20″ form creates a plumper, more supportive pillow, while an 18″ form feels softer and looser.
How do I personalize a reading pillow?
Add personalization through Appliqué with fabric letters, machine embroidery with names or quotes, iron-on vinyl designs, or themed fabric choices that reflect the recipient’s favorite books or characters.