
Have you ever seen a beautiful cylindrical pillow on a sofa or bed and wondered how to make a bolster pillow yourself? These versatile cushions add both comfort and style to any room, serving as lumbar support, decorative accents, or yoga props. Making your own lets you customize the size, fabric, and firmness to perfectly match your space.
This guide walks you through measuring your insert, cutting precise panels, choosing closure methods, and assembling professional finishes like piping and tufting. Whether you want a simple zippered cover or an elegant tufted design, these step-by-step instructions will help you create a polished bolster that looks store-bought but costs significantly less.
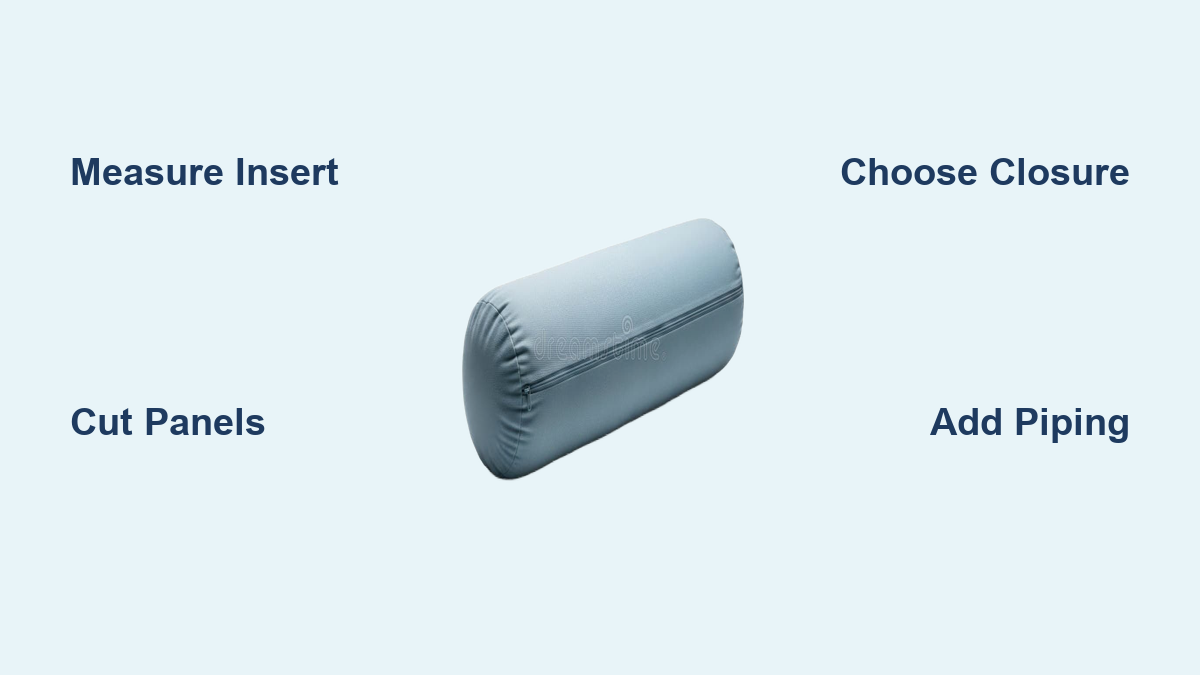
Measure Your Bolster Insert Correctly
Before cutting any fabric, you must measure your actual bolster form using a soft tape measure. Product labels are often inaccurate, and working from measurements ensures a snug fit.
Calculate Circumference from Diameter
Wrap the tape around the widest part of your cylindrical insert to get the circumference directly. If you only know the diameter, multiply it by 3.14. For example, a 7-inch diameter insert gives you approximately 22 inches (7 × 3.14 = 21.98, rounded up).
Add one inch total for seam allowance (half an inch per side), so your final panel width equals circumference plus one inch.
Account for Closure Type
Different closure methods require extra length. A zipper needs only one inch total extra, while Velcro requires four inches (two inches per end) to fold and encase raw edges. Slip stitch closures need a half inch to one inch of extra fabric.
Cut the Main Body and End Caps

With your measurements calculated, you can now cut the fabric pieces precisely.
Cut the Rectangular Tube Panel
Cut one rectangular piece for the body using your calculated width and length. The width equals your circumference plus one inch for seam allowance. The length equals your insert length plus closure allowance plus seam allowance. Use sharp scissors or a rotary cutter on a self-healing mat for clean, accurate edges.
Cut Perfect Circular End Caps
Each end cap diameter equals your insert diameter plus one inch (half inch seam allowance on each side). A 7-inch insert requires 8-inch circles. To cut perfect circles, fold your fabric into quarters, measure the radius from the folded corner, draw a smooth arc, and cut along the line. Unfold and press creases to mark quarter points for alignment.
Choose Your Closure Method
The closure you choose affects both function and appearance. Pick the one that best suits your skill level and intended use.
Zipper for Washable Covers
An invisible or nylon zipper sewn into the long edge works best for frequently cleaned pillows. Choose a zipper at least one inch longer than your panel, lock the slider in the center before sewing to prevent jamming, and stitch both ends of the zipper tape shut to stop the pull from sliding off.
Velcro for Hidden Seams
Apply half-inch wide sew-on Velcro to the short ends if you prefer invisible closures on shorter bolsters. Add two inches extra length per end when cutting the main panel, then fold and encase raw edges before sewing Velcro inside.
Slip Stitch for Seamless Finish
Leave a 4 to 6-inch gap in the seam, insert the form, then hand-sew closed with an invisible slip stitch. This method creates a nearly invisible closure perfect for display-only bolsters.
Add Piping or Welt Cord
Piping gives your bolster a crisp, upholstered look while reinforcing seams.
Attach Piping to End Caps
Pin pre-made bias piping to the raw edge of each circle, then sew close to the cord using a zipper foot. Trim the piping ends two inches shorter than the circumference to avoid bulk when joining. Clip the backing fabric every half inch on curves (called flange snipping) to prevent ripples.
Assemble the Bolster Cover
Now connect all pieces to create your finished cover.
Join Body and Ends Together
With right sides together, pin one end cap to the tube, matching quarter points first for even distribution. Ease the fabric around the curve without stretching, then sew a half-inch seam all the way around. Repeat for the second end.
Finish seams by trimming excess bulk and pressing either open or toward the body. For delicate fabrics, use a French seam by sewing first at a quarter inch, trimming, then folding and sewing at three-eighths inch to enclose raw edges.
Insert the Pillow Form
Test the fit before closing completely.
Test Fit Before Final Closure
Slide the cover onto the insert before closing the final seam. If it is too tight, check your measurements and add one inch of ease next time. If it is too loose, reduce stuffing or remake with smaller dimensions.
Once satisfied with the fit, fully insert the form and close the opening using your chosen method. For zippers, close before inserting to avoid fabric getting caught in the teeth.
Create a Gathered-End Bolster
For a soft, boho-chic look with gathered ends, follow this construction method.
Make Fabric Tunnels for Gathering
Cut two strips four inches wide by circumference plus one inch. Fold each lengthwise with wrong sides together and press. Sew along both long edges to create fabric tunnels, then center each strip on the short ends of the main panel and sew in place, leaving the center open for cord insertion.
Thread Cords and Create Gather
Cut two cords slightly longer than the circumference, tape one end, and thread through each tunnel using a safety pin. Pull the ends to gather, tie knots securely, and trim excess. Alternatively, replace the cord with pom-pom trim stitched directly to the ends.
Build a Tufted Bolster for an Upscale Finish

Tufting creates an elegant, furniture-grade look with dimpled ends and covered buttons.
Tufting Steps and Button Attachment
Assemble the cover with welt on both ends, then insert the form and center it. Thread a long darning needle with doubled waxed upholstery cord (length greater than twice the pillow). Fold the cord in half, loop through the shank of the button to form a lark’s head knot, push the needle through the center of one end and across to the opposite end.
Separate the strands and twist in opposite directions to tighten, then pull until a slight indentation forms. Tie a double overhand knot on both sides, trim excess, and secure the button with a drop of hot glue if it feels loose.
Troubleshoot Common Issues
Even experienced sewers face challenges. Here is how to fix them fast.
Wavy Edges After Sewing
This problem comes from uneven easing on curved seams. Fix it by snipping the flange (backing of welt) every half inch and redistributing fullness before pressing.
Misaligned Seams or Twisted Piping
Poor alignment at join points causes this issue. Leave a 2 to 3-inch tail of unsewn piping at the start and match ends precisely before closing to solve it.
Zipper Will Not Close After Insertion
Fabric caught in the teeth creates this problem. Remove the form, open the zipper fully, then reinsert the pillow carefully.
Lumpy or Uneven Stuffing
Poor distribution of fiberfill leads to lumps. Use a batting liner or stuff in layers, smoothing from center outward as you go.
Customize Your Bolster Design
Make your pillow unique with creative upgrades.
Mix Textures and Fabrics
Pair a velvet body with linen ends, combine a solid back with a patterned front, or use contrasting piping for visual interest.
Add Embellishments
Sew on pom-pom trim, tassels, or ribbon. Embroider initials or motifs, or attach fabric-covered toggles instead of buttons for added personality.
Create an Outdoor-Ready Version
Use Sunbrella or weather-resistant fabric, line with waterproof interfacing, and choose mildew-resistant thread for outdoor durability.
Save Money by Making Versus Buying
Store-bought decorative bolsters often cost 70 to 150 dollars. You can make your own for 30 to 50 percent less.
| Item | Cost to Make | Retail Price |
|---|---|---|
| Foam insert (8 by 24 inches) | 18 dollars | 40 dollars or more |
| Half yard upholstery fabric | 15 dollars | varies |
| Zipper, thread, trim | 7 dollars | varies |
| Total | approximately 40 dollars | 70 to 150 dollars |
Final Tips for a Professional Finish
Pre-wash fabric if the cover will be laundered. Use bonded polyester thread in high-stress areas. Press every seam as you work, because it makes a huge difference in appearance. Mark alignment points clearly using quarter marks, which are essential for even seaming. Reinforce button attachments with knots and glue. Consider adding a muslin liner inside for easy cleaning.
Frequently Asked Questions About Making Bolster Pillows
What is the best fabric for making a bolster pillow?
Medium to heavyweight fabrics work best, including cotton poplin, upholstery-grade cotton, linen blends, and velvet. Outdoor versions benefit from Sunbrella or weather-resistant materials.
How much fabric do I need to make a bolster pillow?
Approximately one yard of 45 to 54-inch wide fabric covers most standard bolsters (such as 6 by 14 inches or 7 by 19 inches). Smaller or narrower designs may only need half a yard.
How do I calculate the size for a bolster pillow cover?
Measure your actual insert diameter, multiply by 3.14 to get circumference, then add one inch for seam allowance. For length, add your insert length plus closure allowance plus seam allowance.
Can I make a bolster pillow without a sewing machine?
Yes, you can hand-sew a bolster using a slip stitch closure, but the process takes much longer. A sewing machine produces more durable results and handles curved seams more easily.
What is the easiest closure method for beginners?
A zipper sewn into the long edge is the most beginner-friendly option. It provides a removable, washable cover that is easy to construct and gives professional results.
How long does it take to make a bolster pillow?
Beginners typically need 2 to 3 hours for a basic version. Advanced designs with tufting and piping require 3 to 5 hours. Recovering an existing bolster takes only 1 to 2 hours.
Key Takeaways for Making Your Own Bolster Pillow
Making a bolster pillow is a satisfying project that blends function and style. Start by measuring your actual insert accurately, calculating circumference using the diameter times 3.14 formula, and adding proper seam allowance. Choose a closure method based on your needs: zippers for washable covers, Velcro for hidden seams, or slip stitch for seamless display.
With precise measuring, quality materials, and attention to detail, your DIY bolster will look professional, last for years, and cost significantly less than retail versions. Begin with a basic version to build your confidence, then experiment with trims, textures, and advanced techniques like tufting to create custom pieces that perfectly match your home decor.