
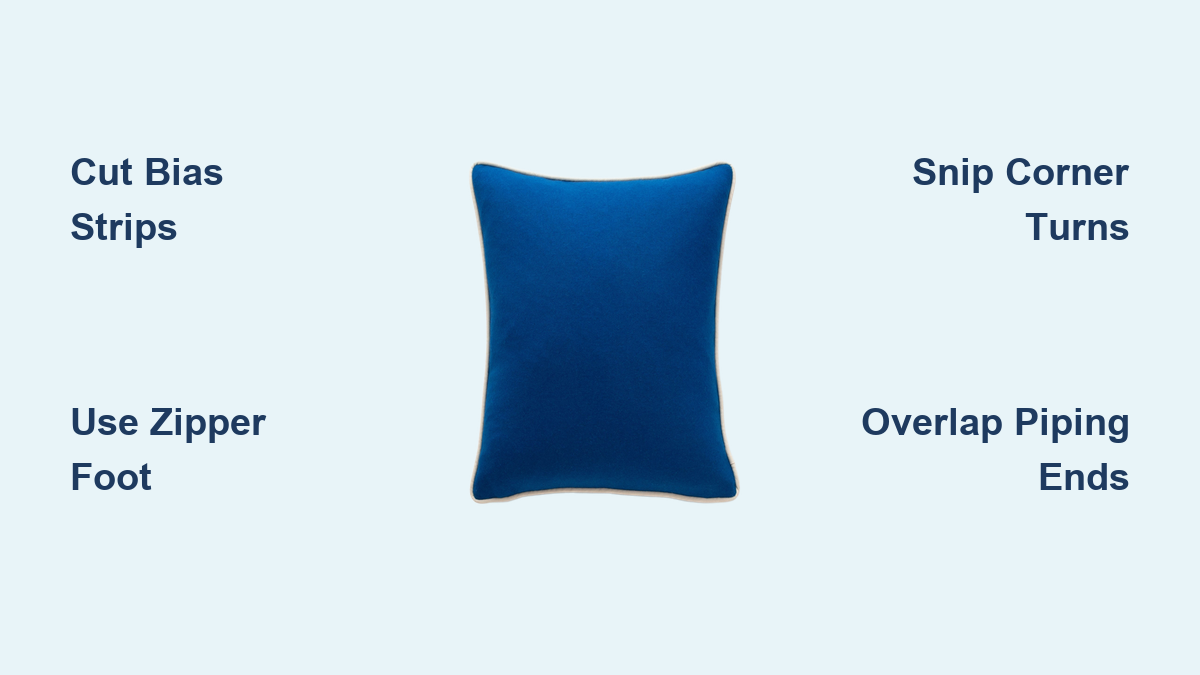
Adding piping to a pillow is the difference between a basic sewn cover and a professional-looking finished product. This technique frames your pillow with crisp, tailored edges that elevate any living space. Whether you are refreshing old throw pillows or creating a handmade gift, knowing how to apply piping to a pillow gives your work that boutique-quality finish. The process involves wrapping cording in fabric and attaching it along the perimeter before sewing the cover together. With the right tools and this step-by-step guide, you can achieve clean corners and seamless joins even as a beginner.
This comprehensive guide covers everything from cutting fabric panels to inserting the pillow form. You will learn how to create custom piping from bias strips, attach it precisely with a zipper foot, and finish with sharp corners and a flawless appearance.
Cut Pillow Panels to Match Insert Size
Start by preparing your fabric panels. The front panel size depends on your preferred fit and closure method.
Cut the front panel to the exact dimensions of your pillow insert for a snug, plump look. For example, cut an 18″ × 18″ panel for an 18″ insert. This prevents sagging and ensures the pillow looks full when finished. If using an envelope back closure, cut the front panel 1 inch larger per side to accommodate the overlap and seam allowance. Always pre-wash and iron your fabric before cutting to prevent shrinkage after construction.
For envelope-style backs, cut two back panels with these specifications:
- Width equals the full width of your front panel
- Height equals approximately half to three-quarters of the pillow height
- For an 18″ pillow, cut back panels around 18″ × 13.5″
Create Custom Piping or Select Pre-Made Options
You have two choices: make your own piping or purchase pre-made bias tape with cording included.
Make Custom Bias Piping
Cut bias strips 1¼” to 2″ wide on a 45-degree angle. Bias-cut fabric stretches slightly, allowing smooth turns around corners without puckering. Join strips diagonally by placing two pieces at right angles, drawing a diagonal line, sewing along the line, pressing open, and trimming to ¼” to reduce bulk.
Slide your chosen cording into the center of the bias strip. Use 1/8″ to 3/8″ welting cord depending on the visual impact you want. Fold the fabric over the cording so raw edges align, then baste or use hot glue to temporarily secure the cording before final sewing.
Use Pre-Made Piping
Pre-made piping from brands like WES RIGHTS or Joann Fabrics requires no assembly. Simply cut to length, join the ends, and attach to your pillow. This option works well for beginners or time-sensitive projects.
Attach Piping to the Front Panel

Position your front panel right side up on a flat surface. Align the raw edge of the piping with the raw edge of the panel, ensuring the cording sits on top of the fabric.
Secure with pins or fabric clips every few inches. Using a narrow zipper foot, begin sewing 2–3 inches from the end of the piping, leaving a tail for joining later. Sew as close to the cording as possible without hitting it. This proximity creates that tight, professional finish.
Navigate Corners Without Puckering
When you are 1–2 inches from a corner, stop with the needle down. Make 3–5 small snips every ¼” into the bias fabric covering, stopping just before the stitching line. Do not cut the thread or cording. Lift the presser foot, pivot the fabric 90 degrees, lower the foot, and continue sewing. These small cuts allow the piping to bend sharply without bunching. Repeat this technique at all four corners.
Join Piping Ends for a Continuous Seam
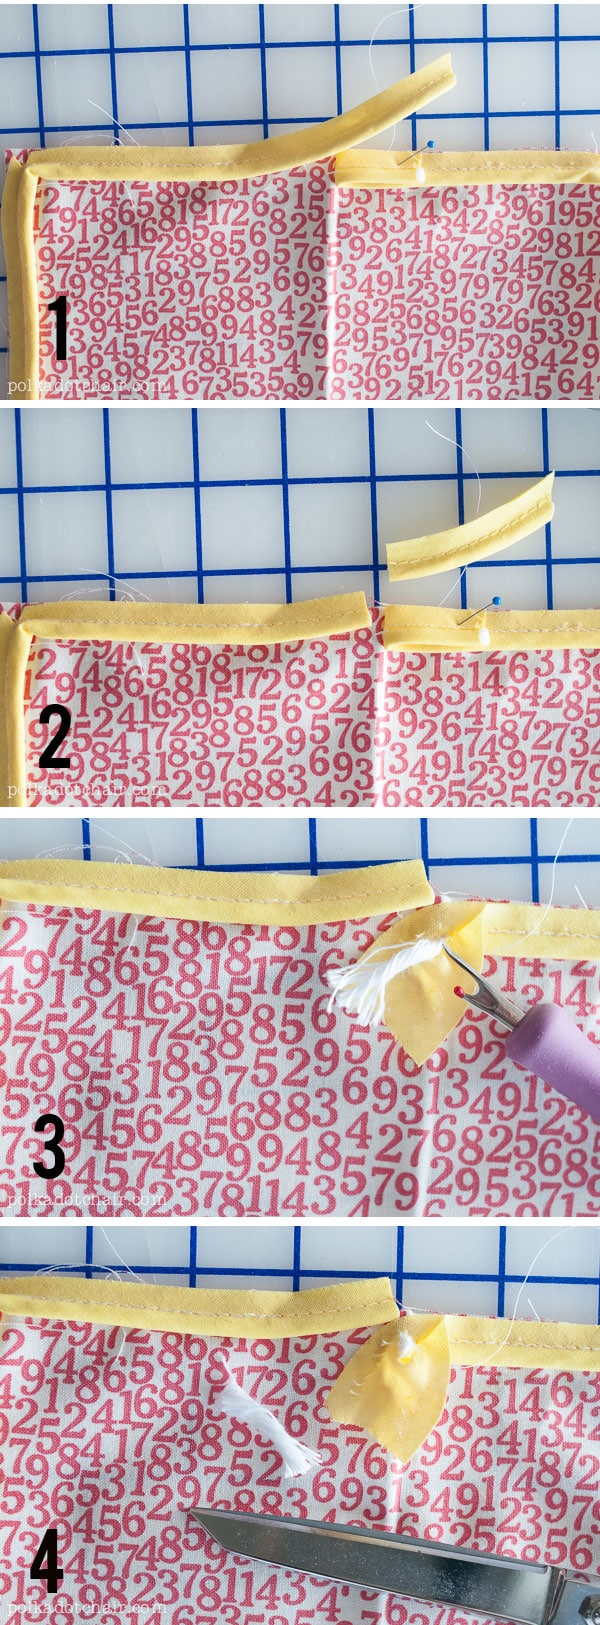
When you are 2–3 inches from your starting point, stop sewing. Trim the cording ends flush so they meet but do not overlap. Fold the starting tail of piping over itself like a hem. Lay the ending tail over it, aligning all raw edges. Pin securely in place.
Resume sewing over the overlapped section to close the loop seamlessly. The join should be invisible when viewed from the front. Practice this technique on scrap piping before attempting your final project.
Prepare Envelope Back Panels
Create clean, durable envelope flaps for your hidden closure. Fold one long edge of each back panel ½” to the wrong side, then fold again another ½”. Press firmly and stitch along the inner fold to create a double hem. This prevents fraying and reinforces the most stressed part of your cover.
Place the top back panel right side down, aligning its top edge with the front panel. Place the bottom back panel right side down, overlapping the top flap and aligning with the bottom edge. The overlap should fully conceal the pillow insert when closed.
Assemble the Pillow Cover
Place the back panel(s) on top of the front panel, ensuring right sides are together. All raw edges should align, with the piping fully sandwiched between the layers.
Pin or clip heavily around the entire perimeter, paying extra attention to corners, the piping join, and any stress points. Using the zipper foot, sew around the entire perimeter with a ½” to ⅝” seam allowance. Stitch close to the existing piping seam. Backstitch at the start, end, and at both envelope openings for durability. Keep the needle down when pivoting at corners for accuracy.
Finish Corners and Inspect Your Work
After sewing, trim excess fabric at corners by cutting diagonally across the seam allowance to reduce bulk. Clip seam allowances if using thick fabric, being careful not to cut through the stitching.
Turn the pillow right side out using a chopstick or turning tool to push out corners fully. Work gently to avoid puncturing the fabric. Lightly press with an iron and pressing cloth, especially on printed or delicate fabrics.
Check that corners are sharp and symmetrical, the piping is continuous and flat, and there are no gaps, twists, or bulges in the cording.
Insert the Pillow Form
Use a pillow form that matches your cover size for a snug fit. For a slightly fuller appearance, use a form 1 inch larger than the cover dimensions. This creates gentle tension without straining seams.
If using an envelope back, simply slide the insert inside and overlap the flaps. For a hand-stitched closure, leave an 8″ opening during assembly, fold raw edges inward ½”, and use a ladder stitch to catch a single thread from each folded edge, pulling gently to close the gap seamlessly.
Pro Tips for Professional Results
Consider using matching thread for an invisible seam or contrasting thread for a bold decorative touch popular in modern farmhouse styles. Change thread color between steps to track progress easily.
Pinning frequently prevents piping from twisting during sewing. Use fabric clips instead of pins for thick or slippery fabrics, as they hold better without distorting the layers. If your machine allows, shift the needle left to stitch even closer to the cording for a tighter finish.
Fix Common Piping Problems
Puckered corners result from using straight-grain fabric or inadequate snipping. Always cut bias strips and snip every ¼” at corners to allow smooth bending.
Gaps at the join occur from poor end-matching technique. Use the overlap method with folded ends, trim cording flush, and sew over the layered fabric for a seamless look.
Pipping pulling away from the edge happens when stitching is too far from the cording. Use a zipper foot and sew as close as possible. The thread should ride just beside the cording, not on top of it.
Select Quality Materials
Choose cotton, linen, or upholstery-weight fabric for best results. Use 1/8″ or 1/4″ cording for standard throw pillows, selecting firm, tightly woven cording for a crisp edge. Avoid stretchy or flimsy fabrics that will not hold the piping shape.
If you are short on time, pre-made bias tape with cording offers a great shortcut. Simply cut, join, and sew without assembly required.
Design Options for Piped Pillows
Create visual impact with contrasting piping in bold colors like navy on cream for added definition. Self-fabric piping offers a subtle, tailored look perfect for minimalist decor. Tonal variations add depth without stark contrast.
Once confident, try double piping with two parallel cords for a dramatic effect. This advanced technique requires wider bias strips and precise spacing but makes a striking statement on larger pillows.
Care for Your Piped Pillow
If using a removable cover, machine wash in cold water on gentle cycle using colorfast thread to prevent bleeding. Air dry or tumble dry low. For non-removable inserts, spot clean only.
Reinforce envelope seams with backstitching during construction. Store pillows in a cool, dry place and rotate regularly to prevent uneven wear.
Complete Checklist for Piping Success
Gather all necessary materials before starting your project. Verify you have the correct panel sizes, bias strips, cording, zipper foot, and turning tools.
Follow each step in sequence, taking time at critical points like corner navigation and end joining. Press throughout the process for accurate alignment and a professional final appearance.
With practice, your pillows will look store-bought while carrying the pride of handmade perfection.
Frequently Asked Questions About Applying Piping to a Pillow
Why should I cut the front panel to the exact insert size?
Cutting the front panel to match the insert size exactly ensures a snug, plump fit that prevents sagging and loose fabric. This creates a professional, polished appearance rather than a deflated look.
Can I apply piping using a regular sewing foot instead of a zipper foot?
A zipper foot is highly recommended because it allows you to stitch extremely close to the cording without hitting it. While possible with a standard foot, achieving professional results becomes much more difficult.
What is the best cording size for throw pillows?
For standard throw pillows, 1/8″ to 1/4″ cording works best. Thicker 3/8″ cording creates a bolder visual impact but works better with heavier upholstery-weight fabrics.
How do I prevent my piping from twisting during sewing?
Pin frequently along the entire length of piping, especially at corners and curves. Using fabric clips instead of pins helps hold thick or slippery fabrics securely without distortion.
Can I use straight-grain fabric for piping instead of bias-cut?
Bias-cut fabric is recommended because it stretches slightly, allowing smooth turns around corners. Straight-grain cutting may work for square pillows with minimal corner definition, but bias-cut provides superior results.
Key Takeaways for Applying Piping to a Pillow
mastering how to apply piping to a pillow transforms simple sewing projects into professional-quality home decor. The essential steps include cutting bias strips for flexible corners, using a zipper foot for tight stitching close to the cording, and practicing the overlap join technique for invisible seams.
Invest in quality materials including firm cording, durable thread, and well-woven fabric. Take time at each critical step, especially corner snipping and end joining, as these details distinguish professional results from amateur work.
Start with pre-made piping and an envelope closure for your first project. As your skills develop, progress to custom bias piping and hand-stitched closures. With practice, you will create beautiful piped pillows that add lasting style and craftsmanship to any room.