

A broken zipper on your favorite couch pillow can be frustrating, especially when the cushion still has plenty of life left. Whether the slider pops open when you lean on it, the teeth have separated, or the fabric is pulling away from the stitching, most zipper issues on throw pillows and sectional cushions can be fixed without replacing the entire cushion. This guide walks you through diagnosing the exact problem, choosing the right repair method, and fixing it step by step using tools you likely already have at home.
Diagnose the Zipper Problem Before Repair
Understanding what exactly is wrong with your couch pillow zipper is the key to choosing the right fix. Different zipper failures require different solutions, and jumping to repairs without diagnosis can waste time and money.
Check if the Slider is Loose or Misaligned
Run your fingers along the zipper from bottom to top. If the slider moves but pops open the moment you release pressure, the internal grip has weakened. Look at the teeth at the bottom of the track. Are they separated or sitting at different heights? This misalignment often causes the zipper to feel stuck or refuse to close properly.
Look for Debris or Bent Teeth
Shine a flashlight along the zipper teeth. Lint, fabric fibers, or small objects can jam the slider in place. For metal zippers, check if any individual teeth are bent or skewed to one side. Nylon coil zippers are more delicate and can crack under stress.
Inspect the Seam and Zipper Stops
Peel back the fabric near the zipper ends. Is the stitching frayed or completely detached? This is a common failure point where the zipper tape pulls away from the cushion cover. Also check the bottom stop, the small metal or plastic piece that prevents the slider from sliding off the track. If it’s missing or damaged, the slider can escape easily.
Tighten a Loose Zipper Slider with Pliers
This method works when your couch pillow zipper closes but will not stay shut. It takes less than five minutes and requires no special purchases.
Realign the Zipper Teeth First
Remove the cushion cover if possible for better access. Unzip the pillow fully and manually press the two rows of teeth together, starting from the bottom. Use your fingers or the tip of a toothpick to guide stubborn teeth into the interlocking position. Both rows must be even and engaged before you proceed.
Compress the Slider to Increase Grip
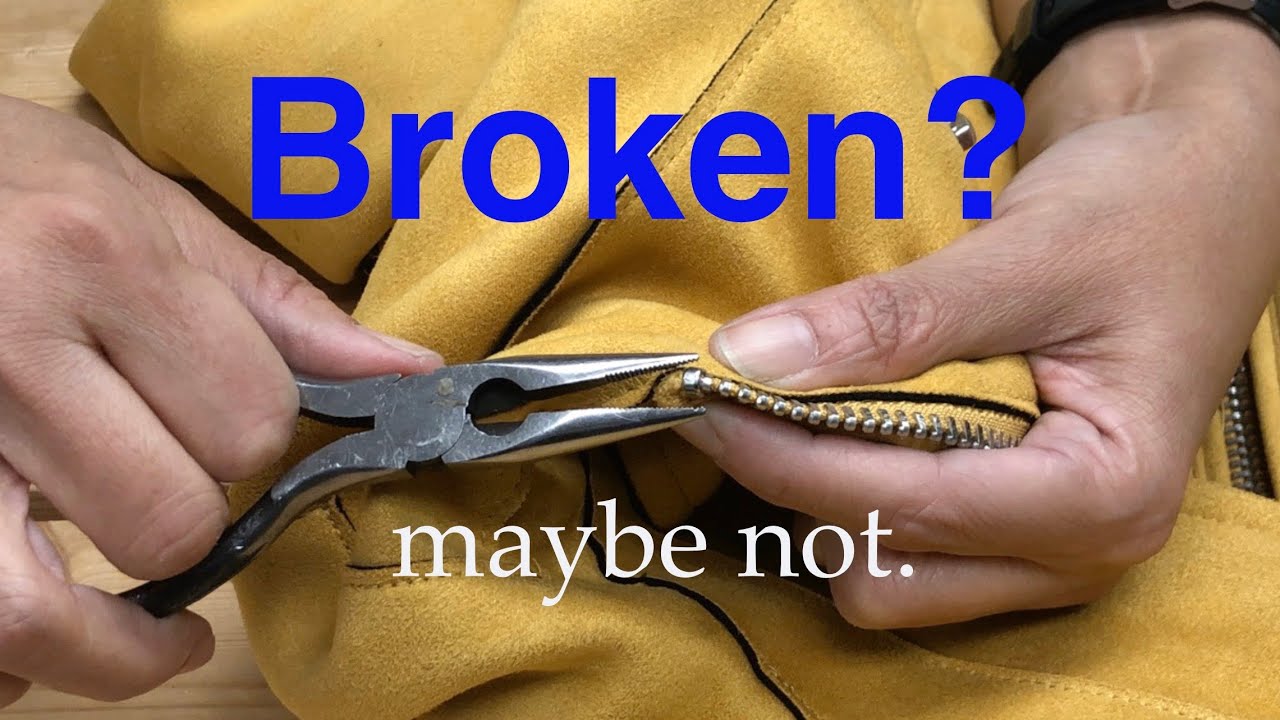
Locate the back of the slider, the end opposite the pull tab. There is a small gap there that controls tension. Wrap your needle-nose pliers jaws in a soft cloth to prevent scratching. Gently squeeze the slider’s rear to compress it slightly. This increases pressure on the teeth and helps the slider grip better.
Pro Tip: Test the zipper after each squeeze. Over-tightening can crack plastic sliders or jam metal ones. Aim for snug, not tight.
Test and Repeat if Necessary
Zip the pillow cover closed and gently tug to test. If it stays shut, the repair is complete. If it still pops open, repeat the compression in small increments until the slider holds. This quick fix works on nylon, plastic, and metal zippers found on most cushion covers.
Use a FixnZip to Lock the Zipper Closed
When the slider works but fails under repeated use, a FixnZip provides a permanent locking mechanism without sewing or permanent modifications.
Choose the Right Size
For couch pillows and cushion covers, use the small FixnZip. It fits standard #5 and #5.5 zippers commonly found on upholstery. These are available at FixnZip.com and come with a warranty.
Install the FixnZip Clamp
Close the zipper fully. Loosen the thumbscrew on the FixnZip to open the side clamps. Position the device 2 to 3 inches from the end of the closed zipper. Feed one row of teeth into each channel, making sure both sides are fully seated. Tighten the thumbscrew with a small screwdriver until snug.
Expert Note: After zipping closed, slide the FixnZip down to lock it in place. To open, pull the original slider to the end first.
Troubleshoot Common Fit Issues
If the FixnZip jams during installation, remove it and realign the teeth before trying again. If it feels loose after installation, tighten the thumbscrew in small increments. Most users report this repair lasts over a year even on high-use furniture and pet-friendly homes.
Replace a Broken or Missing Zipper Slider
If the slider is cracked, completely missing, or will not move at all, replacing it is the best solution. This repair requires no sewing.
Remove the Old Slider
Use needle-nose pliers to gently pry off or clip the bottom stop, the small metal piece at the zipper base. Once removed, slide the old slider off the track. Keep the pull tab if it is intact, as you may be able to reuse it on the new slider.
Match the Replacement Slider
Purchase a new slider that matches your zipper type. Check for nylon coil, metal, or plastic construction. Verify the size, such as #5 or #8, and the opening direction. Closed-end sliders are typical for pillow covers. These replacements are available at fabric stores, online retailers, and upholstery suppliers.
Attach the New Slider
Slide the new slider onto the bottom of the zipper tape. Press it gently with your fingers or pliers until both sides engage. Zip upward slightly to test alignment. Once working correctly, reinstall the bottom stop by crimping it across the tape with pliers.
Warning: Skipping the stop allows the slider to slide off again, defeating the purpose of the repair.
Sew in a New Zipper for Severe Damage
When the zipper teeth are missing, the tape is torn, or the seam is destroyed, replacing the entire zipper is necessary.
Remove the Old Zipper
Unzip the cover and turn it inside out. Use a seam ripper to carefully cut stitches along both sides of the zipper tape. Work slowly to avoid cutting the fabric itself. Once free, remove the old zipper completely.
Prepare the New Zipper
Choose a nylon coil zipper for flexibility and durability on upholstery. Buy one that is 2 inches longer than the opening. Measure the pillow cover seam and cut the new zipper to match, leaving 1 inch of extra tape on each end. Trim any excess beyond the teeth.
Pin and Sew the Zipper
Place the zipper face-down on one side of the fabric, aligning the teeth with the seam edge. Fold the tape over and pin in place. Repeat for the other side. Use a zipper foot on your sewing machine for precision. Sew along both sides, staying 1/8 inch from the teeth. Backstitch at the start and end for durability.
Pro Tip: Use upholstery-grade polyester thread for strength. Match the thread color to the fabric to blend the repair seamlessly.
Add New Zipper Stops
After sewing, close the zipper. At the bottom, sew bar tacks, which are tight perpendicular stitches across the tape, to act as a stop. Alternatively, attach a metal stop and crimp it with pliers.
Reinforce a Fraying or Split Seam
Even with a working zipper, a split seam can lead to total failure. Reinforcing the stitching extends the life of your repair.
Trim and Secure Damaged Fabric
Cut frayed edges about 1/2 inch above the split. Turn the cover inside out. Pull the fabric taut and lock the area with a backstitch or knot to prevent further unraveling.
Cross-Stitch for Maximum Strength
Sew across the damaged area using a tight crosswise stitch pattern. For thin or stretchy fabric, sew from the outside to reduce bulk. Make multiple passes, going forward, backward, and side to side, for maximum durability.
Add a Fabric Backing
Cut a strip of sturdy fabric, such as cotton or denim, slightly larger than the repair zone. Place it behind the zipper tape on the inside of the cover. Sew around the edges to reinforce. This prevents future tearing, especially on frequently used pillows.
Prevent Future Zipper Failures
Regular maintenance keeps your couch pillow zippers working longer and avoids repeated repairs.
Avoid Overstuffing the Cushion
Too much filling pushes outward on the zipper, increasing stress on the teeth and seam. Use the right amount of insert, firm but not bulging, to reduce strain on the closure.
Clean and Lubricate Zippers Monthly
Wipe zippers with a dry cloth to remove dust and debris. For stuck sliders, rub a small amount of paraffin wax, candle wax, or graphite powder along the teeth. Never use WD-40 or oil-based products, as they attract dirt and can stain fabric.
Zip Gently and Inspect Regularly
Forceful zipping bends teeth and wears sliders. Close slowly and carefully. Check monthly for early signs of wobble, fraying, or misalignment. Catching problems early means simple fixes instead of major repairs.
Tighten Sliders at First Sign of Trouble
At the first indication of separation, use pliers to compress the slider back. A quick 10-second fix now prevents a full repair later.
Repair Method Comparison Guide
| Method | Time Required | Cost | Skill Level | Best For |
|---|---|---|---|---|
| Pliers Tightening | 2 to 5 minutes | Free | Beginner | Loose sliders, minor misalignment |
| FixnZip Installation | 3 to 6 minutes | $10 to $15 | Beginner | High-use pillows, decorative covers |
| Slider Replacement | 10 to 15 minutes | $5 to $10 | Intermediate | Broken or missing sliders |
| Full Zipper Replacement | 30+ minutes | $15 to $30 | Intermediate to Advanced | Torn tape, missing teeth |
| Seam Reinforcement | 10 to 20 minutes | $2 to $5 | Intermediate | Frayed edges, weak stitching |
Where to Buy Repair Supplies
Needle-nose pliers are available at home improvement stores and online retailers. Replacement zippers and sliders can be found at fabric stores, craft shops, and upholstery suppliers. FixnZip products are sold exclusively at FixnZip.com, with the small size recommended for couch pillows. For heavy-duty thread, look for polyester or upholstery-grade options in neutral colors. Zipper lubricant is available at sewing departments, or use a plain candle as a DIY alternative.
Key Takeaways for Fixing Couch Pillow Zippers
Fixing a zipper on a couch pillow is a simple, cost-effective way to extend the life of your cushions without purchasing replacements. Start by diagnosing the specific problem, whether it is a loose slider, damaged teeth, or fraying seams. For quick fixes, pliers compression works in minutes at no cost. For long-term security on frequently used pillows, a FixnZip provides a reliable locking mechanism. More severe damage may require slider replacement or a full zipper swap, both achievable with basic tools and moderate skill. Combine any repair with regular maintenance, including gentle handling, monthly cleaning, and occasional lubrication, and your pillow zippers will stay functional for years to come.
Frequently Asked Questions About Fixing Couch Pillow Zippers
Can I fix a zipper on a couch pillow without sewing?
Yes. Methods like pliers tightening, FixnZip installation, and slider replacement require no sewing. Only full zipper replacement and seam reinforcement involve stitching.
What causes couch pillow zippers to break most often?
The most common causes are loose slider tension, misaligned or bent teeth, debris blocking the slider, frayed seams, and overstuffing the cushion. Regular use and forceful zipping accelerate wear.
How long does a FixnZip repair last on a couch pillow?
Most users report FixnZip repairs last over one year with regular use, even in homes with pets or high-traffic furniture.
Can I use WD-40 to lubricate a couch pillow zipper?
No. WD-40 and other oil-based products attract dirt and can stain fabric. Use zipper wax, paraffin, candle wax, or graphite powder instead.
How do I know if I need a full zipper replacement?
Replace the entire zipper if teeth are missing, the tape is torn, or the seam has failed beyond repair. If only the slider is damaged, a replacement slider or FixnZip is usually sufficient.