
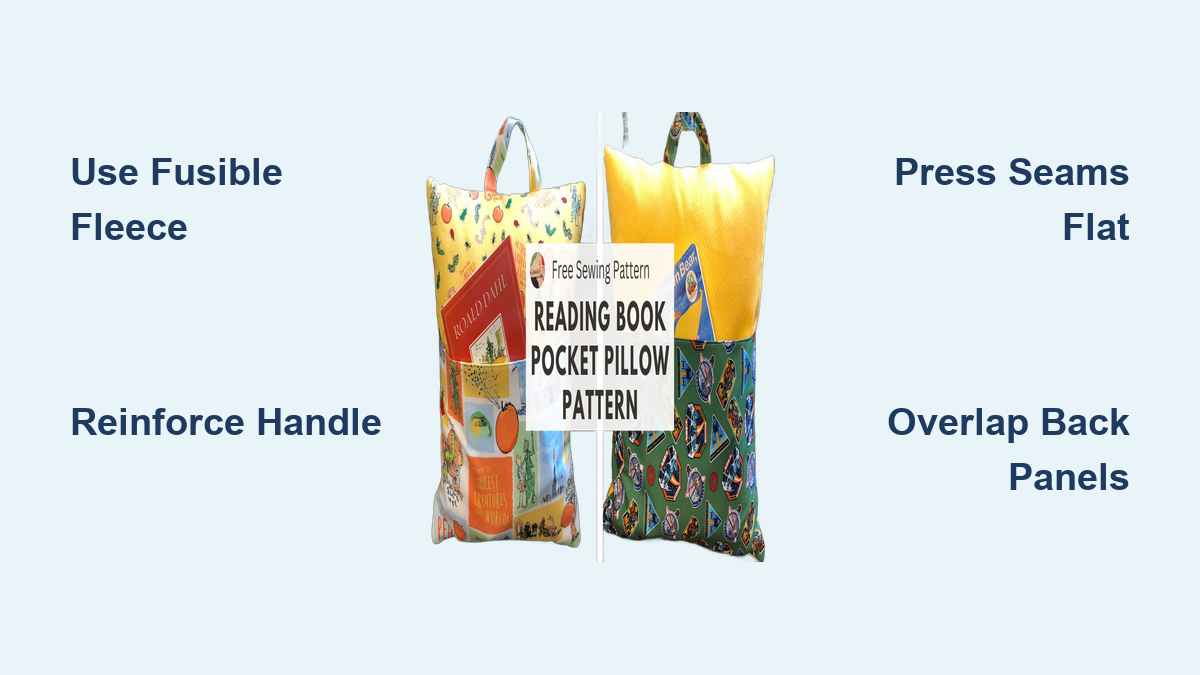
A book pillow combines comfort with functionality, featuring a front pocket to hold your current read plus a handle for easy carrying from room to room. Whether you’re making a cozy reading companion for yourself, a child, or a book-loving friend, this beginner-friendly sewing project can be completed in under 90 minutes with basic materials. This guide covers fabric selection, precise measurements, construction techniques, and customization options to help you create a professional-quality reading pillow.
Choose Your Pillow Size
Selecting the right pillow size is the first major decision. Most book pillows are designed to fit standard square inserts of 16″, 18″, or 20″. The 18″ size offers the best balance of usability and comfort for most adults, while 16″ works well for children and 20″ provides extra room for adults who want more support.
Match Insert to Fabric Cuts
Cut your front panel to match exactly the insert size. For an 18″ pillow, cut an 18″ × 18″ front panel. The cover will be slightly larger after seams are sewn. Use a rotary cutter with a self-healing mat and quilting ruler for precision cutting.
Calculate Pocket and Back Panel Dimensions
Each pillow size requires specific cutting measurements. For an 18″ pillow, cut the pocket at 18″ × 11″, pocket lining at 18″ × 12″, upper back panel at 18″ × 13″, lower back panel at 18″ × 10″, and handle strip at 4″ × 9″. Label each piece with a fabric marker to avoid mix-ups during assembly.
Select the Right Fabrics
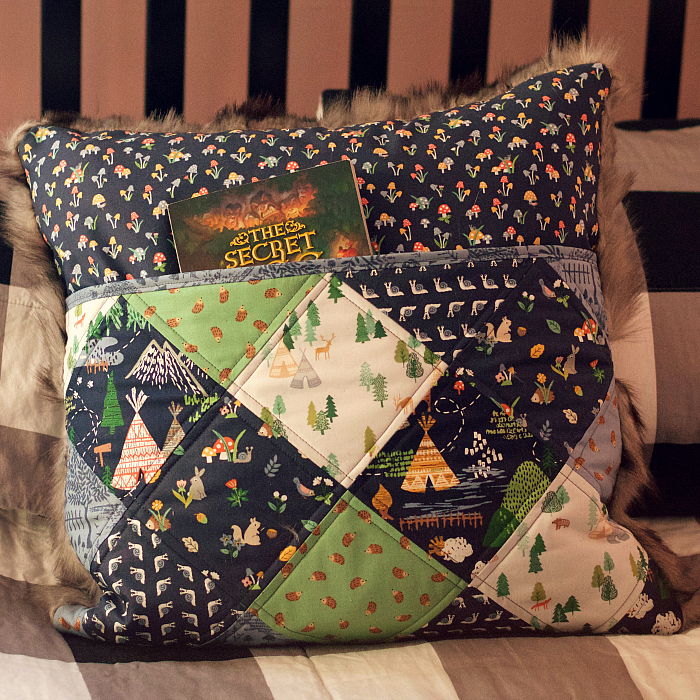
Fabric choice affects both the look and durability of your book pillow. The right materials make the difference between a floppy, unprofessional result and a crisp, lasting creation.
Use Quilting Cotton for Best Results
Quilting-weight cotton is the top choice for book pillows because it cuts cleanly, presses sharply, and comes in endless themed prints. Pre-wash all fabric before cutting to prevent shrinkage after your first wash. Pair a bold print for the front pocket with a coordinating solid for the back panels.
Add Fusible Fleece for Structure
Fusible fleece gives the front panel and pocket body and prevents sagging when loaded with books. Cut a piece to match your front panel dimensions and iron it to the wrong side following manufacturer instructions. This simple step transforms a homemade pillow into a professional-looking finished product.
Make the Pocket
The pocket is the defining feature of a book pillow, holding books, tablets, flashlights, or reading accessories. Several construction methods exist, ranging from simple to decorative.
Sew a Clean-Topped Pocket
Place the pocket lining wrong side up beneath the pocket front right side down, aligning top and side edges. Sew a ½” seam along the top edge only. Flip right side out and press the seam flat, then topstitch ¼” from the top edge to secure and create a crisp finish. This method keeps all raw edges hidden inside.
Optional: Quilt the Pocket for Stability
For a sturdier pocket that resists stretching, fuse fusible fleece to the wrong side of the pocket front. Mark a 1″ grid or diagonal lines with a water-soluble pen, then stitch along the lines using a walking foot. Quilted pockets hold heavy books much better than unquilted versions.
Try False Binding for a Polished Edge
For a boutique-style finish, sew the bottom edge of the lining to the pocket front with a 1/8″ seam. Fold the 1″ excess of the lining over the seam, first ½”, then another ½” to cover the edge completely. Press and topstitch 1/8″ from the folded edge. This technique hides seams beautifully.
Create a Durable Handle

The handle allows you to carry your reading pillow from bed to couch to reading nook. A properly constructed handle supports weight and lasts for years.
Fold and Stitch a Fabric Strip
Cut a 4″ × 9″ fabric strip for the handle. Fold it in half lengthwise, right sides together, and sew a ½” seam along the long edge. Turn right side out using a safety pin or turning tool, then press flat. Fold long edges toward center and topstitch 1/8″ from both edges for a double-folded, durable handle.
Reinforce Attachment Points
Attach the handle to the top edge of the front panel, centered 6″ from each side on an 18″ pillow. Pin securely before basting, then use a shorter stitch length or backstitch at both ends. Add an X-stitch or bar tack for extra strength where the handle meets the pillow.
Finish the Envelope Back
The envelope-style back closure allows easy removal of the pillow insert for washing. This popular method requires no zippers and provides a clean, seamless look.
Hem Both Back Panels
Hem the bottom edge of the upper back panel and the top edge of the lower back panel, each with a ½” double-fold hem. Press sharply to ensure clean overlap. Topstitch close to the inner fold for a neat finish that looks professional.
Overlap Flaps for Secure Closure
When assembled, the two back panels should overlap by 4″ to 6″. For an 18″ pillow, a 5″ overlap is ideal. This prevents the insert from slipping out while still allowing easy access. If flaps gap open, increase the overlap to 6″ and topstitch the hemmed edges for stability.
Attach Pocket and Handle
With components prepared, it’s time to attach the pocket and handle to the front panel before final assembly.
Position Pocket Evenly
Center the pocket on the front panel by aligning bottom edges and ensuring equal space on both sides. The top edge of an 11″ tall pocket should sit about 7″ from the top of an 18″ panel. Pin or clip in place before basting.
Baste All Three Sides
Using a long stitch length of 3.5 to 4.0mm, baste the left, bottom, and right edges of the pocket to the front panel. This holds everything in place during final assembly and adds decorative stitching. Leave the top open for book access.
Secure Handle Before Assembly
Position the handle with raw ends flush with the top edge of the front panel, centered between side seams. Baste in place with reinforced stitching at both ends. Press one more time before proceeding to ensure the handle lies flat without twisting.
Assemble the Pillow Cover
Now all pieces come together in this critical assembly step. Proper layering ensures a symmetrical, well-fitting cover.
Layer Panels Correctly
Place the front panel right side up. Lay the upper back panel right side down, aligning top and side edges. Place the lower back panel right side down, aligning bottom and side edges. The two back panels will overlap in the center, forming the envelope opening. Pin or clip all around the perimeter.
Sew with ½” Seam Allowance
Sew all four sides with a ½” seam allowance, backstitching at the beginning and end. Reinforce handle ends and corners with extra stitches. Use a walking foot if sewing through thick layers to prevent skipping or uneven feeding.
Clip Corners for Sharp Edges
After sewing, clip all four corners diagonally, cutting close to but not through the seam. This reduces bulk and helps corners lie flat when turned right side out. Proper corner clipping makes the difference between rounded, mushy corners and crisp, professional ones.
Turn, Press, and Insert Pillow
The finishing touches transform your assembled pieces into a polished finished product.
Turn Right Side Out
Reach through the envelope opening and pull the entire cover right side out. Use a chopstick or turning tool to gently push out corners. Avoid poking too hard to prevent fabric tears at seams.
Press for a Crisp Finish
Iron the entire pillow cover, focusing on smooth corners, crisp edges, and a flat handle and pocket. Pressing at this stage transforms a homemade-looking project into a professional one. Use a pressing cloth if your iron tends to create shine on cotton.
Insert the Pillow Form
Fold the insert in half to fit through the envelope opening. Guide each corner into the pillow’s corners, then smooth the fabric for even coverage. Use a high-loft polyester fiber insert rather than foam for the most comfortable feel.
Customize and Personalize
Make your book pillow unique with embellishments and functional additions that reflect the recipient’s personality.
Add Appliqué or Embroidery
Use fusible web like HeatnBond to attach fabric shapes such as books, stars, or animals. Machine embroidery works well for names or quotes like “Tomorrow is another day.” Iron-on vinyl from a Cricut creates flocked, soft text that mimics felt.
Try Design Upgrades
Consider adding page holders sewn as ½” ribbon straps inside the pocket to keep books open. A small bookmark loop attached to the top seam adds function. Rounded corners traced from a bowl create a modern look. A tiny glasses pocket on the back panel serves adult readers well.
Ensure Long-Term Durability
A well-made book pillow lasts for years with proper construction and care.
Reinforce Stress Points
Double-stitch handle attachment zones, pocket corners, and all four outer corners. Use bar tacks or X-stitches on handles for heavy use. This reinforcement prevents seam failure during daily use.
Use Interfacing on Back Panels
Fuse lightweight interfacing to the wrong side of both back panels before hemming. This prevents sagging and maintains shape over time, especially important for pillows that see daily use.
Wash Safely
Always remove the insert before washing. Machine wash cold on gentle cycle and tumble dry low or air dry. Iron on low heat, avoiding direct contact with vinyl or embroidery. Pre-washing fabric at the start minimizes future shrinkage.
Troubleshoot Common Issues
Even careful crafters encounter problems. Knowing how to fix them saves time and frustration.
Fix Gapping Back Flaps
If the envelope doesn’t close tightly, increase the overlap to 6″. Topstitch the hemmed edges for stability. Check that both back panels are cut to the correct size and that hems are pressed evenly.
Prevent Bulky Seams
Reduce bulk by trimming seam allowances to ¼” at corners. Clip curves carefully when present. Use a walking foot to manage thickness through multiple layers of fabric and batting.
Stop Pocket Sagging
If the pocket droops, always fuse fusible fleece to the pocket front before construction. Quilt the pocket for extra support. Avoid overloading with heavy books that stress the stitching.
Avoid Twisted Handle
Ensure the handle lies flat by pressing it thoroughly before attaching. Check alignment with front panel edges and pin at multiple points to prevent shifting during sewing.
Frequently Asked Questions About How to Sew a Book Pillow
What is the best fabric for a book pillow?
Quilting-weight cotton is the best fabric for book pillows because it cuts cleanly, presses sharply, and comes in countless themed prints. Flannel works well for children’s versions, while cotton-linen blends offer an elegant look for adult pillows.
How long does it take to sew a book pillow?
A basic book pillow takes 40 to 90 minutes to complete, depending on your experience level and whether you add quilting or embellishments. Beginners should budget about 90 minutes for their first pillow.
What size pillow insert should I use?
Choose a pillow insert that is 1″ to 2″ smaller than your finished cover. For an 18″ × 18″ cover, use a 16″ insert. This allows easy insertion and a plump, comfortable finished pillow.
Can I wash a book pillow?
Yes, remove the pillow insert before washing and machine wash the cover in cold water on a gentle cycle. Tumble dry low or air dry, and iron on low heat if needed.
Do I need a pattern to make a book pillow?
No, you can make a book pillow using basic measurements and this guide. No commercial pattern is required, though patterns are available if you prefer step-by-step instructions.
Key Takeaways for Sewing a Book Pillow
A book pillow is a rewarding project that combines practical function with creative expression. The most important steps are choosing the right fabrics, adding fusible fleece for structure, and reinforcing stress points like the handle and pocket corners. Follow the cutting chart precisely for your chosen size, press every seam for a professional finish, and don’t skip the envelope back overlap of at least 4″ to prevent the insert from slipping out. With these fundamentals in place, you can customize your pillow with themed fabrics, embroidery, or functional additions like page holders and bookmark loops. Now gather your materials, thread your machine, and create a cozy reading companion that holds stories literally and figuratively.